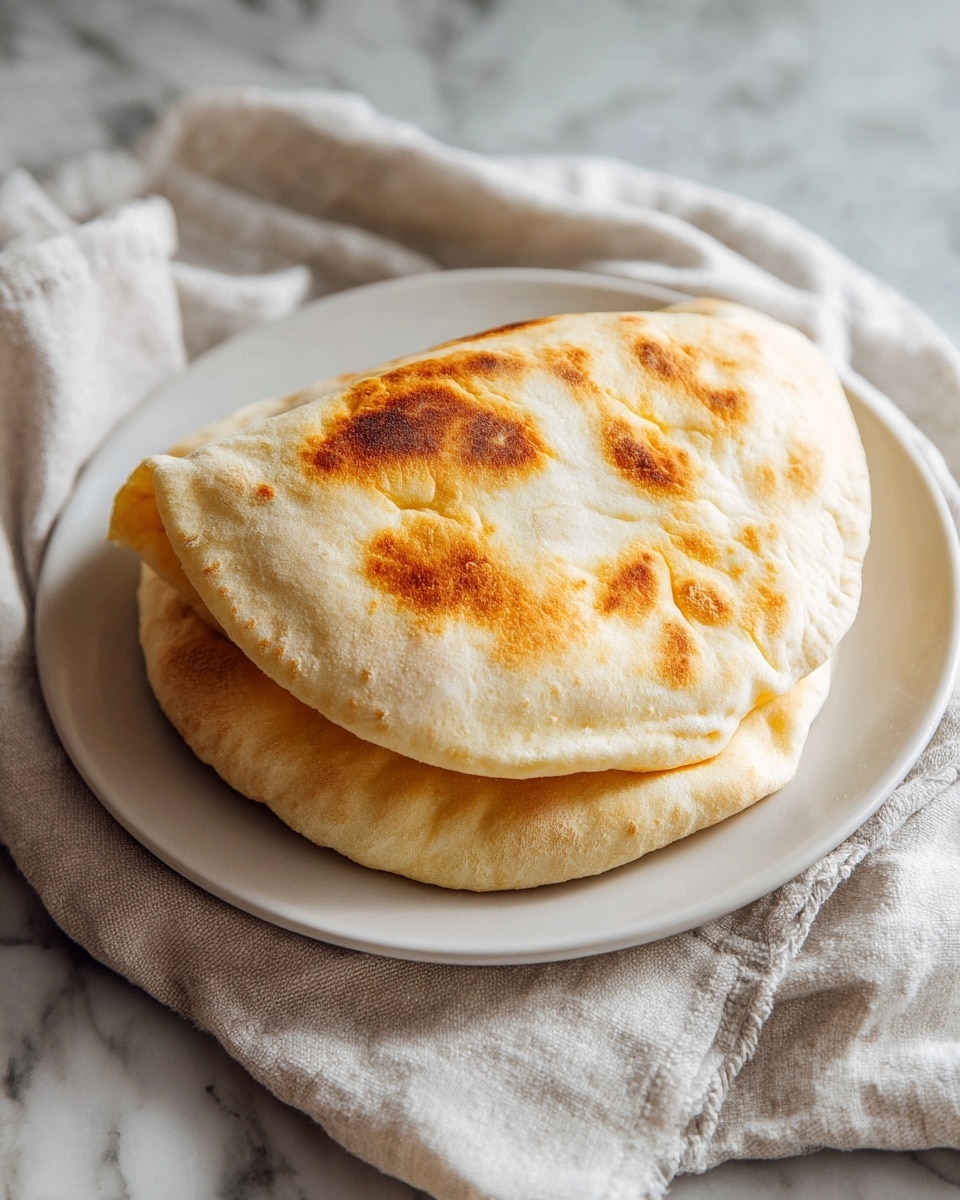
Sourdough Pita Bread Recipe
Picture this: the warm, yeasty aroma of freshly baked sourdough pita bread wafts through your kitchen, inviting you to dive in. As you gently tear into that golden, pillowy pocket, steam escapes, and the soft, chewy texture melts delightfully in your mouth. This Sourdough Pita Bread Recipe is a game-changer, combining the tangy depth of sourdough with the effortless charm of homemade pita. It’s quick enough to fit into a busy day, easy enough to make even if you’re new to bread baking, and impressive enough to wow anyone lucky enough to share a bite.
Why You’ll Love This Sourdough Pita Bread Recipe
- Ready in 14 hours and 25 minutes, mostly hands-off: Perfect for planning ahead and waking up to fresh pita bread without rushing.
- Uses simple, wholesome ingredients: Just flour, active sourdough starter, water, salt, sugar, and olive oil — pantry staples that combine into magic.
- Perfect for beginners and bread lovers alike: The step-by-step process is straightforward and teaches you essential sourdough basics.
- Impressive puffed-up pockets every time: These pita breads bake beautifully with perfect golden blisters that are as pretty as they are delicious.
- Customizable and versatile: Use as wraps, sandwich pockets, or warm scoops for dips — endless options for your meals.
Why This Sourdough Pita Bread Recipe Works
The secret behind this Sourdough Pita Bread Recipe lies in its gentle stretch and fold technique alongside a slow, cool fermentation. The stretch and folds develop gluten strength without tough kneading, creating a beautifully airy crumb. Refrigerating the dough overnight allows flavors to deepen and the dough to become incredibly easy to work with. Finally, baking on a preheated stone at high heat ensures that signature puff, forming mouthwatering pockets that feel light and tender, yet satisfyingly chewy.
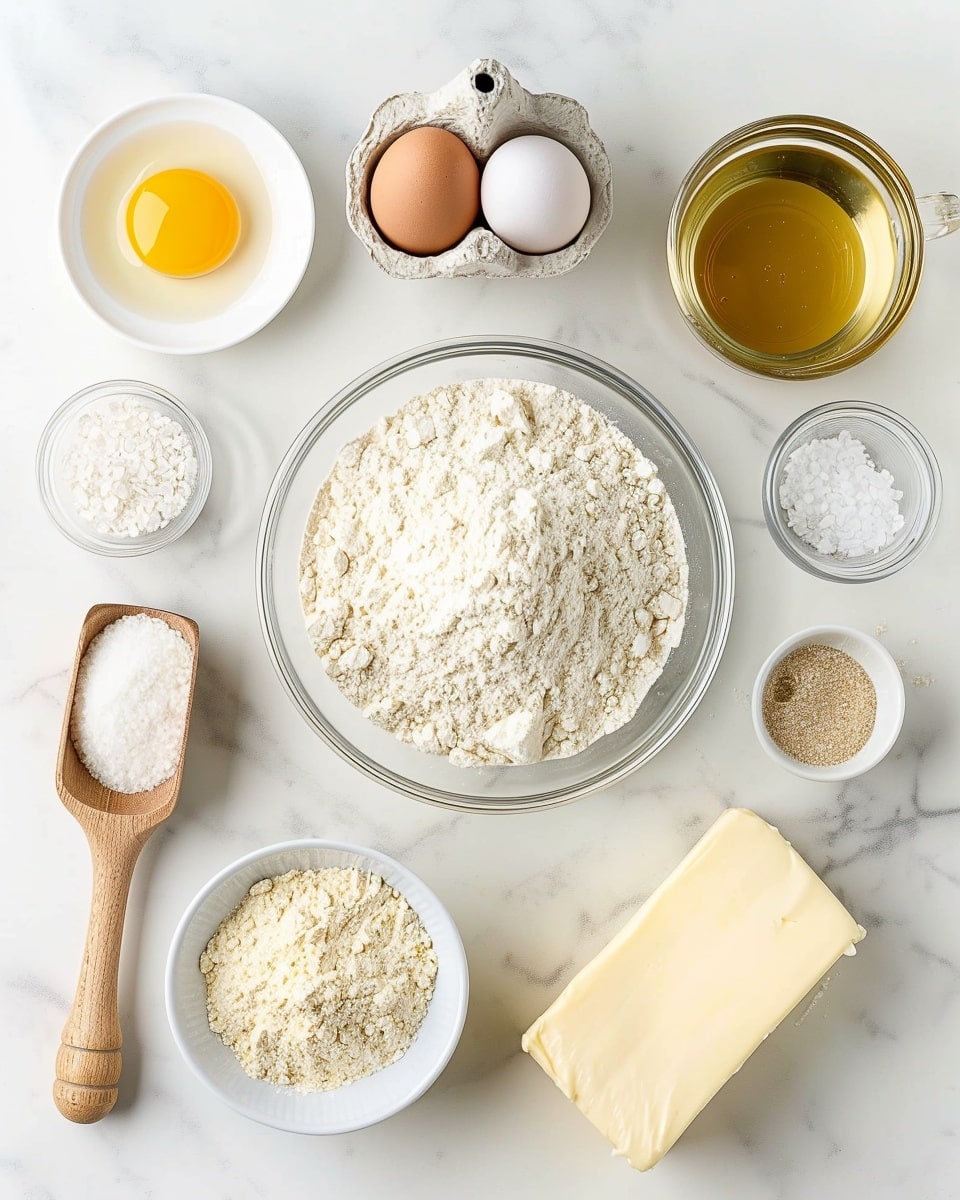
Ingredients You’ll Need
These ingredients are remarkably simple, yet they combine to form the perfect texture and flavor that make this recipe shine.
- Active sourdough starter: The heart and soul of the bread, lending flavor and natural leavening.
- Warm water: Activates the starter and hydrates the flour for the perfect dough consistency.
- Unbleached all-purpose or bread flour: Provides structure and chewiness with the scoop and level method ensuring accuracy.
- Granulated sugar: Feeds the starter and enhances browning for that golden crust.
- Coarse kosher salt: Balances flavor and strengthens the dough.
- Olive oil: Adds richness and helps keep the pita tender.
Ingredient Substitutions & Tips
- Flour: Whole wheat flour can be used for a nuttier flavor, but reduce water slightly as it absorbs more.
- Sourdough starter: If you don’t have one, a small amount of instant yeast (about 1 teaspoon) can substitute for quicker results.
- Olive oil: Avocado oil or melted butter can be swapped in for different flavor notes.
- Granulated sugar: Honey or maple syrup can replace sugar, adding a subtle sweetness and helping with browning.
👨🍳 Pro Tips for Perfect Results
- Always use an active starter: Feed your starter 4-6 hours before making the dough for best rise and flavor.
- Measure flour correctly: Use the scoop and level method to avoid dense dough from packing flour too tightly.
- Maintain warm water between 80-90°F: This temperature range gently wakes the starter without killing it.
- Use a baking stone or steel: It retains heat well and creates that perfect puff and golden crust.
- Don’t skip the rest and stretch/fold cycles: They build gluten, ensuring soft yet sturdy pita pockets.
How to Make Sourdough Pita Bread Recipe
Step 1: Mix Starter, Water, and Flour
In the bowl of your stand mixer, combine 1 cup of warm water (around 80-90°F), 1 cup of active sourdough starter, and 2 cups of flour using the paddle attachment. Mix until everything is thoroughly combined. Let this mixture rest for 10 minutes to hydrate the flour and start gluten formation.
💡 Pro Tip: This resting period, called autolyse, improves dough strength and texture.
Step 2: Add Remaining Ingredients and Knead
Next, add 1½ cups of flour, ¼ teaspoon granulated sugar, 1½ teaspoons kosher salt, and 3 tablespoons olive oil to the bowl. Switch to the dough hook attachment and knead for 5 minutes until the dough becomes smooth and elastic.
💡 Pro Tip: Knead just enough to develop gluten without overworking – the dough should pull away cleanly from the bowl.
Step 3: Rest and Stretch/Fold Cycles
Cover the bowl and let the dough rest for 30 minutes. Then perform a gentle stretch and fold, reaching beneath the dough, stretching it upwards, and folding it back over itself. Repeat this rest and fold cycle three times in total to build structure and strength.
💡 Pro Tip: Stretch and folds replace intense kneading, making a more tender crumb.
Step 4: Refrigerate Overnight
Cover your dough tightly and place it in the refrigerator for any time between 12 to 72 hours. This slow cold fermentation deepens flavor and makes the dough easier to shape.
💡 Pro Tip: The longer the ferment, the tangier your pita’s flavor will be.
Step 5: Bring Dough to Room Temperature
Remove the dough from the fridge and let it sit for about 3 hours to warm up and make it more workable for shaping.
💡 Pro Tip: Patience here means your pita will puff better when baked.
Step 6: Prepare Oven and Baking Stone
Place a baking stone in your oven and preheat it to 500°F. The baking stone will hold intense, consistent heat essential for getting the pita pockets to puff up beautifully.
💡 Pro Tip: Preheat the stone for at least 45 minutes to ensure it’s scorching hot.
Step 7: Divide and Rest Dough Balls
Divide the dough into 8 equal pieces and roll each into smooth balls. Let them rest for 20 minutes under a towel to relax the gluten before rolling out.
💡 Pro Tip: Resting prevents the dough from springing back when rolling.
Step 8: Roll Out Circles
Roll each ball into a 6-inch diameter circle about ¼ inch thick. Thickness is key for puffing, so keep it uniform to achieve those perfect air pockets.
💡 Pro Tip: If the dough resists rolling, give it a few more minutes of rest.
Step 9: Bake on Hot Stone
Slide each rolled-out pita onto the hot baking stone and bake at 500°F for 3 to 5 minutes until puffed and lightly golden.
💡 Pro Tip: Work quickly to keep the oven temperature stable and the dough warm.
Step 10: Keep Warm and Repeat
After baking, remove the pita and immediately wrap it in a clean kitchen towel, then place it in a plastic bread bag to keep soft while you bake the remaining rounds.
💡 Pro Tip: Wrapping traps steam, maintaining softness and pliability.
Common Mistakes to Avoid
Learn from these common pitfalls:
- Using an inactive starter: Your dough won’t rise well without a lively starter.
- Skipping the rest and stretch/fold steps: Can result in dense or tough pita bread.
- Rolling the dough too thin or thick: Too thin and they won’t puff; too thick and the center stays doughy.
- Not preheating your baking stone long enough: Leads to uneven cooking and no puff.
- Leaving dough cold when shaping: Tough to work with and won’t puff properly.
- Baking too long or at lower temperature: Pita won’t puff or develop golden color.
Delicious Variations to Try
Once you’ve mastered the classic Sourdough Pita Bread Recipe, why not shake things up with some fun variations?
Herbed Garlic Pita
Add finely minced garlic and chopped fresh herbs like rosemary or thyme into the dough before the final knead for aromatic, flavorful bites.
Whole Wheat Sourdough Pita
Replace half the all-purpose flour with whole wheat for a hearty, nutrient-rich pita with a slightly nutty taste.
Za’atar Spiced Pita
Sprinkle za’atar seasoning on top of rolled dough before baking to add a tangy, herbal crunch perfect for dipping.
Stuffed Pita Pockets
Before rolling, fold in chopped olives, sun-dried tomatoes, or caramelized onions for flavorful surprises inside each pita.
Sweet Cinnamon Pita
Incorporate cinnamon and a touch of sugar into the dough, then brush with honey after baking for a delightful twist.
How to Serve Sourdough Pita Bread Recipe
Garnishes
Sprinkle freshly chopped herbs like parsley or cilantro, a drizzle of olive oil, or a sprinkle of sesame seeds on warm pitas to elevate their appearance and taste.
Side Dishes
These pitas are perfect alongside Mediterranean classics like creamy hummus, smoky baba ganoush, tangy tzatziki, or spiced grilled meats.
Creative Ways to Present
Slice into triangles and serve as dippers for dips, stuff pockets with falafel and fresh veggies, or turn into mini pita pizzas topped with your favorite ingredients.
Make Ahead and Storage
Storing Leftovers
Keep cooked pita bread in an airtight container or plastic bag at room temperature for up to 2 days to maintain softness.
Freezing
Wrap cooled pita breads tightly in plastic wrap and store in a freezer-safe bag for up to 3 months. Thaw at room temperature or in the refrigerator.
Reheating
Reheat pita on a hot skillet or in a 375°F oven wrapped in foil until warm and pliable. Avoid microwaving, which can dry them out.
FAQs
Can I use instant yeast instead of sourdough starter?
Yes! Substitute 1 teaspoon instant yeast for the starter and reduce the rise time significantly, but you’ll miss out on that signature sourdough flavor.
What if my pita doesn’t puff up?
Common causes are dough temperature, thickness, or oven heat. Make sure your dough is warmed to room temp, rolled evenly about ¼ inch thick, and bake on a super hot baking stone.
Can I make pita without a baking stone?
You can try using a heavy-duty baking sheet preheated in the oven, but a baking stone or steel is ideal for best puff and crust.
How long can I refrigerate the dough?
Between 12 and 72 hours is perfect. Longer fermentations develop stronger flavor but can slightly weaken dough structure.
Is it okay to use bleached flour?
Unbleached flour is best for flavor and texture, but bleached flour will work if that’s what you have on hand.
Can I add flavors like herbs or spices to the dough?
Absolutely! Fold in finely chopped herbs, spices, or seeds during kneading to customize your pita bread’s flavor.
Why do I need to wrap the pita in a towel after baking?
This traps steam, keeping the pita soft and pliable, perfect for stuffing or dipping.
How can I tell if my sourdough starter is active?
It should double in size within 4-6 hours of feeding, have bubbles throughout, and smell pleasantly tangy but not sour or alcoholic.
Final Thoughts
There’s something truly magical about pulling freshly baked sourdough pita bread from your oven — that warm, golden perfection made with your own hands. This Sourdough Pita Bread Recipe isn’t just about the bread itself; it’s about the joy and connection that come with creating food from scratch, sharing flavors that carry generations and cultures. Whether you’re wrapping falafel, dipping into creamy hummus, or simply savoring it plain, these pitas bring comfort and delight to every bite.
Have you tried this Sourdough Pita Bread Recipe? I’d love to hear how it turned out! Leave a comment below. If you loved this recipe, please share it with friends and family. Happy cooking! 🍞❤️
PrintSourdough Pita Bread Recipe

This sourdough pita bread recipe yields soft, flavorful, and perfectly puffed pitas made with a natural sourdough starter. The dough is slowly fermented overnight for enhanced taste and texture, then baked at high heat on a baking stone to achieve traditional pita pockets. Ideal for sandwiches, dips, or Mediterranean-inspired meals.
- Prep Time: 20 minutes (excluding fermentation and resting)
- Cook Time: 3-5 minutes per batch
- Total Time: Approximately 14 hours 25 minutes (including 12+ hour cold fermentation and resting times)
- Yield: 8 servings (8 pita breads) 1x
- Category: Bread
- Method: Baking
- Cuisine: Mediterranean
- Diet: Vegetarian
Ingredients
Dough Ingredients
- 1 cup active sourdough starter (stirred down)
- 1 cup warm water (between 80-90°F)
- 3 ½ cups unbleached all-purpose flour or bread flour (using the scoop + level method)
- ¼ teaspoon granulated sugar
- 1 ½ teaspoons coarse kosher salt
- 3 tablespoons olive oil
Instructions
- Mix initial dough: Combine 1 cup warm water, 1 cup sourdough starter, and 2 cups flour in the bowl of a stand mixer. Use the paddle attachment to mix until fully combined. Let the mixture rest for 10 minutes to hydrate.
- Add remaining ingredients and knead: Add the remaining 1 ½ cups flour, ¼ teaspoon granulated sugar, 1 ½ teaspoons coarse kosher salt, and 3 tablespoons olive oil to the bowl. Switch to the dough hook and knead the dough for 5 minutes until smooth and elastic.
- First rest and stretch-and-fold: Cover the bowl and let the dough rest for 30 minutes. After resting, perform a stretch and fold on the dough to develop gluten. Repeat this rest and stretch-and-fold cycle a total of 3 times to improve dough structure.
- Cold fermentation: Cover the dough tightly and place it in the refrigerator overnight, from 12 up to 72 hours. This slow fermentation enhances flavor and texture.
- Bring to room temperature: Remove the dough from the fridge and let it come to room temperature, approximately 3 hours before baking.
- Preheat oven and baking stone: Place a baking stone in the oven and preheat the oven to 500°F (260°C). The baking stone ensures even heat distribution for puffed pita pockets.
- Divide and shape: Divide the dough into 8 equal pieces, rolling each into a smooth ball. Let the dough balls rest for 20 minutes to relax the gluten.
- Roll out pitas: Just before baking, roll each dough ball into a 6-inch circle, aiming for about ¼ inch thickness. The exact diameter is less important than achieving the proper thickness for puffing.
- Bake: Place the rolled-out dough circles directly onto the preheated baking stone. Bake at 500°F for 3-5 minutes, or until the pitas have puffed fully and show a light golden color.
- Keep warm and soft: Remove baked pitas from the oven and immediately wrap them in a clean kitchen towel. Slide the wrapped pitas into a plastic bread bag to retain moisture and softness while baking the remaining pieces.
Notes
- Using the scoop + level method for flour ensures consistent measurement and dough hydration.
- The baking stone must be thoroughly preheated to achieve puffing characteristic of pita bread.
- Resting dough balls before rolling helps with easier shaping and prevents the dough from shrinking back.
- Thickness is more critical than size; aim for about ¼ inch thickness for proper puffing in the oven.
- If you don’t have a baking stone, a heavy baking sheet preheated in the oven may be a substitute but results may vary.
Keywords: sourdough pita, pita bread, Mediterranean bread, homemade pita, sourdough bread, bakery style pita