Grilled Cheese Roll Ups Recipe
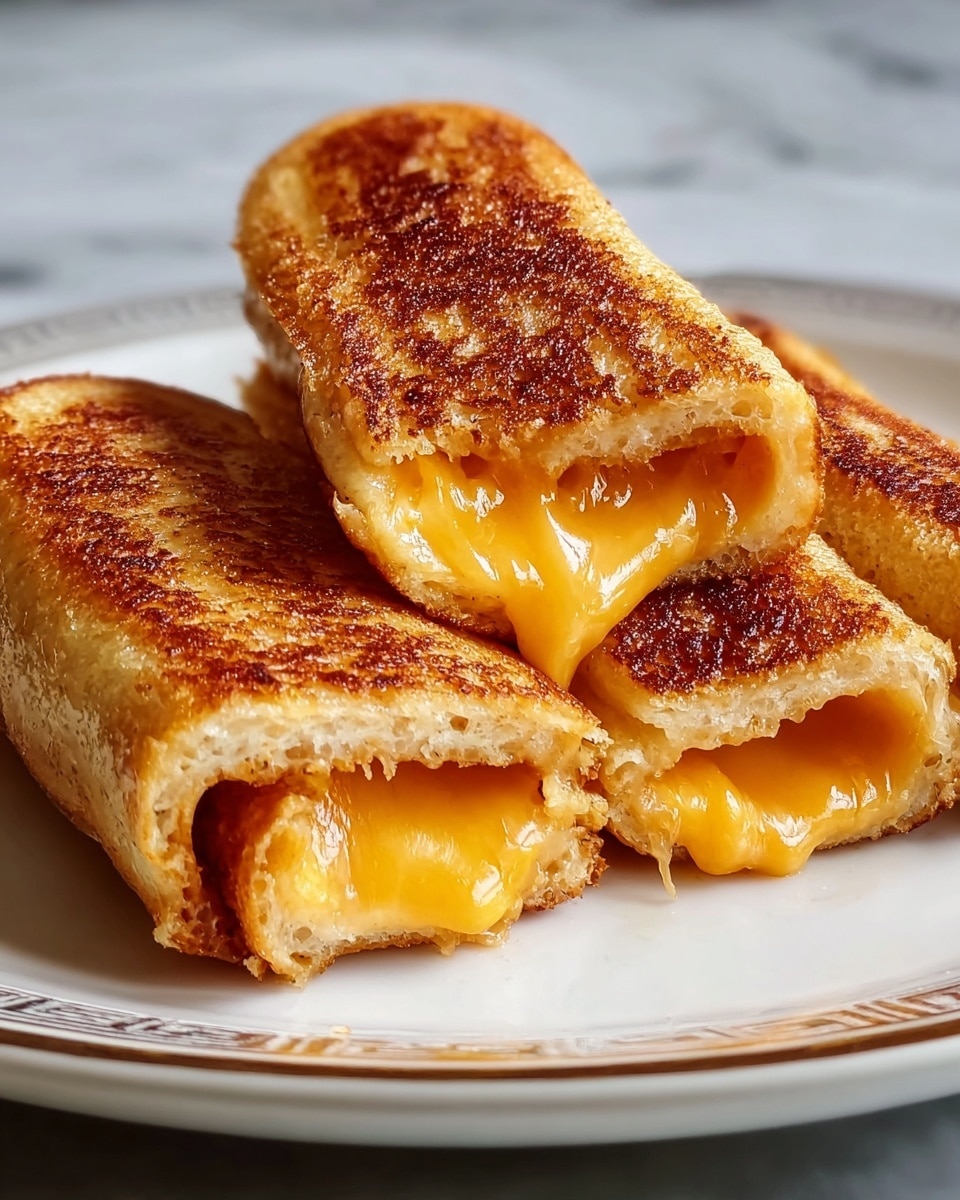
Picture this: golden, crispy little cylinders sizzling on your skillet, the buttery aroma wrapping around your kitchen like a cozy hug. As you take that first bite, a molten river of cheese oozes out, warmly inviting you back for another. These Grilled Cheese Roll Ups are not just quick bites; they’re miniature comfort food treasures packed with ooey-gooey goodness and a crispy exterior that’ll make your taste buds sing. They’re so easy to whip up, yet fancy enough to impress your family or surprise your guests with something utterly delightful.
Why You’ll Love This Grilled Cheese Roll Ups Recipe
- Ready in 30 minutes: From crust removal to golden grilling, you can have these cheesy delights on the table in no time, perfect for busy weeknights or snack attacks.
- Uses simple ingredients: Just bread, cheese, and butter — pantry staples that you probably already have, making this recipe super accessible.
- Perfect for beginners: No complicated steps or fancy equipment needed; anyone can master this with a little love and practice.
- Impressive presentation: These elegant, spiral roll-ups look far fancier than your classic grilled cheese sandwich, sure to wow even picky eaters.
- Customizable: Swap cheeses and seasonings to fit your mood or fridge contents – endless delicious possibilities await.
Why This Grilled Cheese Roll Ups Recipe Works
The magic lies in a few crucial details that make all the difference. First, flattening the bread paper-thin ensures it rolls up neatly without tearing or breaking, creating that perfect wrap to hold in the melty cheese. Buttering each roll inside and out produces a golden-brown crust that crisps to perfection while locking in the gooey center. Finally, cooking on medium-low heat lets the cheese melt slowly and evenly, preventing any burnt edges while you get that irresistible crunch and creamy interior. This balance of textures and flavors is what makes this Grilled Cheese Roll Ups Recipe so irresistibly good.
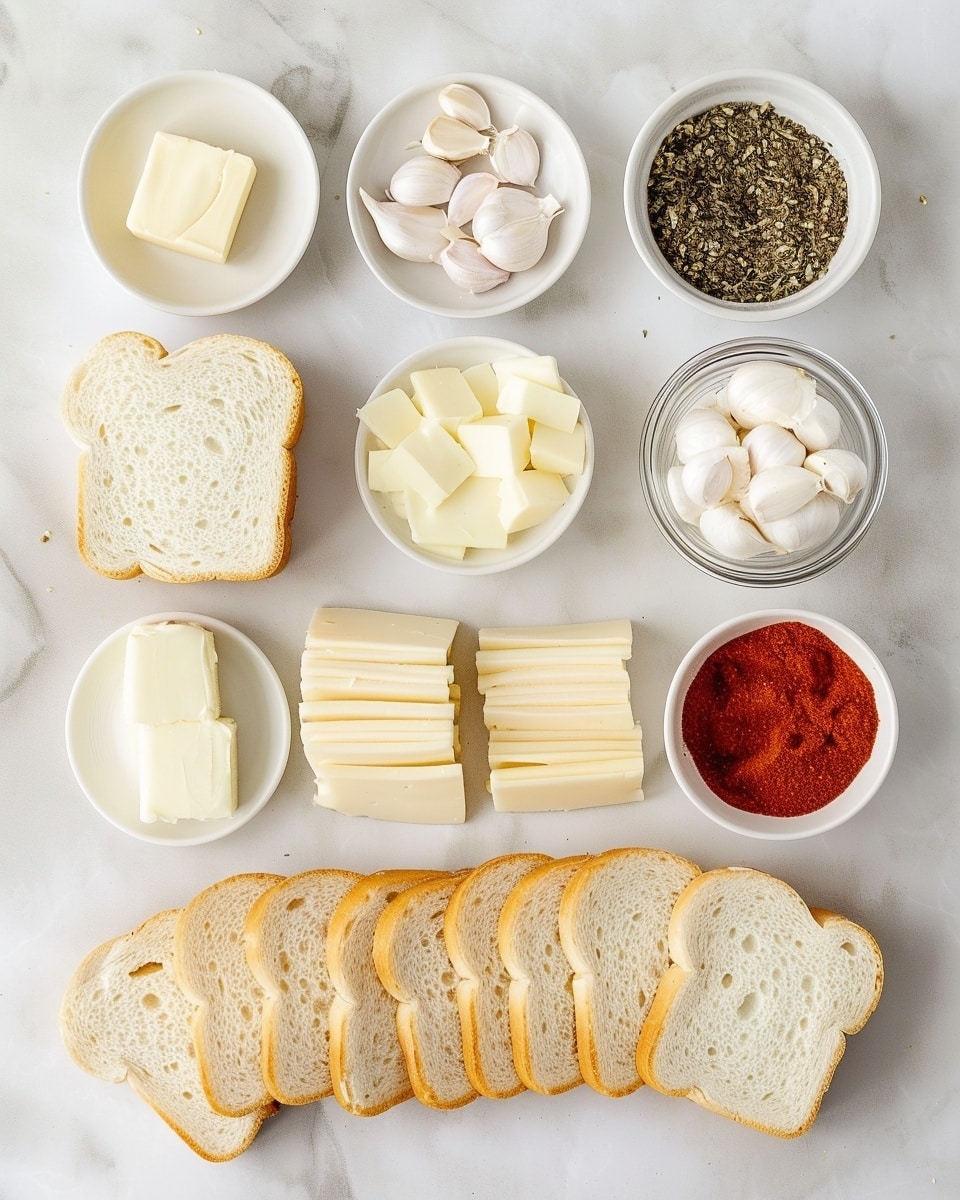
Ingredients You’ll Need
These simple ingredients work together to create a symphony of flavor and texture; just a few basics transform into pure deliciousness.
- Bread: Soft white sandwich bread is ideal for flattening and rolling without ripping, offering a tender bite.
- Cheese: Your favorite melting cheese, sliced for neat rolls and gooey meltiness.
- Butter: Unsalted butter, softened or melted, creates that crispy, golden exterior that’s impossible to resist.
- Optional seasonings: Garlic powder, paprika, and dried Italian herbs add aroma and depth.
Ingredient Substitutions & Tips
- Bread: Whole wheat or multigrain bread can be used, but pick the softest varieties to avoid tearing.
- Cheese: Try mozzarella or gouda for a different flavor and texture profile.
- Butter: Use margarine or olive oil for a dairy-free option, though flavor and crispiness will vary.
- Optional seasonings: Swap garlic powder for onion powder, or experiment with smoked paprika to deepen the smoky notes.
👨🍳 Pro Tips for Perfect Results
- Use day-old bread: Slightly stale bread handles flattening better without tearing.
- Be gentle when flattening: Press firmly but slowly with the rolling pin to keep the bread intact.
- Don’t overfill with cheese: Too much can leak out and burn, so keep it just right for easy rolling.
- Cook on medium-low heat: Patience here ensures crispy rolls and perfectly melted cheese inside.
- Seal the edges: Pinch the seam or place seam side down on the skillet to keep rolls intact while cooking.
How to Make Grilled Cheese Roll Ups Recipe
Step 1: Prepare the Bread
Start by carefully cutting the crusts off each slice of bread using a sharp knife. This step is essential because crustless bread rolls up more gently and melts evenly without the toughness of crusts getting in the way. Next, place each slice on a flat surface and use a rolling pin to flatten it. Press gently but firmly until the bread is about 1/16 to 1/8 inch thick, like a soft tortilla. Doing this in several directions helps avoid rips and ensures even thickness.
💡 Pro Tip: Chill the bread in the fridge for 10 minutes before rolling to make it less sticky and easier to handle.
Step 2: Add the Cheese
Grab your favorite cheese slice and, if needed, trim it slightly so it fits perfectly on the flattened bread without spilling over. Lay the cheese along one edge of the bread, leaving a small space on the sides to prevent mess. If you want to jazz things up, sprinkle some paprika, Italian herbs, or a pinch of garlic powder over the cheese to deepen the flavor profile before rolling.
💡 Pro Tip: For a neat roll-up, avoid piling on shredded cheese too thickly; thin lines melt better and help maintain shape.
Step 3: Roll ‘Em Up
Begin rolling your bread tightly from the cheese side, forming a compact little cylinder that encases the cheese snugly. The key here is to keep your roll tight so it doesn’t unravel while cooking. If a roll seems to loosen, gently pinch the seam or place it seam-side down on your skillet to seal it shut naturally. Repeat with the remainder of the bread slices.
💡 Pro Tip: Use your fingertips to flatten the edges gently as you roll for a cleaner shape and better seal.
Step 4: Butter the Rolls
Choose between brushing melted butter generously over each roll or spreading softened butter carefully. This buttery coating will toast to a deep golden color and form the irresistible crispy crust. Be sure every inch of the roll is buttered for an even, mouthwatering crunch.
💡 Pro Tip: Mix a pinch of garlic powder into your butter before applying for that subtle, aromatic kick.
Step 5: Grill to Perfection
Warm up a large non-stick skillet on medium-low heat – patience is key to prevent burning. Place your buttered roll-ups seam side down first so they seal properly. Cook in batches if necessary to avoid overcrowding and losing that perfect crisping heat. Let them brown for 2-4 minutes on one side, then turn carefully with tongs to toast all around. Each side gets about 1-2 minutes until you see a beautiful golden crust and cheese melted to bubbly perfection inside.
💡 Pro Tip: Listen for a gentle sizzle as your cue that the heat is just right.
Step 6: Serve Immediately
Once all sides are toasted and your kitchen fills with the intoxicating aroma of warm cheese and butter, transfer the roll ups to a plate. Serve hot, while the cheese is gloriously melty and the crust still crackles under your bite.
💡 Pro Tip: Have your dipping sauces ready before cooking so your guests can dive in right away.
Common Mistakes to Avoid
Learn from these common pitfalls:
- Using stale or hard bread: It’s tough to roll and may crack with thinner flattening.
- Not flattening the bread evenly: Uneven thickness leads to uneven cooking and potential breakage.
- Overfilling cheese: Cheese can spill out and burn, messing up the roll’s shape and taste.
- Cooking on too high heat: Bread burns before cheese melts properly.
- Skipping the butter: Results in a dry, less crispy roll lacking that golden crunch.
- Not sealing the seam side: Rolls can unravel while grilling, causing a cheesy mess.
Delicious Variations to Try
Once you’ve mastered the classic version, try shaking things up with these tasty twists:
Spicy Jalapeño Cheese Roll Ups
Add thin slices of pickled jalapeños inside before rolling with pepper jack cheese for a smoky, spicy flair.
Spinach and Feta Roll Ups
Mix chopped fresh spinach and crumbled feta with your cheese for a Mediterranean-inspired version that’s fresh and tangy.
Bacon and Cheddar Roll Ups
Add crispy bacon strips inside with sharp cheddar for an irresistible smoky, savory snack.
Tomato Basil Mozzarella Roll Ups
Include thin tomato slices and fresh basil leaves with mozzarella for a Caprese-inspired take bursting with summery flavor.
Sweet and Savory Roll Ups
Spread a tiny bit of fig jam inside with sharp cheese for a surprising and sophisticated sweet-savory combo.
How to Serve Grilled Cheese Roll Ups Recipe
Garnishes
Brighten up your plate with fresh parsley, a sprinkle of sea salt, or a dusting of smoked paprika atop the roll ups for color and flavor contrast.
Side Dishes
Serve alongside crisp pickles, a lively salad with a zesty vinaigrette, or a warm bowl of tomato soup for a classic pairing that never fails.
Creative Ways to Present
Skewer multiple roll-ups onto decorative sticks for fun finger food at parties. Arrange them standing upright in a bread basket with dipping sauces on the side to entice guests visually.
Make Ahead and Storage
Storing Leftovers
Keep cooled roll ups in an airtight container in the refrigerator. They’ll stay good for up to 2 days but are best enjoyed fresh for optimal crispness and melty cheese.
Freezing
Wrap each unbuttered roll-up tightly in plastic wrap and store in a freezer-safe bag. Freeze for up to 1 month. Do not butter before freezing, as it affects texture.
Reheating
To reheat, brush the rolls with butter and warm them in a preheated skillet over medium-low heat until crispy and cheese is warmed through. Avoid the microwave to keep the exterior crunchy.
FAQs
Can I use gluten-free bread?
Yes, but ensure your gluten-free bread is very soft and fresh to withstand flattening without breaking.
What’s the best cheese for melting?
American, cheddar, Monterey Jack, and provolone melt beautifully and give you that classic gooey texture.
Can I make these vegan?
Try dairy-free cheese slices and use vegan bread with olive oil or vegan butter for a delicious plant-based version.
What dipping sauces go well with these roll ups?
Classic marinara, ranch dressing, honey mustard, or a spicy sriracha mayo complement the flavors wonderfully.
How do I prevent the filling from leaking out during cooking?
Trim your cheese to fit neatly inside and roll tightly, sealing the seam well. Buttering and cooking seam side down first helps keep them intact.
Can I add fillings other than cheese?
Absolutely! Thin slices of ham, turkey, or vegetables like roasted peppers work well added with the cheese.
Why is my bread tearing when I roll?
Your bread might be too fresh or too thick. Try gently toasting briefly or flattening it thinner and slower.
Can I bake these instead of cooking on a skillet?
You can! Place them on a baking sheet, brush with butter, and bake at 375°F (190°C) for 10-15 minutes until golden and crispy.
Final Thoughts
There’s something truly special about the simple joy of melting cheese wrapped in buttery, crispy bread. This Grilled Cheese Roll Ups Recipe brings that joy in an exciting, elegant twist that’s both nostalgic and fresh. Whether you’re feeding kids, hosting friends, or craving a warm snack, it never disappoints. It’s quick, adaptable, and seriously addictive. Cooking it feels like creating a little edible hug that melts your cares away, one bite at a time.
Have you tried this Grilled Cheese Roll Ups Recipe? I’d love to hear how it turned out! Leave a comment below. If you loved this recipe, please share it with friends and family. Happy cooking! 🧀🔥
PrintGrilled Cheese Roll Ups Recipe

Grilled Cheese Roll Ups are a fun, melty twist on classic grilled cheese sandwiches. Using soft white bread flattened thinly and rolled around your favorite melty cheese, these crispy, golden-brown roll ups make a perfect snack or appetizer. Buttered and cooked in a skillet until all sides are crisp and the cheese is gooey inside, they combine creamy cheese with a crunchy exterior for a delightful bite.
- Prep Time: 10 minutes
- Cook Time: 8 minutes
- Total Time: 18 minutes
- Yield: 8–10 roll-ups 1x
- Category: Snack
- Method: Frying
- Cuisine: American
Ingredients
Bread
- 8–10 slices of soft white sandwich bread, crusts removed
Cheese
- 8–10 slices of melting cheese (Cheddar, American, Monterey Jack, Colby Jack, or Provolone)
Butter
- 4–5 tablespoons of unsalted butter, softened or melted
Optional Seasonings
- 1/4 teaspoon garlic powder (to mix with butter)
- Pinch of paprika (to sprinkle on cheese before rolling)
- Small sprinkle of dried Italian herbs (to sprinkle on cheese before rolling)
Instructions
- Prepare the Bread: Carefully remove the crusts from each bread slice with a sharp knife to make rolling easier. Place each slice on a flat surface and use a rolling pin to gently but firmly flatten the bread until it’s about 1/16 to 1/8 inch thick, rolling in multiple directions for even thinness. Repeat for all slices.
- Add the Cheese: Trim cheese slices if they are larger than the bread to prevent leakage. Place one slice or a neat line of shredded cheese along one edge of each flattened bread slice, leaving about 1/4 inch border. Sprinkle optional paprika or dried herbs over the cheese if using.
- Roll ‘Em Up: Starting from the cheese edge, tightly roll each bread slice into a compact cylinder. The moisture and pressure should help seal the roll; if needed, pinch the seam or place roll seam-side down while preparing others.
- Butter the Rolls: Choose one method: (1) Melt butter and brush evenly over the exterior of each roll using a pastry brush; or (2) Spread softened butter thinly and evenly over the outside of each roll.
- Grill to Perfection: Heat a large non-stick skillet or frying pan over medium-low to medium heat. Place roll-ups seam-side down and cook without overcrowding, 2-4 minutes per first side until golden brown. Use tongs to turn rolls to other sides, cooking 1-2 minutes per side until all sides are crispy and cheese is melted, total cooking time about 5-8 minutes.
- Serve Immediately: Remove from skillet and serve hot to enjoy the perfectly crispy exterior and gooey melty cheese inside.
Notes
- Use the softest and freshest white bread possible for easy rolling without tearing.
- Adjust cheese type according to your flavor preference; American cheese offers the creamiest melt.
- If using shredded cheese, be careful not to overfill to avoid leakage.
- Butter can be salted or unsalted; omit additional salt if using salted butter.
- Cook on medium-low heat to ensure cheese melts fully before the bread burns.
- Serve immediately for best texture and flavor.
Keywords: grilled cheese, roll ups, cheese roll-ups, snack, appetizer, easy recipe, melty cheese, buttery bread, skillet