Easter Nest Torte Recipe
Picture this: the tantalizing aroma of rich, melted chocolate fills your kitchen, weaving its way through the air and wrapping you in comfort. A glossy chocolate nest, delicate and inviting, awaits your touch, brimming with colorful, candy eggs nestled amid fluffy, velvety cream. This Easter Nest Torte Recipe is more than just dessert — it’s a celebration on a plate, easy enough to whip up on a busy day yet impressive enough to steal the show at any gathering. Whether you’re new to baking or a seasoned pro, this chocolatey delight promises joy with every slice.
Why You’ll Love This Easter Nest Torte Recipe
- Ready in just over an hour: From start to finish, this treat comes together quickly, giving you more time to enjoy family and festivities.
- Uses simple ingredients: No need to hunt for rare baking supplies; everything you need is probably already in your pantry.
- Perfect for beginners: Clear step-by-step instructions make this dessert approachable for all skill levels, with pro tips included.
- Impressive presentation: The chocolate nest with candy eggs looks stunning and festive, guaranteed to wow your guests.
- Customizable: Love nuts, different chocolates, or fruity additions? This recipe easily adapts to your preferences.
Why This Easter Nest Torte Recipe Works
This Easter Nest Torte Recipe shines because of a few magic moments in the kitchen: the buttery chocolate cake base is light enough to complement the luscious pudding-like filling, while still packing a deep cocoa punch. The use of gelatin ensures the creamy filling sets perfectly without being heavy, creating a silky mousse texture that melts on your tongue. Wrapping the cake with a tempered chocolate strip is a clever technique that forms a beautiful nest without fuss—making the whole dessert both a delight to create and to behold.
Ingredients You’ll Need
The ingredients for this Easter Nest Torte Recipe are wonderfully straightforward, proving that simple components can make pure magic when combined thoughtfully.
- Butter: Provides richness and moisture essential for a tender cake.
- Sugar: Sweetens the cake and the creamy filling, balancing chocolate’s bitterness.
- Eggs: Create structure in the cake and a velvety consistency in the filling.
- All-purpose flour: The backbone of the cake, giving it lightness and fluff.
- Baking cocoa: Delivers deep chocolate flavor without added fat.
- Baking powder and salt: Help the cake rise and enhance flavor complexity.
- Semisweet chocolate: Used melted in the cake and chopped in the filling for rich chocolate layers.
- Cornstarch: Thickens the custard filling for that luscious texture.
- Milk (2%): The creamy base for the filling that keeps it smooth yet light.
- Unflavored gelatin: Sets the filling without an overly firm texture.
- Heavy whipping cream: Whipped to soft peaks to fold into the filling for airy richness.
- Small candy Easter eggs: The final playful and colorful touch that brings the nest to life.
Ingredient Substitutions & Tips
- Butter: You can swap with margarine or coconut oil for a dairy-free twist, though flavor will be slightly different.
- Semisweet chocolate: Use bittersweet or even milk chocolate if you prefer a sweeter, milder taste.
- Heavy whipping cream: Substitute with coconut cream or aquafaba for a vegan-friendly filling.
- Milk: Almond or oat milk works fine as long as it’s unsweetened and not too thin.
👨🍳 Pro Tips for Perfect Results
- Use room temperature eggs: They blend better into batter, giving a lighter cake texture.
- Don’t rush setting the chocolate wrap: Let the chocolate firm up just enough to be flexible but not hard.
- Whip cream to soft peaks: This prevents overbeating and keeps the filling airy and smooth.
- Use a toothpick to test cake doneness: Insert it in the center; if it comes out clean, the cake is ready.
- Chill the assembled torte: This step is crucial to let all flavors meld and the nest shape stabilize.
How to Make Easter Nest Torte Recipe
Step 1: Prepare the Cake Base
Start by preheating your oven to 350°F (175°C). Cream the softened butter and sugar for 5 to 7 minutes until the mixture is light and fluffy, filling your kitchen with a buttery sweetness that promises a tender crumb. Add the eggs, one at a time, beating thoroughly after each addition to create a smooth, airy batter. In a separate bowl, sift together flour, cocoa, baking powder, and salt—these dry ingredients infuse the cake with that luscious chocolatey depth without any heaviness. Gradually fold the dry mixture into the creamed base, stirring gently but well. Pour this rich batter into a greased 9-inch springform pan and bake for 15 to 20 minutes, or until a toothpick inserted in the center comes out clean. Allow the cake to cool before removing it from the pan so it retains its perfect shape.
💡 Pro Tip: Don’t open the oven door during the first 12 minutes of baking to prevent your cake from sinking.
Step 2: Create the Chocolate Wrap
While your cake cools, it’s time to make the dramatic chocolate wrap—the signature “nest” edge that encircles your torte with elegant, glossy waves. Cut a long, thin strip of waxed paper and fold it lengthwise. Slowly spread melted chocolate along one edge in a wavy pattern, keeping about half an inch away from the other edge to avoid messes. Let the chocolate set partially until it’s pliable but not brittle—this usually takes 10 to 30 minutes. Wrap this around the cake like a bracelet, with the straight edge at the bottom. Leave the wax paper on to hold it steady as it chills in the fridge.
💡 Pro Tip: Slightly warming your hands before wrapping helps mold the chocolate gently without cracking.
Step 3: Make the Chocolate Twigs
Next, prepare the whimsical twigs that decorate the nest’s top. Drizzle the remaining melted chocolate in crisscross patterns over sheets of waxed paper lined on baking trays. The random zigzag shapes mimic natural twigs and add a delightful crunch. Chill for about 10 minutes until firm, then peel off the wax paper and gently break the chocolate into 2- to 3-inch twig pieces—a perfect rustic touch.
💡 Pro Tip: Use a fork for drizzling for more delicate, twiggy strands.
Step 4: Whip Up the Filling
The luscious filling is a rich custard meets mousse that makes the torte irresistibly creamy. In a small saucepan, whisk sugar and cornstarch together, then gradually stir in milk until silky smooth. Heat over medium-high, stirring constantly until the mixture thickens and bubbles, then reduce the heat and cook for 2 more minutes. Temper the egg yolks by stirring a spoonful of the hot custard into them before adding everything back to the pan. Bring to a gentle boil and cook for 2 additional minutes for that velvety finish. Sprinkle gelatin over cold water and let bloom, then stir it into the custard until fully melted. While still warm, add chopped chocolate and stir until smooth. Cover the custard with plastic wrap touching its surface to prevent a skin from forming, and cool to room temperature.
💡 Pro Tip: Constant stirring during cooking prevents lumps and ensures a silky smooth custard.
Step 5: Assemble the Easter Nest Torte
Finally, beat the heavy cream until soft peaks form and gently fold it into the cooled chocolate custard for a heavenly mousse texture. Spoon this luscious filling over your cooled cake base wrapped in chocolate, spreading evenly with care. Cover and refrigerate for about 1 to 2 hours to allow the torte to set firmly. When chilled, carefully peel away the waxed paper from the chocolate wrap—revealing the nest walls. Nestle the chocolate twigs around the torte’s top edge to mimic twigs, then finish by arranging your colorful candy eggs snugly in the center, creating a festive nest that sparks smiles and delight.
💡 Pro Tip: Use a small offset spatula for even spreading without disturbing the chocolate wrap.
Common Mistakes to Avoid
Learn from these common pitfalls:
- Cake sinking: Opening the oven door too soon or inaccurate oven temperature can cause the cake to collapse.
- Chocolate wrap cracking: Trying to wrap the chocolate when it’s fully hardened instead of pliable leads to breakage.
- Filling too runny: Underestimating the gelatin bloom or insufficient cooking of custard causes a loose filling that won’t set.
- Overbeaten cream: Whipping cream to stiff peaks can result in a grainy texture rather than smooth folding.
- Uneven cake base: Not greasing the pan properly or uneven batter spreading results in a lopsided foundation.
- Not chilling long enough: Skipping resting time prevents proper setting, resulting in a messy torte.
Delicious Variations to Try
Once you’ve mastered the classic Easter Nest Torte Recipe, why not shake things up a bit? Here are a few fun twists to keep your dessert routine bursting with flavor and creativity:
Nutty Delight
Fold in toasted chopped hazelnuts or pecans into the filling for an irresistible crunch and a nutty depth that complements the chocolate.
Berry Surprise
Add a layer of fresh raspberries or strawberries between the cake and mousse for a bright, tart contrast that livens the palate.
Mint Chocolate Dream
Infuse the filling custard with a few drops of peppermint extract before adding chocolate — a refreshing holiday twist that’s heavenly.
Salted Caramel Drizzle
Once assembled, drizzle homemade salted caramel sauce over the top for an extra layer of indulgence and a sophisticated finish.
Vegan Easter Nest
Swap dairy and eggs with coconut cream, aquafaba, and plant-based chocolate to make this recipe vegan-friendly without sacrificing flavor.
White Chocolate Nest
Use white chocolate instead of semisweet for a sweeter, creamier nest, and decorate with pastel candy eggs for an extra festive look.
How to Serve Easter Nest Torte Recipe

Garnishes
A dusting of cocoa powder or powdered sugar on the plate adds a delicate snowy touch, while edible flowers or mint sprigs bring fresh vibrancy. You can also add extra candy eggs or even a sprinkle of toasted coconut to enhance the nest aesthetic.
Side Dishes
Pair this torte with freshly whipped cream, a scoop of vanilla bean ice cream, or a bowl of tangy raspberry sauce for a delightful balance. Fresh fruit salad with citrus notes also lifts the richness beautifully.
Creative Ways to Present
Serve individual slices on vintage plates to elevate the charm, or portion the torte into mini nest cups for a playful twist perfect for parties. For larger gatherings, decorate the serving platter with spring flowers and pastel-colored napkins to complement the Easter theme.
Make Ahead and Storage
Storing Leftovers
Cover your Easter Nest Torte tightly with plastic wrap or store in an airtight container. Keep refrigerated and consume within 3 days for optimal freshness and creamy texture.
Freezing
This torte freezes well without losing texture. Wrap tightly in plastic wrap, followed by foil, and freeze for up to 1 month. To thaw, place in the refrigerator overnight before serving.
Reheating
Since this is a chilled dessert, avoid reheating. Instead, allow it to come to room temperature for about 15 minutes before serving to enjoy its best flavor and softness.
FAQs
Can I use milk chocolate instead of semisweet?
Absolutely! Milk chocolate will make the torte sweeter and creamier but reduce the intense chocolate flavor.
What if I don’t have a springform pan?
You can use a regular round cake pan, but be very gentle removing the cake to avoid breakage.
Is gelatin necessary in the filling?
Yes, gelatin helps the filling set properly while keeping it soft and mousse-like.
Can I make this torte dairy-free?
Yes! Use coconut oil or vegan butter in the cake and substitute dairy milk and cream with plant-based alternatives.
How long does the torte keep fresh?
If stored properly in the fridge, it stays fresh for up to 3 days.
Can I prepare this dessert ahead of Easter?
Definitely! Prepare up to 2 days in advance to let flavors meld. Just decorate with candy eggs just before serving.
What type of candy eggs work best?
Small, colorful, hard-shelled candy eggs add the best contrast and mimic real nests beautifully.
How can I prevent the chocolate twigs from melting?
Make sure your hands are clean and dry, and assemble the torte in a cool room or refrigerator for best results.
Final Thoughts
This Easter Nest Torte Recipe is a true showstopper—a beautiful blend of textures and flavors that brings festive joy and chocolatey comfort to any table. The moment you unveil that glossy chocolate “nest” brimming with pastel candy eggs, you’ll see why this dessert is a cherished tradition. It’s easy enough for a weeknight treat but elegant enough for holiday celebrations, making it a versatile favorite you’ll return to year after year.
Have you tried this Easter Nest Torte Recipe? I’d love to hear how it turned out! Leave a comment below. If you loved this recipe, please share it with friends and family. Happy cooking! 🍫🐣
PrintEaster Nest Torte Recipe

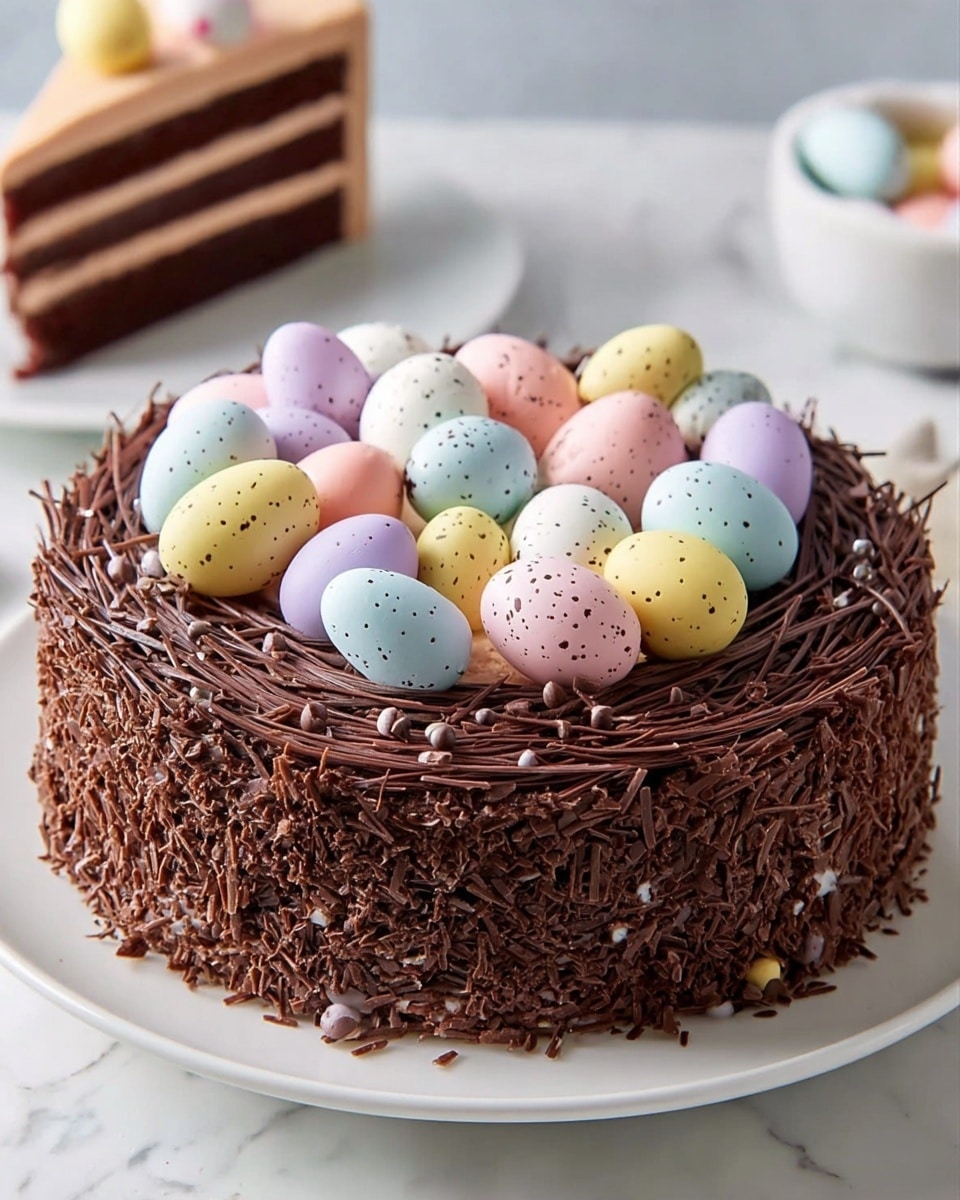
This Easter Nest Torte is a delightful and visually stunning chocolate dessert perfect for spring celebrations. Featuring a rich cocoa-infused cake base wrapped in a delicate chocolate collar, filled with creamy chocolate custard, and topped with chocolate twigs and candy eggs, it creates a whimsical edible nest that’s sure to impress family and guests.
- Prep Time: 1 hour plus chilling
- Cook Time: 15 minutes plus cooling
- Total Time: 1 hour 15 minutes plus chilling and cooling
- Yield: 16 servings 1x
- Category: Dessert
- Method: Baking
- Cuisine: American
Ingredients
For the Cake:
- 1/2 cup butter, softened
- 1/2 cup sugar
- 2 large eggs, room temperature
- 1/2 cup all-purpose flour
- 1/3 cup baking cocoa
- 1 teaspoon baking powder
- 1/4 teaspoon salt
- 8 ounces semisweet chocolate, melted
For the Filling:
- 1/4 cup sugar
- 1 teaspoon cornstarch
- 1–1/4 cups 2% milk
- 3 large egg yolks, lightly beaten
- 1 envelope unflavored gelatin
- 3 tablespoons cold water
- 7 ounces semisweet chocolate, chopped
- 1–1/4 cups heavy whipping cream
- 20 to 30 small candy Easter eggs
Instructions
- Prepare the Cake: Preheat your oven to 350°F (175°C). In a large bowl, cream together the softened butter and sugar until the mixture is light and fluffy, about 5 to 7 minutes. Add the eggs one at a time, beating well after each addition to fully incorporate.
- Mix Dry Ingredients: In a separate bowl, whisk together the all-purpose flour, baking cocoa, baking powder, and salt. Gradually add these dry ingredients to the creamed butter mixture, mixing thoroughly to form a smooth batter.
- Bake the Cake: Spread the batter evenly into a greased 9-inch springform pan. Bake in the preheated oven for 15 to 20 minutes or until a toothpick inserted in the center comes out clean. Allow the cake to cool for 10 minutes, then run a knife around the edge to loosen. Remove the sides and bottom of the pan carefully and cool the cake completely on a wire rack.
- Create the Chocolate Wrap: Cut a 29 by 5-inch strip of waxed paper and fold it lengthwise in half. Place it on a work surface covered with waxed paper. Spread the melted semisweet chocolate along one long edge to create a wavy line just under 1/2 inch from the opposite edge. Let this set for 10 to 30 minutes until the chocolate is partially set but still pliable. Wrap this chocolate strip around the cooled cake with the straight edge at the bottom, leaving the waxed paper in place. Refrigerate until the chocolate wrap is chilled and firm.
- Make the Chocolate Twigs: Cover three baking sheets with waxed paper. Using a spatula, drizzle the remaining melted chocolate back and forth over the waxed paper to form twig-like patterns. Chill for 10 minutes until set, then peel off the waxed paper and break the chocolate into 2- to 3-inch twig pieces.
- Prepare the Filling: In a small saucepan, combine sugar and cornstarch, then stir in milk until smooth. Cook over medium-high heat, stirring constantly, until the mixture thickens and begins to bubble. Reduce heat and continue cooking for 2 more minutes. Remove from heat and temper the egg yolks by stirring a small amount of the hot mixture into them, then return all to the pan, stirring constantly. Bring to a gentle boil, cook and stir for an additional 2 minutes. Remove from heat.
- Dissolve Gelatin and Add Chocolate: Sprinkle gelatin over cold water in a small bowl; let it stand for 1 minute to bloom. Stir the gelatin mixture into the hot custard until dissolved, then add the chopped semisweet chocolate and stir until smooth. Cover the surface with plastic wrap to prevent a skin from forming and cool to room temperature.
- Assemble the Torte: In a large bowl, beat the heavy whipping cream until soft peaks form. Fold the whipped cream gently into the cooled chocolate custard mixture. Spoon this filling evenly over the cake inside the chocolate wrap. Cover and refrigerate for 1 to 2 hours or until the filling is set.
- Decorate: Once set, carefully peel off the waxed paper from the chocolate wrap surrounding the cake. Arrange the chocolate twigs around the top edge of the cake to create a nest effect. Finally, place 20 to 30 small candy Easter eggs in the center of the nest for a festive finish.
Notes
- Ensure eggs and butter are at room temperature for best creaming results.
- When spreading the chocolate wrap, work quickly before the chocolate sets to avoid cracking.
- The custard filling requires constant stirring to prevent lumps and curdling.
- Gelatin must bloom properly in cold water before adding to the custard to ensure smooth texture.
- Refrigeration times can be extended if more firmness is desired in the filling and chocolate wrap.
- Use high-quality semisweet chocolate for the best flavor in the wrap, twigs, and filling.
Keywords: Easter dessert, chocolate torte, Easter nest cake, chocolate custard torte, holiday cake, festive dessert