Danish Butter Cookies (Melt in Your Mouth) Recipe
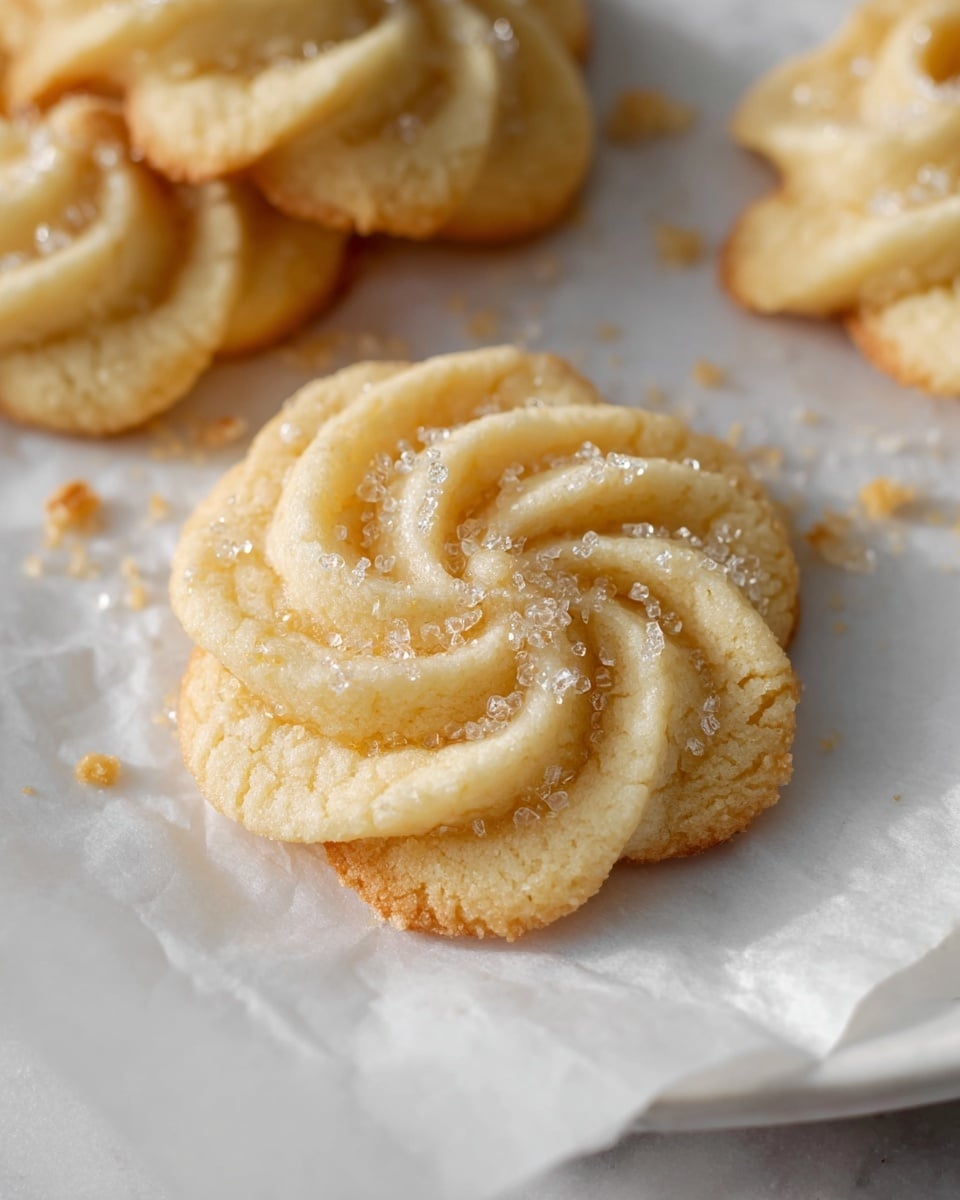
Picture this: warm, buttery waves of golden Danish butter cookies, each delicate bite dissolving effortlessly on your tongue. The kitchen fills with a dreamy vanilla aroma that instantly wraps you in cozy memories of festive gatherings and heartfelt moments. These Danish Butter Cookies (Melt in Your Mouth) Recipe is your passport to pure bliss—the kind of treat that feels fancy but is surprisingly simple to whip up anytime you crave a little sweetness. Ready in just over an hour, they truly melt like a dream, making every bite an irresistible moment of joy.
Why You’ll Love This Danish Butter Cookies (Melt in Your Mouth) Recipe
- Ready in just over an hour: From mixing to baking, this recipe fits perfectly into your day without fuss.
- Uses simple ingredients: No need for exotic pantry staples—just butter, sugar, flour, and a few classics.
- Perfect for beginners: Straightforward steps ensure even novice bakers feel like pros.
- Impressive presentation: Pipe elegant shapes that look like they belong in a bakery display.
- Customizable: Add sprinkles, coarse sugar, or even a touch of citrus zest to make them your own.
Why This Danish Butter Cookies (Melt in Your Mouth) Recipe Works
What truly elevates these cookies is the use of high-quality European salted butter, lending that unmistakable rich flavor and silky texture. The blend of all-purpose and cake flour creates the perfect crumb—light enough to melt on your tongue but sturdy enough to hold shape when piped. Chilling the dough after piping is a game changer, preventing over-spread and ensuring crisp edges with tender centers. Every step works harmoniously to deliver that coveted melt-in-your-mouth experience that Danish Butter Cookies are famous for.
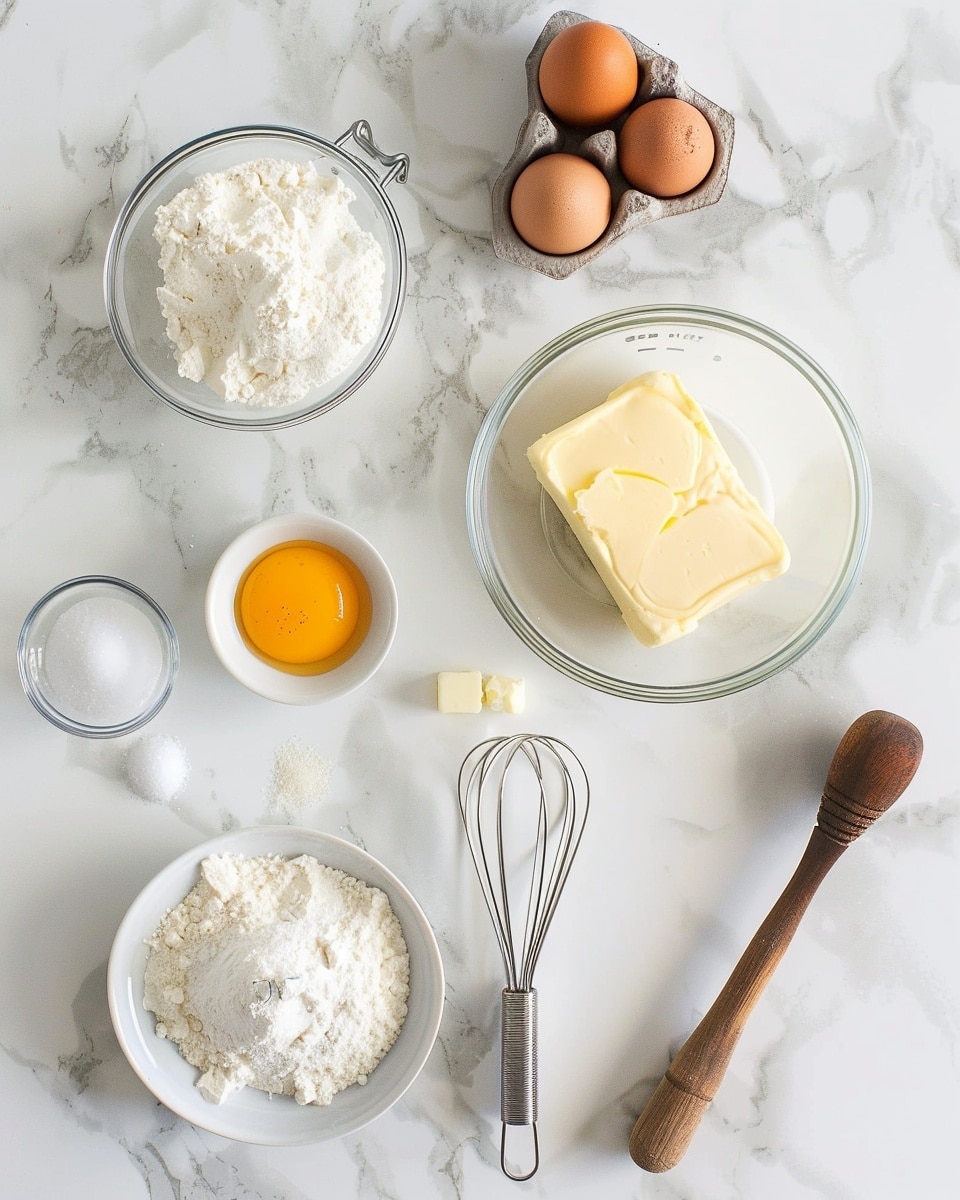
Ingredients You’ll Need
The ingredient list might look simple, but each item plays a starring role in crafting these buttery delights. Together, they create a delicate balance of flavor, texture, and aroma that’s hard to resist.
- European salted butter (1 cup, room temperature): The key to richness and depth in flavor.
- Granulated sugar (1/2 cup): Adds sweetness and helps create a tender crumb.
- Salt (1/8 teaspoon): Enhances and balances all flavors perfectly.
- Egg yolks (2): Contributes richness and helps bind the dough.
- Vanilla extract (2 teaspoons): Infuses fragrant warmth and classic aroma.
- Whole milk (1 tablespoon): Softens the dough for easy piping.
- All-purpose flour (2 cups): Provides structure and body to the cookies.
- Cake flour (1/2 cup): Adds tenderness and helps cookies melt in your mouth.
- Coarse sugar (for decorating): Optional, but adds a delightful sparkle and crunch.
Ingredient Substitutions & Tips
- European salted butter: You can use unsalted butter plus a pinch of extra salt, but European butter will always give a richer flavor.
- Vanilla extract: Substitute with almond extract for a nutty twist or lemon zest for citrus brightness.
- Whole milk: Use cream or half-and-half for an even richer dough or a splash of almond milk for lactose-free options.
- Cake flour: If unavailable, make your own by replacing 2 tablespoons of all-purpose flour with cornstarch per cup.
👨🍳 Pro Tips for Perfect Results
- Use room temperature butter: Creaming soft butter ensures the cookies are tender and airy.
- Don’t skip chilling: Refrigerate the piped dough to prevent spreading and maintain those gorgeous shapes.
- Pipe with a proper tip: A ½-inch open star tip gives you classic swirls and texture.
- Space cookies evenly: Leave at least 2 inches apart on the baking sheet for even baking.
- Watch the oven closely: Remove as soon as edges turn slightly golden for that perfect melt-in-your-mouth bite.
How to Make Danish Butter Cookies (Melt in Your Mouth) Recipe
Step 1: Prep Your Space
Clear some room in your refrigerator to chill the cookies later and line two baking sheets with parchment paper or silicone mats. This sets you up for success, ensuring the cookies bake evenly without sticking.
💡 Pro Tip: Chilling space is essential to keep the cookies from spreading too much in the oven.
Step 2: Cream Butter, Sugar, and Salt
In your stand mixer fitted with the paddle attachment, beat the softened butter on medium speed until smooth. Slowly add sugar and salt while mixing on low, then increase to medium speed until the mixture is luxuriously light and fluffy—about 3 to 5 minutes.
💡 Pro Tip: Proper creaming dissolves sugar crystals and traps air, which helps create those tender cookies.
Step 3: Add Egg Yolks, Vanilla, and Milk
With the mixer running on medium, pour in the egg yolks, vanilla extract, and milk. Mix until fully combined, scraping the bowl sides to make sure every bit is incorporated into the batter.
💡 Pro Tip: Mixing evenly at this stage ensures a smooth dough without streaks.
Step 4: Mix in the Flours
Whisk the all-purpose and cake flour together, then add them in two batches to the mixing bowl on low speed. Mix until just combined without any visible flour patches. If the batter feels too stiff to pipe, gently add another tablespoon of milk to soften.
💡 Pro Tip: Over-mixing develops gluten and can toughen cookies; mix just enough for a homogenous dough.
Step 5: Pipe the Cookies
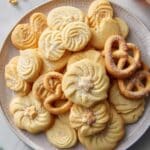
Fit a large piping bag with a ½-inch open star tip and fill it with your cookie dough. On prepared baking sheets, pipe 2-inch cookies in shapes like rosettes, pretzels, circles, or squares, spacing them at least 2 inches apart. Optional: sprinkle with coarse sugar or festive sprinkles for extra sparkle.
💡 Pro Tip: Keep your piping hand steady to create beautiful, consistent shapes.
Step 6: Chill the Cookies
Place the trays in the refrigerator and let the cookies chill for 20-30 minutes. This crucial step helps them hold their piped shape and prevents excessive spreading during baking.
💡 Pro Tip: Don’t rush this stage—it’s the secret weapon for perfect texture.
Step 7: Bake to Golden Perfection
Preheat your oven to 350°F (175°C) and position the rack in the middle. Bake cookies for 10-15 minutes or until the edges just show a hint of golden brown. Allow them to cool on the baking sheets for 5 minutes before transferring to wire racks.
💡 Pro Tip: Keep a close eye starting at 10 minutes to avoid over-baking—they’re best when barely golden.
Common Mistakes to Avoid
Learn from these common pitfalls:
- Using cold butter: Leads to heavy, dense cookies rather than delicate and airy ones.
- Skipping chilling: Cookies spread too much and lose their signature shape and texture.
- Overmixing the dough: Creates tough cookies by developing too much gluten.
- Not spacing cookies properly: Causes them to stick together during baking.
- Ignoring oven temperature: Too hot can burn edges; too cool won’t bake cookies enough.
- Using the wrong piping tip or bag size: Results in inconsistent shapes and sizes.
Delicious Variations to Try
Once you’ve mastered the classic version of this Danish Butter Cookies (Melt in Your Mouth) Recipe, it’s time to get creative with these taste twists!
Chocolate-Dipped Danish Butter Cookies
Dip half of each cooled cookie into melted dark or white chocolate, then set on parchment to harden. The rich chocolate contrasts wonderfully with the buttery base.
Lemon Zest and Poppy Seeds
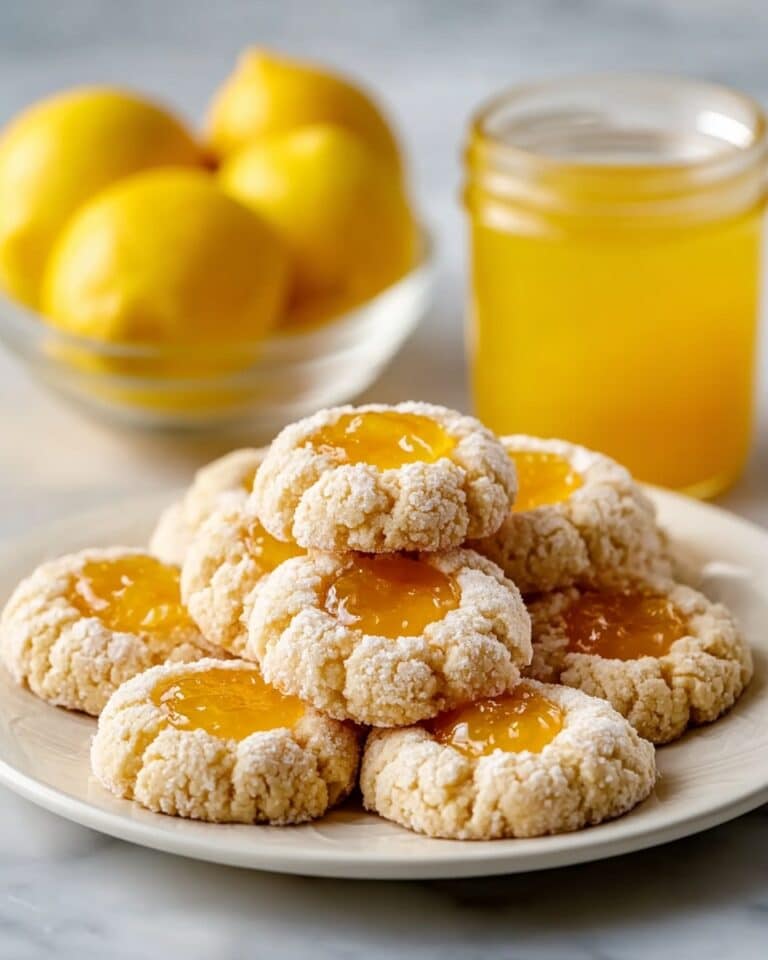
Add a teaspoon of freshly grated lemon zest and a tablespoon of poppy seeds to the dough before piping for a bright, textured treat.
Almond Crusted Cookies
Before chilling, press a sliver of toasted almond into the center of each cookie, adding crunch and a nutty aroma.
Sprinkled with Festive Colored Sugar
For holidays or special occasions, decorate the dough with multicolored coarse sugar or edible glitter right before chilling.
Cinnamon Sugar Twist
Swirl cinnamon into the dough or sprinkle cinnamon sugar atop the piped cookies for a warm, spiced flavor.
How to Serve Danish Butter Cookies (Melt in Your Mouth) Recipe
Garnishes
Simple powdered sugar dusting, a sprinkle of coarse sugar crystals, or a light drizzle of melted chocolate elevate the presentation effortlessly.
Side Dishes
Pair these cookies with a steaming cup of tea—Earl Grey or chamomile work beautifully—or a rich espresso to balance the buttery sweetness.
Creative Ways to Present
Arrange cookies on a vintage tiered tray for tea parties, gift-pack them in clear cellophane tied with ribbons, or stack them in mason jars as thoughtful homemade gifts.
Make Ahead and Storage
Storing Leftovers
Store cooled cookies in an airtight container at room temperature for up to one week to maintain their tender crispness.
Freezing
You can freeze unbaked piped dough on baking sheets, then transfer to bags for up to 3 months. Bake directly from frozen, adding a minute or two to baking time.
Reheating
Refresh cookies by warming briefly in a 300°F oven for 3-5 minutes to revive that fresh-baked aroma and melt-in-your-mouth texture.
FAQs
Can I use salted butter instead of unsalted?
Yes! This recipe calls for European salted butter, which adds a nice depth of flavor. If using unsalted, add a pinch extra salt to compensate.
What’s the difference between all-purpose and cake flour?
All-purpose flour has a higher protein content, while cake flour is softer and lighter. The mix helps create tender yet structured cookies.
Can I make these cookies gluten-free?
Yes, but substitutions require a reliable gluten-free flour blend, and texture might differ. Adding xanthan gum can help mimic the structure.
Why do I need to chill the piped dough?
Chilling firms up the butter so cookies hold their shape during baking and prevents spreading that leads to flat cookies.
Can I use a different piping tip?
While the ½-inch open star tip is traditional, you can experiment with other shapes but expect different cookie appearances.
How long do these cookies stay fresh?
Stored properly, they stay fresh for up to a week at room temperature and several months if frozen.
Can I add flavors like almond or citrus?
Absolutely! Almond extract, lemon zest, or orange zest add delightful nuances to the buttery base.
Are these cookies suitable for gifting?
Definitely! Their elegant shapes and buttery perfection make them wonderful gifts for holidays or special occasions.
Final Thoughts
This Danish Butter Cookies (Melt in Your Mouth) Recipe is more than just a cookie; it’s a little piece of happiness baked fresh from your kitchen. With buttery richness, delicate crumb, and that heavenly melt-on-your-tongue texture, these cookies never fail to impress family and friends. Whether it’s your first time or the hundredth, they promise consistent comfort and joy every batch. So grab your piping bag, fill your kitchen with warm vanilla scents, and share a classic treat that feels like a warm hug.
Have you tried this Danish Butter Cookies (Melt in Your Mouth) Recipe? I’d love to hear how it turned out! Leave a comment below. If you loved this recipe, please share it with friends and family. Happy cooking! 😊
PrintDanish Butter Cookies (Melt in Your Mouth) Recipe
Classic Danish Butter Cookies that melt in your mouth, made with rich European salted butter, delicate vanilla, and a blend of all-purpose and cake flours. These cookies are piped into charming shapes, chilled to prevent spreading, and baked to a light golden perfection. Perfect for festive occasions or a delightful everyday treat.
- Prep Time: 30 minutes
- Cook Time: 15 minutes
- Total Time: 1 hour 30 minutes
- Yield: 24 servings 1x
- Category: Dessert
- Method: Baking
- Cuisine: Danish
Ingredients
Cookie Dough
- 1 cup (227 g) European salted butter (room temperature)
- 1/2 cup (100 g) granulated sugar
- 1/8 teaspoon salt
- 2 egg yolks
- 2 teaspoons (10 g) vanilla extract
- 1 tablespoon (15 g) whole milk (plus more if needed to soften)
- 2 cups (220 g) all-purpose flour
- 1/2 cup (50 g) cake flour
For Decorating
- Coarse sugar (for sprinkling)
- Optional festive sprinkles
Instructions
- Prep the refrigerator and baking mats: Clear space in your refrigerator to chill the shaped cookies. Line two baking sheets with parchment paper or silicone baking mats and set aside.
- Cream butter, sugar, and salt: Using a stand mixer with a paddle attachment, beat the room temperature butter on medium speed until smooth. Gradually add the granulated sugar and salt while mixing on low speed, then increase to medium speed and beat until the mixture is light and fluffy.
- Add egg yolks, vanilla, and milk: With the mixer running on medium speed, incorporate the egg yolks, vanilla extract, and 1 tablespoon of whole milk. Mix until fully combined, then scrape down the bowl to mix all ingredients evenly.
- Combine and add dry ingredients: In a separate bowl, whisk together the all-purpose flour and cake flour. Add the flour mixture to the wet ingredients in two parts, mixing on low speed and scraping down the sides after each addition until no traces of flour remain. If the dough is too stiff to pipe, add an additional tablespoon of milk.
- Pipe the cookies: Transfer the cookie dough to a piping bag fitted with a ½-inch open star tip. Pipe cookies approximately 2 inches in diameter in various shapes such as rosettes, pretzels, circles, or squares on the prepared baking sheets. Space them at least 2 inches apart. Optionally, sprinkle with coarse sugar or festive sprinkles. Chill the shaped cookies in the refrigerator for 20-30 minutes to prevent spreading when baking.
- Preheat the oven: Set the oven to 350°F (175°C) and position the rack in the middle.
- Bake the cookies: Bake chilled cookies for 10-15 minutes or until the edges are just lightly golden brown. Remove from the oven and allow cookies to cool on the baking sheets for about 5 minutes before transferring them to wire racks to cool completely to room temperature.
Notes
- Chilling the cookies before baking is crucial to maintain their shape and prevent over-spreading.
- You can experiment with different piping shapes and sprinkle decorations for festive occasions.
- Use European-style butter for the best flavor and texture, as it has a higher fat content compared to regular butter.
- Store cookies in an airtight container at room temperature for up to one week.
- For softer cookies, add a little more milk to the dough as needed to achieve the right consistency for piping.
Keywords: Danish butter cookies, butter cookies, melt in your mouth cookies, piped cookies, holiday cookies, vanilla cookies, classic Danish dessert