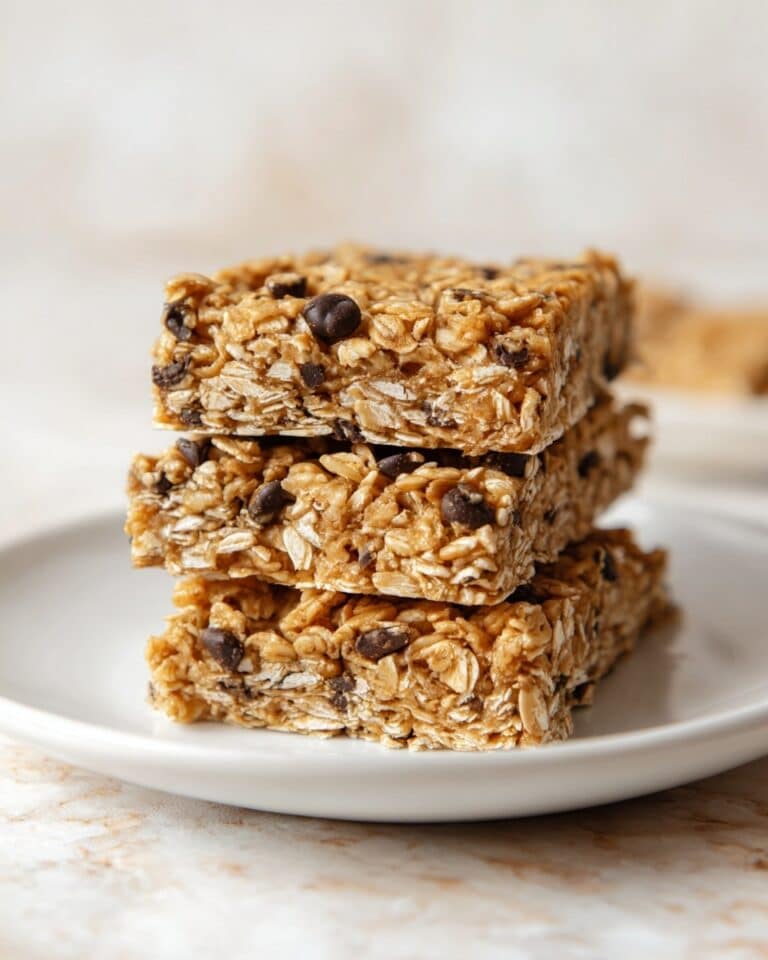
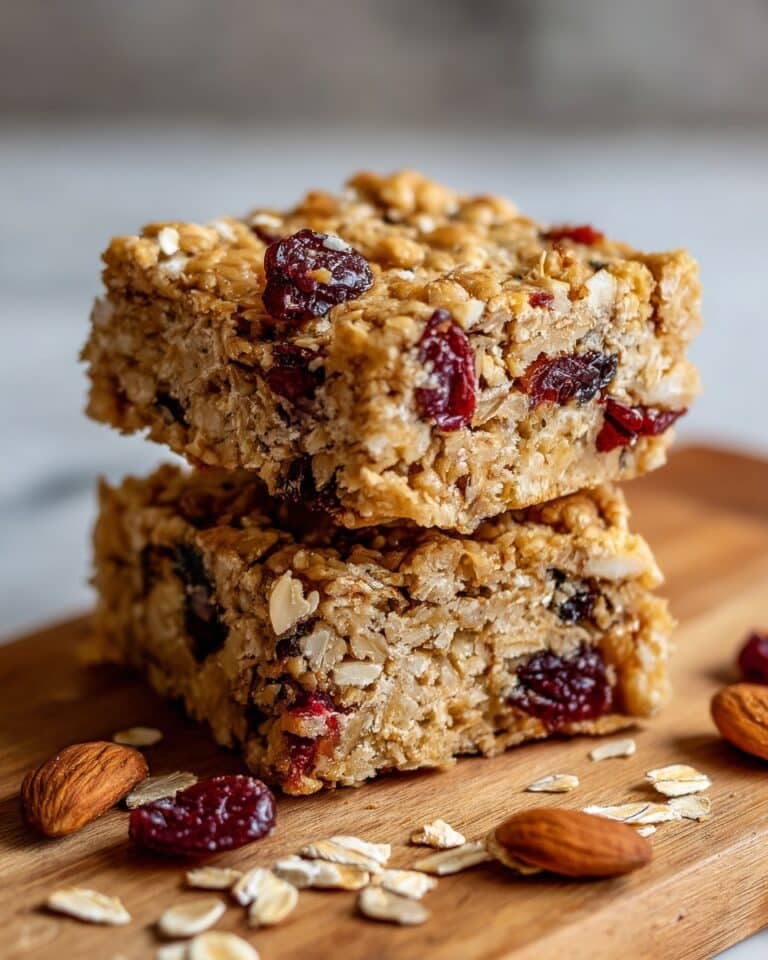
Cranberry Nut Granola Bars Recipe
Picture this: the warm, cozy aroma of toasted oats and nuts fills your kitchen as you press together a sweet, sticky mixture bursting with tangy dried cranberries. The golden edges begin to crisp just right in the oven, promising a perfect bite every time. These Cranberry Nut Granola Bars are the ultimate treat—quick to whip up, packed with wholesome goodness, and irresistibly chewy. They’re the kind of snack that makes your day brighter and your afternoon cravings disappear, without any fuss.
Why You’ll Love This Cranberry Nut Granola Bars Recipe
- Ready in 30 minutes: From mixing to munching, these bars come together swiftly—ideal for busy mornings or last-minute snacks.
- Uses simple ingredients: You probably have most of these pantry staples already, no fancy shopping trips required.
- Perfect for beginners: No complicated techniques here, just straightforward steps that anyone can follow with confidence.
- Impressive presentation: With golden edges and festive cranberries peeking through, these bars look as amazing as they taste.
- Customizable: Swap in your favorite nuts or dried fruits to tailor the bars exactly to your cravings and dietary needs.
Why This Cranberry Nut Granola Bars Recipe Works
This Cranberry Nut Granola Bars recipe shines because it balances textures and flavors like a pro. The rolled oats offer a hearty chewiness, while the chopped nuts provide satisfying crunch that contrasts beautifully with the juicy bursts of dried cranberries. Combining honey or maple syrup with almond or peanut butter creates a sticky binder that holds everything together securely while keeping the bars moist and tender. Baking just until the edges turn golden ensures that perfect crisp without drying them out. The secret is pressing the mixture firmly into the pan—this dense compression means the bars cut cleanly and hold their shape, delivering a snack that travels well and satisfies every time.

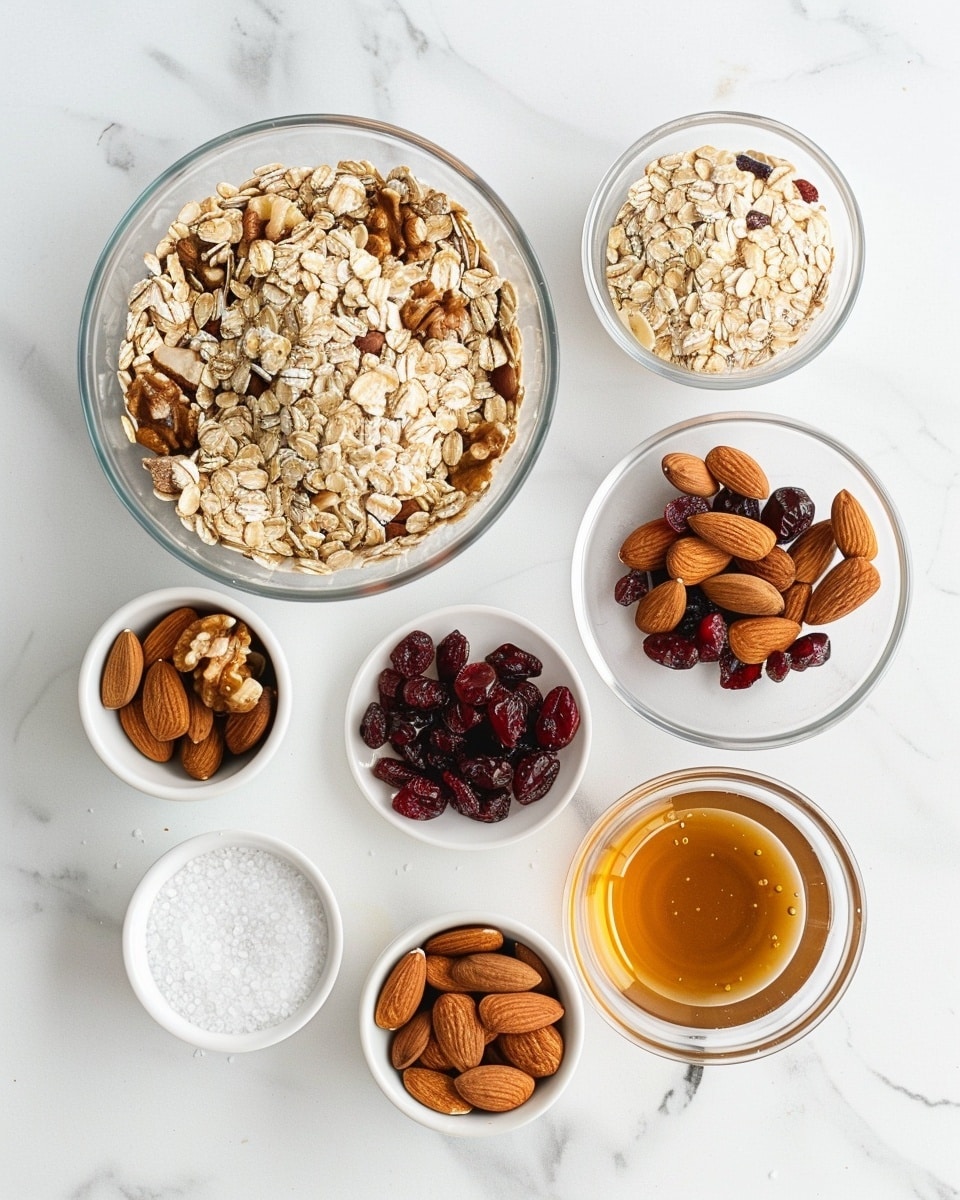
Ingredients You’ll Need
Gathering simple yet essential ingredients is all it takes to make these delightful granola bars come to life.
- Rolled oats: The hearty base that gives the bars their chewy texture and wholesome flavor.
- Chopped nuts: Almonds, walnuts, or your favorite combo add crunch and richness.
- Dried cranberries: Juicy, tart bursts that beautifully contrast the sweetness.
- Salt: Just a pinch to enhance and balance all the flavors.
- Honey or maple syrup: Natural sweeteners that bind the bars together with a gentle stickiness.
- Almond butter or peanut butter: Adds creaminess and nutty depth while helping everything hold firm.
- Vanilla extract: A subtle layer of warm flavor that rounds out the sweetness.
Ingredient Substitutions & Tips
- Chopped nuts: Try pecans, cashews, or pistachios for a different crunch.
- Dried cranberries: Swap with raisins, chopped dates, or even dried cherries for variety.
- Honey or maple syrup: Agave nectar or brown rice syrup work great as vegan alternatives.
- Almond butter or peanut butter: Use sunflower seed butter for a nut-free option.
👨🍳 Pro Tips for Perfect Results
- Toast the nuts: Lightly toast chopped nuts beforehand to deepen their flavor and crunch.
- Press firmly: When transferring to the pan, press the mixture down hard for bars that hold together beautifully.
- Line your pan well: Using parchment paper with an overhang makes removing the bars effortless.
- Don’t overbake: Watch for golden edges—this ensures chewy centers and crisp exteriors.
- Customize with mix-ins: Feel free to sneak in chia seeds or shredded coconut for extra texture and nutrition.
How to Make Cranberry Nut Granola Bars Recipe
Step 1: Preparation
Begin by preheating your oven to 350°F (175°C). Line an 8×8-inch baking dish with parchment paper, making sure to leave some overhang on the sides. This little trick makes lifting the bars out after baking so much easier.
💡 Pro Tip: If you don’t have parchment paper, lightly grease the pan and dust with oats to prevent sticking.
Step 2: Mix the Dry Ingredients
In a large bowl, combine rolled oats, chopped nuts, dried cranberries, and salt. Give everything a good stir so the ingredients are evenly distributed, setting the stage for a perfectly balanced bar in every bite.
💡 Pro Tip: Toast your nuts beforehand in a dry skillet for 5 minutes to enhance their nutty aroma.
Step 3: Combine the Wet Ingredients
In a smaller bowl, whisk together the honey (or maple syrup), almond butter (or peanut butter), and vanilla extract until you achieve a smooth and glossy mixture. This luscious blend will act as the glue that holds your bars together with love.
💡 Pro Tip: Warm the honey and nut butter slightly if they’re too thick to mix easily.
Step 4: Blend Wet and Dry Mixtures
Pour the wet mixture over the dry ingredients and stir thoroughly, making sure every oat and nut is coated evenly. This ensures your bars have consistent sweetness and stickiness throughout.
💡 Pro Tip: Use a sturdy spoon or spatula to really press the mixture together as you combine.
Step 5: Press and Bake
Transfer the thick mixture to your prepared baking dish. Press it down firmly with your hands or the back of a spatula until the surface is smooth and compacted. Pop the pan into the preheated oven and bake for 15-20 minutes, keeping a close eye for golden-brown edges.
💡 Pro Tip: Rotate the pan halfway through baking for perfectly even browning.
Step 6: Cool and Cut
Once out of the oven, let the bars cool in the pan for about 10 minutes. Then, using the parchment overhang, gently lift the entire block onto a cutting board. Slice into bars or squares while still slightly warm for clean cuts that won’t crumble.
💡 Pro Tip: Let cool completely before storing to keep structural integrity.
Common Mistakes to Avoid
Learn from these common pitfalls to make your Cranberry Nut Granola Bars recipe foolproof:
- Not pressing firmly enough: This leads to crumbly bars that don’t hold together well.
- Overbaking: Can dry out the bars, making them hard instead of chewy.
- Skipping parchment paper: Makes removal tricky and can cause sticking.
- Using chunky nut butters: Might prevent an even mixture; smooth is best.
- Too much sweetener: Makes bars overly sticky and less healthy.
- Ignoring oven hot spots: Uneven baking can cause burnt edges or undercooked centers.
Delicious Variations to Try
Once you’ve nailed the classic Cranberry Nut Granola Bars recipe, switch things up with these fun ideas:
Chocolate Chip & Almond
Add a 1/3 cup of mini chocolate chips and swap walnuts for almonds to satisfy your sweet tooth with every bite.
Tropical Coconut & Cashew
Incorporate shredded coconut and chopped cashews, plus sub dried cranberries with dried pineapple bits for a sunny twist.
Spiced Pumpkin Seed
Mix in a teaspoon of cinnamon and ginger, and use pumpkin seeds instead of your usual nuts for a fall-inspired bar.
Peanut Butter & Raisin
Stick to peanut butter as your binder and replace cranberries with raisins for a classic, nostalgic flavor.
Chia & Flax Boost
Add a tablespoon each of chia seeds and ground flaxseed to pack in extra nutrition and subtle nutty flavors.
How to Serve Cranberry Nut Granola Bars Recipe
Garnishes
Sprinkle a pinch of sea salt on top before baking for a salty-sweet harmony, or drizzle melted dark chocolate over cooled bars for an indulgent touch.
Side Dishes
Pair these bars with a fresh fruit salad, a creamy yogurt parfait, or a cup of steaming herbal tea for a balanced and satisfying snack time.
Creative Ways to Present
Wrap individual bars in parchment and tie with twine for gifting, or cut bite-sized squares and serve on a charming wooden platter at gatherings for an inviting treat.
Make Ahead and Storage
Storing Leftovers
Keep your granola bars fresh in an airtight container at room temperature for up to a week. Make sure they are completely cooled before storing to prevent sogginess.
Freezing
Wrap bars individually in plastic wrap and place them in a freezer-safe bag or container. They freeze beautifully for up to three months. Thaw at room temperature before enjoying.
Reheating
If you like your bars warm, pop one in the microwave for 10-15 seconds or briefly heat in a low-temperature oven. This revives their chewy softness and enhances the nutty aroma.
FAQs
Can I use quick oats instead of rolled oats?
Quick oats might produce a less chewy texture since they are more processed. Rolled oats are best for that hearty bite, but quick oats can work in a pinch.
How do I make these bars vegan?
Simply swap honey for maple syrup or agave nectar and use your favorite nut butter. All other ingredients should be naturally vegan.
What nuts work best in this recipe?
Almonds, walnuts, pecans, and cashews all add wonderful crunch and flavor. Mix and match to keep things interesting!
Can I add chocolate chips before baking?
It’s best to add chocolate chips after baking and cooling to prevent them from melting completely into the bars.
How do I ensure the bars stick together well?
Make sure to press the mixture firmly into the pan and don’t skip the nut butter and sweetener combination—they are key binders.
Are these bars gluten-free?
Use certified gluten-free rolled oats and double-check your nuts and other ingredients to ensure they haven’t been cross-contaminated.
Can I double the recipe?
Absolutely! Just double all ingredients and use a larger baking dish, adjusting baking time slightly as needed.
How long do the bars keep?
Stored properly, they last about a week at room temperature and up to three months frozen.
Final Thoughts
There is something truly comforting about creating homemade snacks that feel nourishing and satisfying. This Cranberry Nut Granola Bars recipe is a gem—combining wholesome ingredients with simple techniques to produce a treat that’s as delicious as it is reliable. Whether you’re packing lunches, fueling afternoon hikes, or just craving a sweet bite with your coffee, these bars bring joy and energy in every chewy, crunchy mouthful.
Have you tried this Cranberry Nut Granola Bars Recipe? I’d love to hear how it turned out! Leave a comment below. If you loved this recipe, please share it with friends and family. Happy cooking! 😊
PrintCranberry Nut Granola Bars Recipe
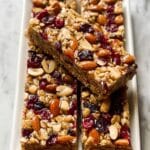
Delicious and wholesome Cranberry Nut Granola Bars that combine rolled oats, nuts, and dried cranberries bound together with honey and almond butter. Perfect as a healthy snack or breakfast on-the-go, these bars bake to a golden-brown perfection with a chewy texture and satisfying crunch.
- Prep Time: 10 minutes
- Cook Time: 20 minutes
- Total Time: 30 minutes
- Yield: 12 servings 1x
- Category: Snack
- Method: Baking
- Cuisine: American
- Diet: Vegetarian
Ingredients
Dry Ingredients
- 2 cups rolled oats
- 1 cup chopped nuts (almonds, walnuts, or your choice)
- 1/2 cup dried cranberries
- 1/4 teaspoon salt
Wet Ingredients
- 1/2 cup honey or maple syrup
- 1/4 cup almond butter or peanut butter
- 1/2 teaspoon vanilla extract
Instructions
- Preparation: Preheat your oven to 350°F (175°C) and line an 8×8-inch baking dish with parchment paper, leaving an overhang for easy removal of the granola bars later.
- Mix Dry Ingredients: In a large mixing bowl, combine the rolled oats, chopped nuts, dried cranberries, and salt. Stir well to evenly distribute the ingredients.
- Mix Wet Ingredients: In a smaller bowl, whisk together the honey or maple syrup, almond butter or peanut butter, and vanilla extract until smooth and fully combined.
- Combine Mixtures: Pour the wet mixture over the dry ingredients, mixing thoroughly to ensure all the dry ingredients are evenly coated and sticky.
- Press Mixture: Transfer the combined mixture to the prepared baking dish. Use a spatula or your hands to press the mixture down firmly and evenly to form a compact layer.
- Bake: Place the pan in the preheated oven and bake for 15-20 minutes, or until the edges start to turn a golden brown color.
- Cool: Remove the baked granola from the oven and allow it to cool in the pan for about 10 minutes to set.
- Cut Bars: Use the parchment paper overhang to lift the granola slab out of the baking dish onto a cutting board. Cut into bars or squares of your preferred size.
Notes
- You can substitute dried cranberries with raisins or chopped dates according to your preference.
- Feel free to mix and match nuts such as almonds, walnuts, pecans, or cashews based on availability and taste.
- For a vegan option, use maple syrup instead of honey.
- Store the granola bars in an airtight container at room temperature for up to one week.
- Pressing the mixture firmly before baking helps the bars hold together better after baking.
Keywords: granola bars, cranberry nut bars, healthy snack, baked granola, oat bars, homemade granola bars, easy snack