Cast Iron Skillet Apple Crisp Recipe
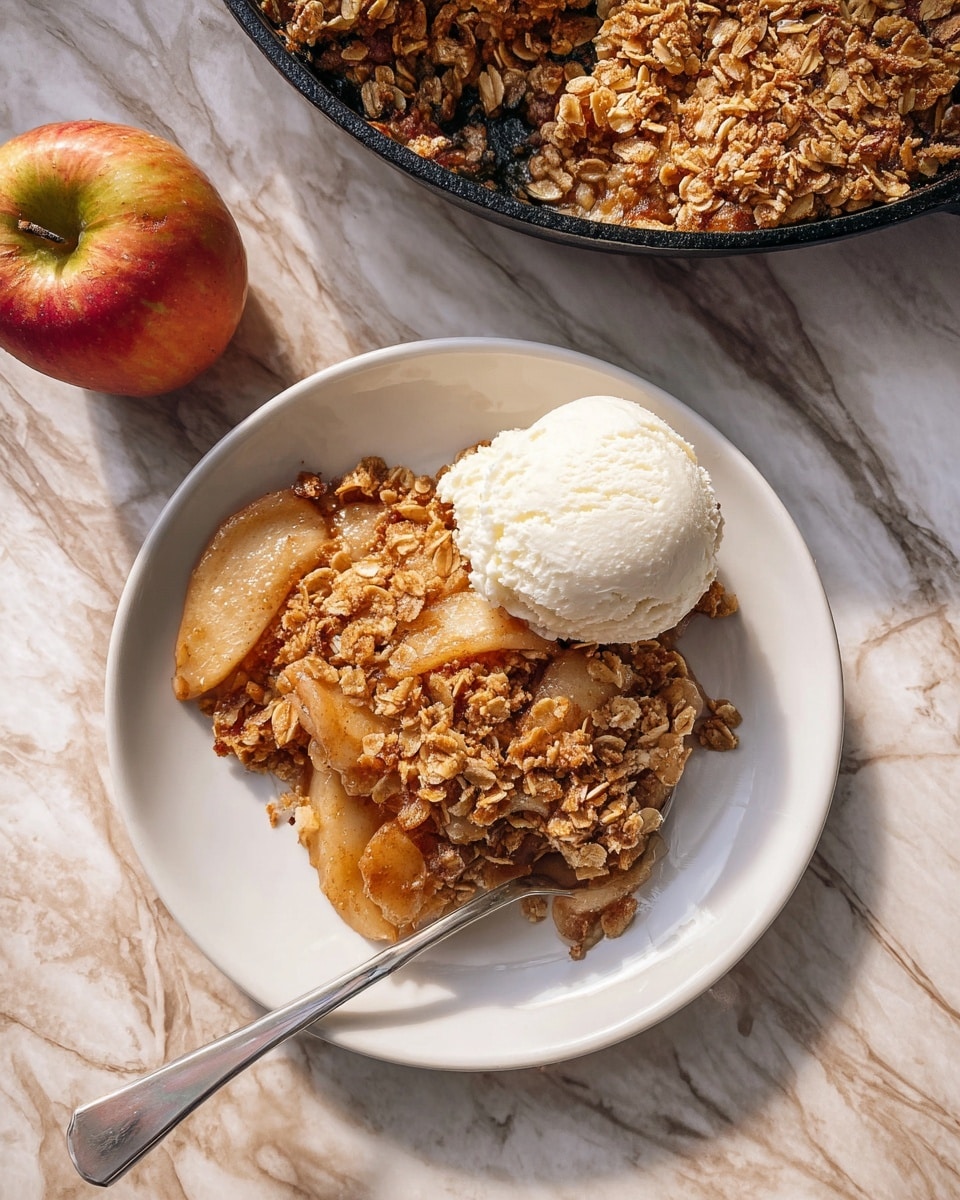
Picture this: The warm, inviting aroma of cinnamon and caramelized apples fills your kitchen, wrapping around you like a cozy blanket. Golden, crispy oats bubbling atop tender, spiced apple slices create a masterpiece right in your favorite cast iron skillet. It’s the kind of dessert that feels like a comforting hug on a chilly day and a quick way to impress anyone lucky enough to share a bite. This Cast Iron Skillet Apple Crisp Recipe is the perfect blend of simplicity and show-stopping flavor that will turn any gathering into a memorable moment.
Why You’ll Love This Cast Iron Skillet Apple Crisp Recipe
- Ready in 1 hour 20 minutes: From peeling apples to pulling it out of the oven, it’s a beautifully paced recipe perfect for a relaxed afternoon or an easy dessert.
- Uses simple ingredients: Pantry staples like oats, cinnamon, brown sugar, and butter come together to create magic without any complicated shopping trips.
- Perfect for beginners: The step-by-step directions make this accessible, even if it’s your first time working with a cast iron skillet or making crisp topping.
- Impressive presentation: Serving this golden, bubbling apple crisp straight from the skillet adds rustic charm and an irresistible “just out of the oven” appeal.
- Customizable: Easily add nuts, swap apples, or tweak spices to make it your own signature dessert delight.
Why This Cast Iron Skillet Apple Crisp Recipe Works
This recipe shines because of a few clever tricks and time-tested techniques. First, warming the skillet and cooking the apples briefly before baking softens them just enough to achieve that melt-in-your-mouth tenderness while keeping their shape intact. Then, the topping – a beautiful blend of oats, flour, butter, and brown sugar – bakes to a crunchy, golden crust that contrasts perfectly with the juicy filling. Using cold butter for the topping ensures those delicious buttery lumps that create texture and richness. Finally, baking it all in a cast iron skillet allows for even heat distribution, helping to caramelize edges and bubble temptingly.
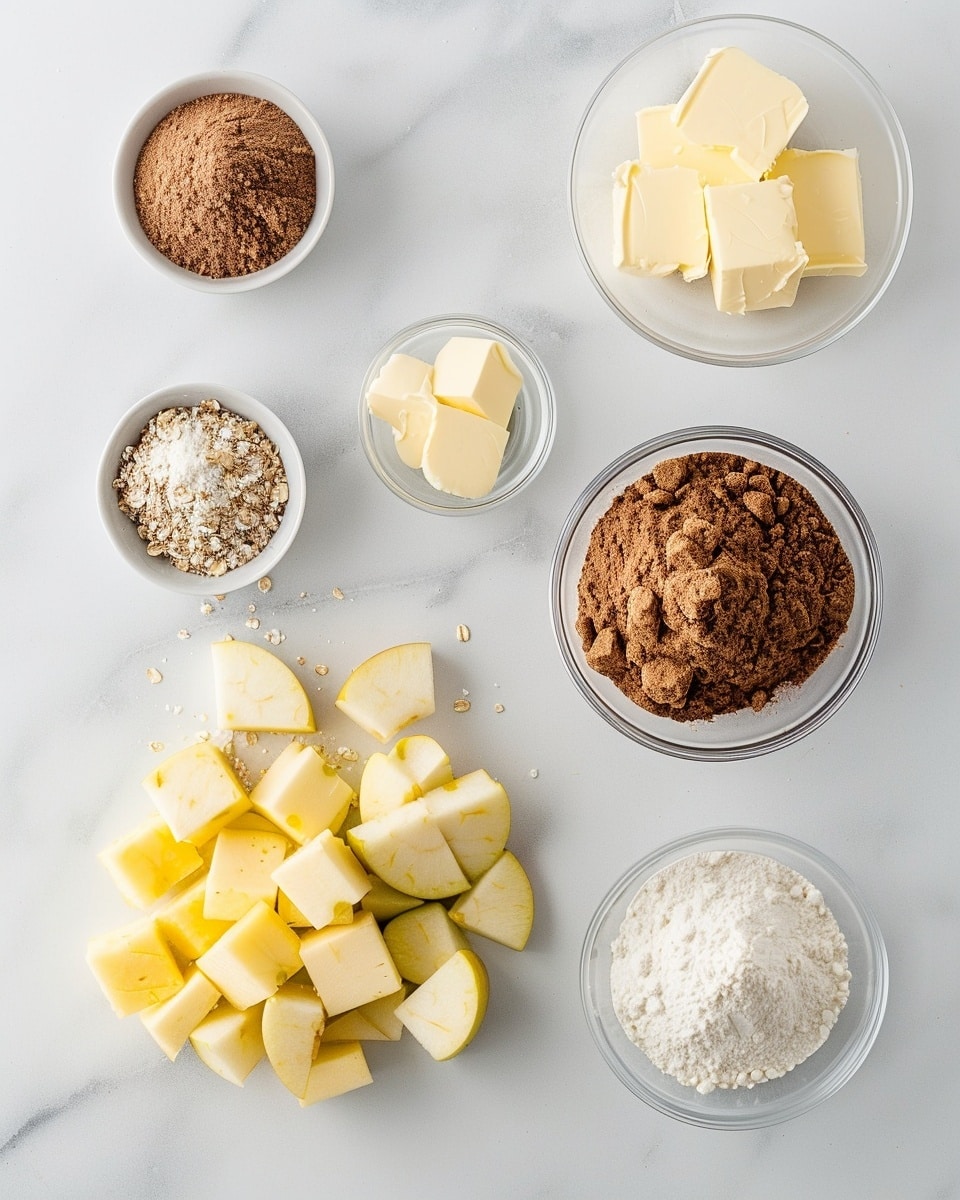
Ingredients You’ll Need
Gathering these straightforward but essential ingredients is your first step toward a memorable dessert that feels both homey and special.
- Apples: Six medium apples, peeled, cored, and chopped small to create the sweet and tender base.
- Unsalted butter: Used twice – melted for the filling and cold for the topping to add rich flavor and texture.
- Brown sugar: Adds warmth and caramel notes, balancing tartness in the apple filling and crisp topping.
- Ground cinnamon: Gives that classic spiced aroma and flavor that brings apple desserts to life.
- Diamond Crystal kosher salt: Just a pinch to enhance and balance all the sweetness.
- Old fashioned oats: Create that golden, hearty, crunchy topping everyone loves.
- All-purpose flour: Binds the topping ingredients for structure and crispness.
Ingredient Substitutions & Tips
- Apples: Granny Smith, Honeycrisp, or Fuji work beautifully — pick your favorite blend to tailor sweetness and tartness.
- Unsalted butter: You can use salted butter but reduce added salt slightly.
- Brown sugar: Swap with coconut sugar or maple sugar for a different caramel undertone.
- Old fashioned oats: Quick oats can be used but expect a less chewy topping texture.
👨🍳 Pro Tips for Perfect Results
- Tip 1: Use a sharp knife or apple peeler to prep apples quickly and evenly—uniform pieces cook more consistently.
- Tip 2: Don’t skip preheating the skillet; it helps jumpstart the browning and adds deep caramel notes.
- Tip 3: Keep the butter for the topping cold to create the perfect crumbly texture with little pockets of richness.
- Tip 4: Stir the apples only a few times while cooking in the skillet to avoid turning the filling mushy.
- Tip 5: Let the crisp cool before serving so the juices thicken and flavors deepen.
How to Make Cast Iron Skillet Apple Crisp Recipe
Step 1: Prepping the Apples
Begin by peeling, coring, and cutting six medium apples into small, bite-sized pieces. The smaller chunks ensure they cook evenly and absorb all that buttery cinnamon sweetness. Dump the chopped apples into a large mixing bowl and set aside.
💡 Pro Tip: Toss apple slices in lemon juice if you want to prevent browning before you start the filling.
Step 2: Making the Filling
Heat a 10-inch cast iron skillet over medium-low heat and melt 3 tablespoons of unsalted butter. Whisk in 1/3 cup brown sugar, 2 teaspoons ground cinnamon, and a pinch of kosher salt until combined and fragrant. Pour this luscious buttery mixture over your apples in the bowl and toss thoroughly so every piece is coated in that cinnamon-sugar goodness.
💡 Pro Tip: The smell at this stage should be heavenly—don’t rush, let those spices bloom a little.
Step 3: Cooking Apples in the Skillet
Transfer the apple mixture back into the skillet and turn heat to medium. Stir every couple of minutes for about 5 minutes until the apples begin to soften but still hold their shape. Remove the skillet from the heat, keeping the apples warm and ready for their crunchy topping.
💡 Pro Tip: Stir gently to maintain some apple pieces intact for a satisfying texture.
Step 4: Making the Topping
In a separate medium bowl, combine 1¼ cups old fashioned oats, 2 tablespoons all-purpose flour, 1/3 cup brown sugar, 1/8 teaspoon salt, and 5 tablespoons cold unsalted butter cut into pieces. Use your hands or a pastry cutter to mix until your topping resembles coarse crumbs with some buttery lumps still visible. This balance is key to that famous golden crunch.
💡 Pro Tip: Keep your butter cold by chilling the bowl and tools beforehand for an even more crumble-perfect topping.
Step 5: Assembling and Baking
Spread the topping evenly over the softened apples, then sprinkle a light dusting of cinnamon on top for a final fragrant touch. Place your skillet into a preheated oven at 350°F and bake for 35-40 minutes until the apples are tender, bubbling around the edges, and the topping is a gorgeous deep golden brown.
💡 Pro Tip: Rotate the skillet halfway through baking if your oven runs hot for even browning.
Step 6: Cooling and Serving
Once baked, remove the skillet from the oven and allow it to rest at room temperature for about 30 minutes. This wait helps the juices thicken up beautifully so every spoonful holds together just right. Then dive in with a big scoop of vanilla ice cream to send this treat into masterpiece territory.
💡 Pro Tip: Resist the urge to dig in hot—it’s delicious but even better after resting.
Common Mistakes to Avoid
Learn from these common pitfalls:
- Overcooking the apples: They’ll turn mushy instead of tender-crisp if cooked too long.
- Using wet apples: Do not rinse apples after peeling as excess moisture can water down the filling.
- Skipping cold butter for the topping: Warm butter leads to a greasy, dense crust instead of a crumbly topping.
- Ignoring the rest time before serving: Cutting in too soon makes the filling runny and messy.
- Using wrong types of oats: Instant oats won’t give you that glorious chewy texture.
- Uneven apple pieces: Large chunks take longer to cook and lead to inconsistent texture.
Delicious Variations to Try
Once you’ve mastered the classic version of this Cast Iron Skillet Apple Crisp Recipe, why not shake things up with these fun twists?
Walnut Crunch
Add ½ cup chopped walnuts or pecans to the topping for extra crunch and a toasty depth of flavor that pairs wonderfully with cinnamon-spiced apples.
Maple Pecan
Replace brown sugar in the topping with pure maple syrup and mix pecans into the oats for a rich, nutty maple-infused crisp.
Mixed Berry Apple Crisp
Stir in 1 cup fresh or frozen berries like blueberries or raspberries with the apples for a bright, juicy twist on the classic.
Spiced Apple Crisp
Add a pinch of nutmeg, cloves, or ginger along with cinnamon to intensify the warm spice profile reminiscent of holiday flavors.
Caramel Drizzle
Once baked and slightly cooled, drizzle warm caramel sauce over the crisp before serving for a decadent finishing touch.
How to Serve Cast Iron Skillet Apple Crisp Recipe
Garnishes
A scoop of vanilla ice cream melting over the warm crisp is heavenly. Alternatively, a dollop of whipped cream, a sprinkle of chopped toasted nuts, or a dash of powdered sugar adds lovely finishing touches.
Side Dishes
Serve alongside rich hot coffee, spiced chai tea, or a glass of chilled dessert wine. For a cozy meal, pair with pork chops or roasted chicken.
Creative Ways to Present
Bring the entire skillet to the table for a rustic, festive centerpiece. Garnish the edges with fresh apple slices or cinnamon sticks. Or portion into small ramekins for elegant single servings perfect for intimate dinners.
Make Ahead and Storage
Storing Leftovers
Cover the skillet or transfer leftover apple crisp to an airtight container and refrigerate for up to 3 days. The flavors deepen over time, making it even more delicious the next day.
Freezing
For longer storage, freeze the crisp in a freezer-safe dish for up to 2 months. Thaw overnight in the fridge before reheating.
Reheating
Warm leftovers in a 350°F oven for 15-20 minutes until heated through and the topping is crisp again. Avoid the microwave if possible, as it can make the topping soggy.
FAQs
Can I use a different type of skillet?
While a cast iron skillet gives even heat and beautiful caramelization, you can use a ceramic or oven-safe pan, but cooking times might vary slightly.
What type of apples are best for this recipe?
Granny Smith, Honeycrisp, Fuji, or a mix work wonderfully, balancing tartness with sweetness and holding their shape through baking.
Can I make the topping gluten-free?
Yes! Substitute all-purpose flour with a gluten-free flour blend, and ensure oats are certified gluten-free.
How do I avoid a soggy bottom?
Cooking the apples briefly in the skillet and allowing the mixture to rest before serving helps juices thicken and prevents sogginess.
Can I prepare this dessert ahead of time?
Absolutely! Assemble and refrigerate uncovered, then bake fresh when ready, adding an extra 5-10 minutes to baking time.
Is this recipe suitable for vegan diets?
You can veganize it by swapping butter with coconut oil or a vegan butter substitute, though flavor and texture will slightly differ.
What’s the best way to slice apples quickly?
A sharp paring knife or apple corer/slicer speeds up prepping, making the process faster and safer.
Can I add other spices to the filling?
Definitely! Nutmeg, ginger, or allspice complement cinnamon beautifully and can be added to taste.
Final Thoughts
This Cast Iron Skillet Apple Crisp Recipe captures everything wonderful about homemade desserts: warmth, comfort, simplicity, and irresistible flavor. It’s a crowd-pleaser that’s just as special enjoyed with family on a Sunday afternoon as it is served at holiday celebrations. The best part? It’s so easy to make, you can whip it up whenever the craving for something sweet and cozy hits.
Have you tried this Cast Iron Skillet Apple Crisp Recipe? I’d love to hear how it turned out! Leave a comment below. If you loved this recipe, please share it with friends and family. Happy cooking! 🍎🍂
PrintCast Iron Skillet Apple Crisp Recipe

This Cast Iron Skillet Apple Crisp is a comforting dessert featuring tender, cinnamon-coated apples baked under a crunchy oat and brown sugar topping. Cooked partly on the stovetop and finished in the oven, it delivers a perfect balance of warm fruitiness and crispy texture. Ideal for an easy yet impressive homemade treat that serves six.
- Prep Time: 20 minutes
- Cook Time: 40 minutes
- Total Time: 1 hour 20 minutes
- Yield: 6 servings 1x
- Category: Dessert
- Method: Baking
- Cuisine: American
Ingredients
Apple Filling
- 6 medium apples, peeled, cored and cut into small pieces
- 3 tablespoons unsalted butter
- ⅓ cup brown sugar
- 2 teaspoons ground cinnamon
- ⅛ teaspoon Diamond Crystal kosher salt
Topping
- 1 ¼ cups old fashioned oats
- 2 tablespoons all purpose flour
- 5 tablespoons cold unsalted butter, cut into 5 pieces
- ⅓ cup brown sugar
- ⅛ teaspoon Diamond Crystal kosher salt
- Sprinkle of ground cinnamon
Instructions
- Preheat Oven: Preheat the oven to 350°F to prepare for baking the apple crisp toward the end of the cooking process.
- Prepare Apples: Peel, core, and cut the apples into small pieces. Place them in a large mixing bowl and set aside.
- Make the Filling: Heat a 10-inch cast iron skillet over medium low heat and melt the 3 tablespoons of butter. Whisk in the brown sugar, ground cinnamon, and kosher salt until combined.
- Toss Apples: Pour the butter and spice mixture over the cut apples in the bowl and toss until all pieces are well coated with the flavorful filling.
- Cook Apples on Stovetop: Transfer the apple mixture back into the skillet and increase heat to medium. Stir occasionally and cook for 5 minutes until the apples begin to soften. Remove the skillet from heat but keep the apple mixture inside.
- Prepare the Topping: In a medium mixing bowl, combine old fashioned oats, all purpose flour, brown sugar, kosher salt, and cold butter pieces (except cinnamon). Use your hands or a pastry cutter to mix until the mixture has small lumps of butter throughout but clumps together slightly.
- Assemble and Bake: Evenly spread the oat topping over the apples in the skillet. Sprinkle ground cinnamon over the top. Place the skillet in the preheated oven.
- Bake the Crisp: Bake for 35-40 minutes until the apples are tender and slightly bubbling, and the topping is golden brown and crunchy.
- Cool and Serve: Remove skillet from oven and allow the apple crisp to rest at room temperature for about 30 minutes before serving to let the flavors meld and the topping set.
Notes
- Using a cast iron skillet helps achieve an evenly cooked filling with a crispy base and edges.
- Old fashioned oats create a hearty, chewy texture in the topping, but you can substitute quick oats if needed.
- Letting the crisp cool before serving prevents burns and improves flavor development.
- The recipe can be doubled for larger servings, but use a larger skillet or baking dish accordingly.
- For added depth, consider sprinkling chopped nuts like walnuts or pecans into the topping.
- To enhance sweetness, serve with ice cream or whipped cream.
Keywords: apple crisp, cast iron skillet dessert, baked apple dessert, oat topping apple crisp, easy apple dessert