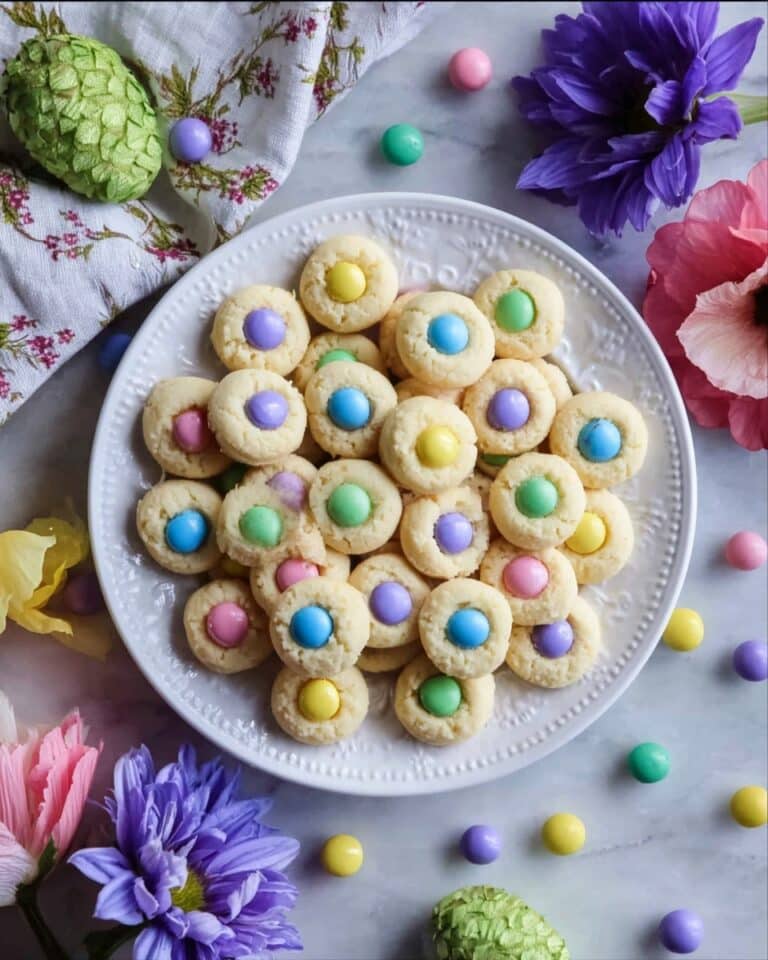
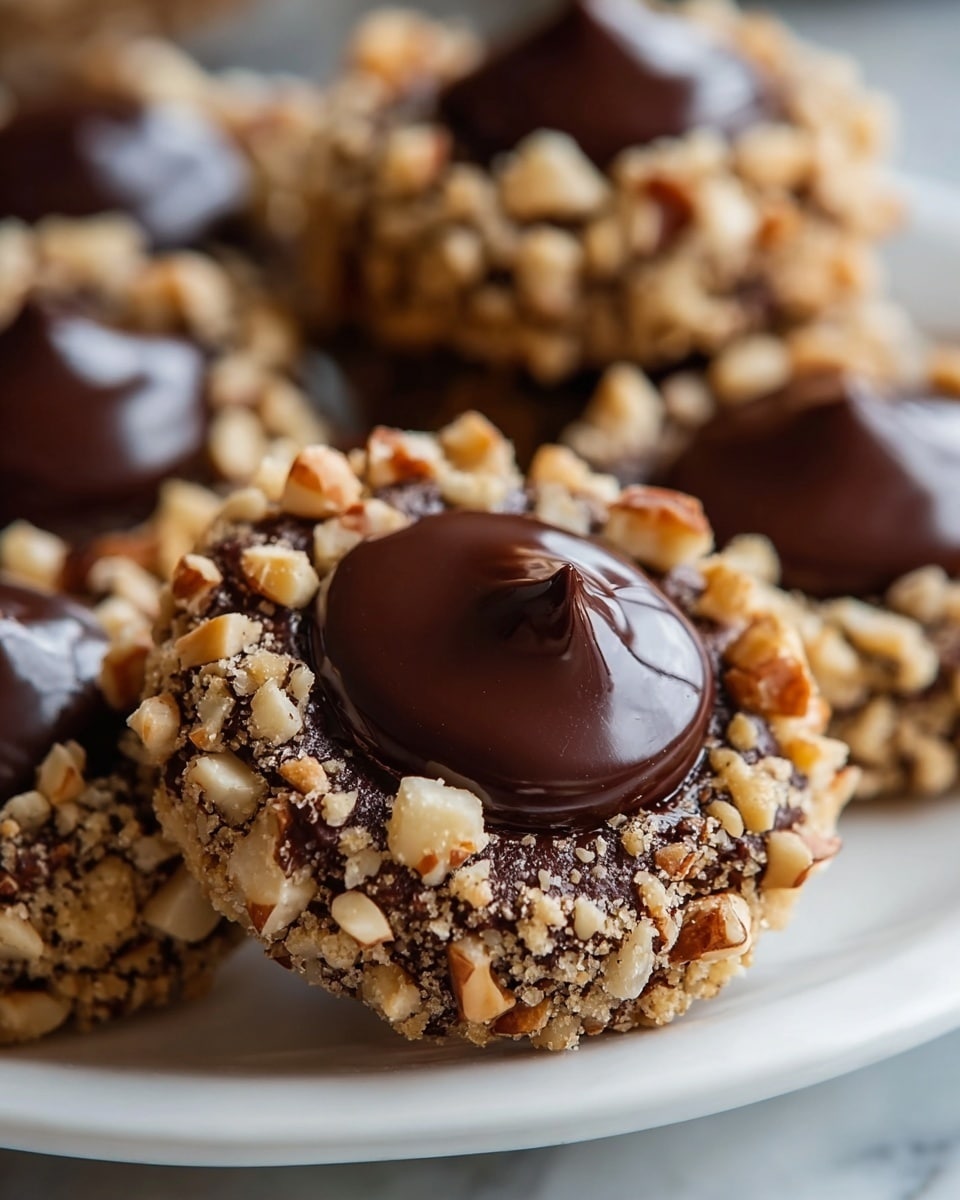
Chocolate Hazelnut Thumbprint Cookies Recipe
Picture this: the cozy aroma of rich cocoa and toasted hazelnuts fills your kitchen as warm, buttery cookies come out of the oven. Your fingers reach for one, delighting in the satisfying crunch of chopped hazelnuts outside, then melting into the creamy, luscious chocolate hazelnut center. This Chocolate Hazelnut Thumbprint Cookies Recipe is not just a treat, it’s a little celebration in every bite—quick to whip up, incredibly impressive, and perfect for sharing (or sneaking!). Trust me, once you make these, they’ll become your new go-to for any occasion.
Why You’ll Love This Chocolate Hazelnut Thumbprint Cookies Recipe
- Quick and easy to prepare: Ready in just over an hour, these cookies come together effortlessly, perfect for last-minute cravings or gifting.
- Simple, wholesome ingredients: No complicated pantry raids here—just classic staples and that indulgent hazelnut twist.
- Great for bakers of all levels: Whether this is your first cookie batch or your hundredth, the step-by-step process will have you feeling like a pro.
- Elegant presentation: The glossy, nut-studded dough and gooey chocolate centers make every cookie look like a miniature masterpiece.
- Customizable to suit your palate: Swap hazelnuts for almonds, try different chocolate spreads, or experiment with toppings—it’s your canvas!
Why This Chocolate Hazelnut Thumbprint Cookies Recipe Works
What makes this Chocolate Hazelnut Thumbprint Cookies Recipe stand out is the harmony of textures and flavors. The key is creaming the butter and sugar until fluffy, which creates that tender, melt-in-your-mouth crumb. Incorporating cocoa powder into the dry mix adds deep chocolate richness without overpowering the sweetness. Rolling the dough balls in chopped hazelnuts brings a delightful crunch and nutty aroma that complements the silky hazelnut spread dolloped in the center. Finally, gently pressing the indentation after baking ensures a perfect well that holds the creamy filling while keeping the cookies intact.
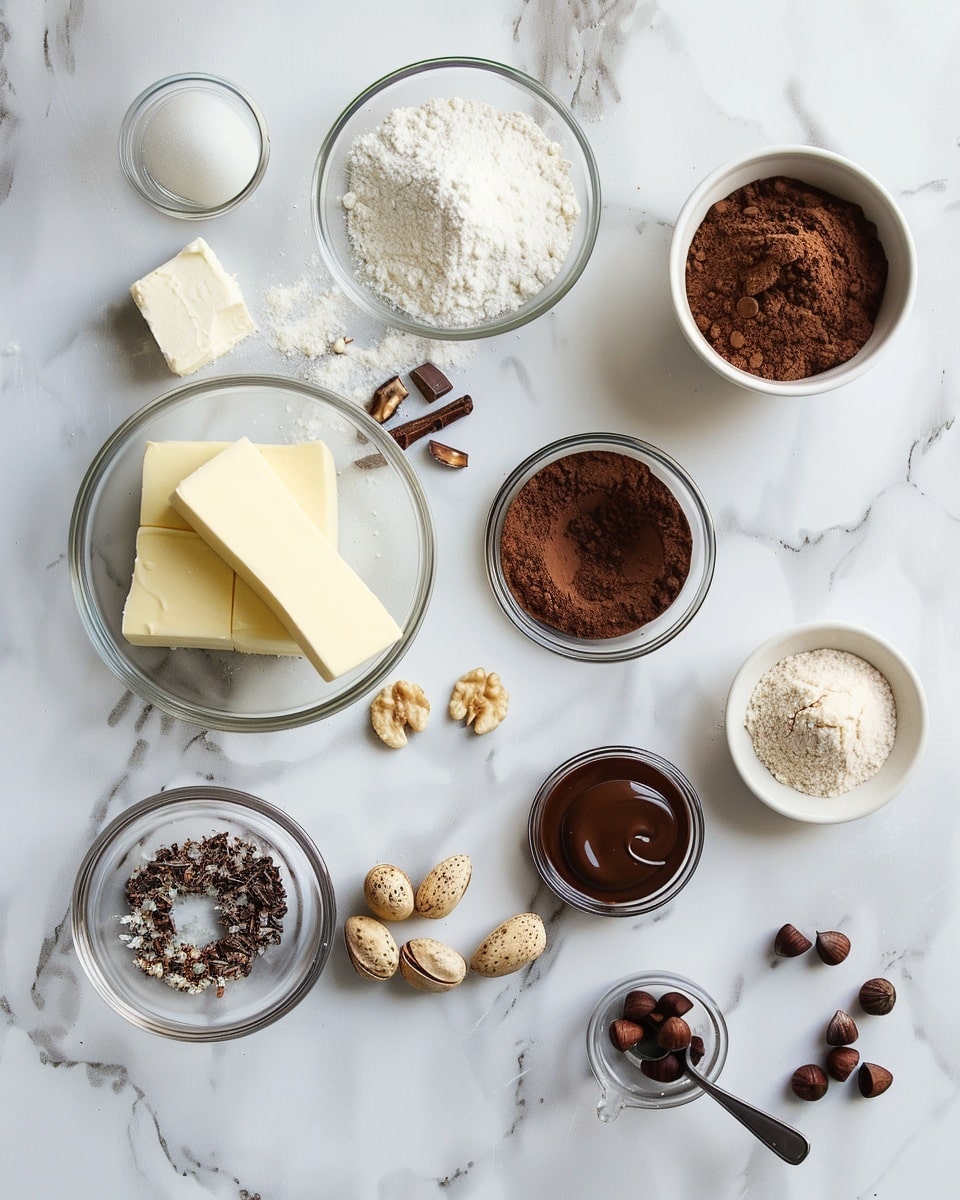
Ingredients You’ll Need
This recipe calls for straightforward ingredients that come together beautifully for a luscious, nutty dessert you’ll crave repeatedly.
- Unsalted butter: Provides that rich, buttery base and tender texture.
- Granulated sugar: Balances the bitterness of cocoa with sweet warmth.
- Vanilla extract: Lifts the flavor with its fragrant, floral notes.
- All-purpose flour: Forms the sturdy backbone of the cookie dough.
- Cocoa powder: Adds intense chocolate flavor without heaviness.
- Salt: Enhances all the sweet and nutty flavors perfectly.
- Chopped hazelnuts: For rolling, they bring irresistible crunch and aroma.
- Chocolate hazelnut spread (e.g., Nutella): The luscious filling that takes these cookies over the top.
- Whole hazelnuts (optional): For topping, adding extra crunch and charm.
Ingredient Substitutions & Tips
- Unsalted butter: You can swap for salted butter but reduce added salt to avoid oversalting.
- Granulated sugar: Light brown sugar works wonderfully for a deeper caramel flavor.
- All-purpose flour: For a gluten-free twist, try a 1-to-1 gluten-free baking blend.
- Chocolate hazelnut spread: Substitute with almond butter or peanut butter for a different nutty surprise.
👨🍳 Pro Tips for Perfect Results
- Use room temperature butter: It creams better with sugar, creating a lighter dough.
- Don’t overmix once flour is added: Mix just until combined to avoid tough cookies.
- Chill the dough if too soft: Firm dough rolls easier and holds shape better.
- Press the indentations gently: Too deep will flatten the cookies during baking.
- Fill thumbprints while cookies are still warm: This makes spreading the chocolate hazelnut spread easier and more manageable.
How to Make Chocolate Hazelnut Thumbprint Cookies Recipe
Step 1: Preheat and Prepare
Begin by preheating your oven to 350°F (175°C). Line two baking sheets with parchment paper to ensure easy cookie release and effortless cleanup.
💡 Pro Tip: Make sure your parchment sheets fit snugly to prevent curling edges when baking.
Step 2: Cream Butter and Sugar
In a large bowl, beat the softened unsalted butter with granulated sugar until the mixture is pale and fluffy. This aeration step is crucial to a tender texture. Stir in the vanilla extract to infuse floral sweetness.
💡 Pro Tip: Scrape down the bowl sides to keep the mixture uniform and well combined.
Step 3: Combine Dry Ingredients
Whisk together the all-purpose flour, cocoa powder, and salt in a separate bowl. This step ensures the cocoa is evenly distributed and prevents clumping in your dough.
💡 Pro Tip: Sift your cocoa powder if it tends to clump for a smooth, even dough.
Step 4: Mix Dry Into Butter Mixture
Gradually add the dry mixture to the creamed butter and sugar, mixing on low speed until just combined. The dough should be firm, pliable, and hold together well without being sticky.
💡 Pro Tip: Avoid overworking the dough to keep cookies tender rather than chewy.
Step 5: Shape and Roll in Hazelnuts
Roll the dough into 1-inch balls, then gently coat each ball in the finely chopped hazelnuts. Arrange them spaced about 2 inches apart on your lined baking sheets to allow room for spreading.
💡 Pro Tip: Press the chopped hazelnuts lightly into the dough balls so they stick throughout baking.
Step 6: Create Thumbprint Indentations
Use your thumb or the back of a small spoon to press a neat indentation in the center of each dough ball. Not too deep—just enough to cradle the filling later.
💡 Pro Tip: Dip your thumb in flour or cool water to prevent sticking if needed.
Step 7: Bake Until Set
Place the baking sheets in the preheated oven and bake for 12 to 14 minutes. The cookies should look set but still soft to the touch—avoid overbaking to keep them tender.
💡 Pro Tip: Rotate the pans halfway through baking for even color and texture.
Step 8: Add Chocolate Hazelnut Filling
Remove cookies from the oven and, while still warm, gently press the indentations again if they’ve puffed up. Spoon about a teaspoon of chocolate hazelnut spread into each well. For a special finishing touch, nestle a whole hazelnut on top.
💡 Pro Tip: Use a small spoon or piping bag for neat filling placement.
Step 9: Cool and Enjoy
Allow the cookies to cool on the sheets for five minutes before transferring to a wire rack to cool completely. This prevents breakage and sets the perfect texture.
💡 Pro Tip: Serve slightly warm for gooey centers or fully cooled for a delightful firm bite.
Common Mistakes to Avoid
Learn from these common pitfalls:
- Using cold butter: Makes creaming difficult and affects cookie texture.
- Overmixing after adding flour: Leads to tough, dense cookies.
- Indentations too deep or shallow: Deep wells flatten cookies; shallow ones can’t hold filling.
- Skipping nuts on the outside: You miss out on critical crunch and flavor contrast.
- Overbaking: Cookies become hard and lose that tender crumb.
- Not pressing the indentations again after baking: Filling won’t sit properly and may spread unevenly.
Delicious Variations to Try
Once you’ve mastered the classic Chocolate Hazelnut Thumbprint Cookies Recipe, why not experiment with these inspired twists?
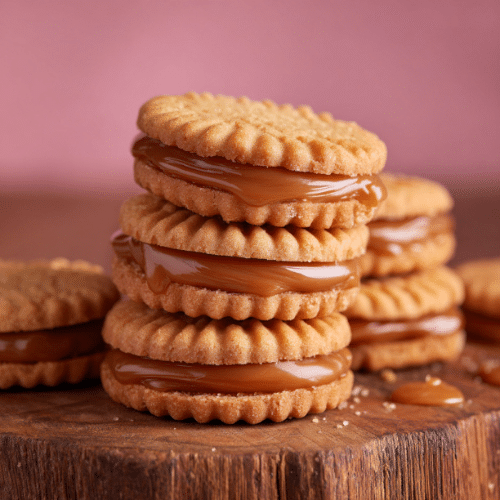
Salted Caramel Thumbprints
Swap the chocolate hazelnut spread for caramel sauce and sprinkle flaky sea salt on top for a sweet, salty, buttery delight.
Raspberry Jam Centers
Fill the thumbprints with vibrant raspberry jam instead of Nutella for a fruity pop that pairs wonderfully with the chocolate dough.
White Chocolate and Pistachio
Use white chocolate spread and roll the dough balls in finely chopped pistachios for a colorful, nutty variation.
Mocha Madness
Add a teaspoon of instant espresso powder to the dry ingredients to deepen the chocolate flavor with a subtle coffee kick.
Almond Butter Delight
Replace the hazelnut spread with creamy almond butter and top with sliced almonds for a wholesome, nutty alternative.
How to Serve Chocolate Hazelnut Thumbprint Cookies Recipe
Garnishes
Sprinkle with powdered sugar or drizzle melted dark chocolate over the cooled cookies. Fresh mint leaves or edible gold flakes also add an elegant touch.
Side Dishes
Serve alongside a steaming cup of espresso or a frothy cappuccino. They also pair beautifully with a cold glass of milk or a rich hot chocolate for extra indulgence.
Creative Ways to Present
Arrange these cookies on tiered dessert stands for festive occasions. Use decorative tins or mason jars for gift-giving. Stack small towers tied with ribbon for charming party favors.
Make Ahead and Storage
Storing Leftovers
Keep the cookies in an airtight container at room temperature for up to 5 days. Store them between layers of parchment to prevent sticking.
Freezing
You can freeze the baked cookies (without filling) in a single layer on a baking sheet, then transfer to a freezer-safe bag for up to 3 months. Thaw at room temperature before adding the chocolate hazelnut spread.
Reheating
Warm frozen or refrigerated cookies in a 300°F (150°C) oven for 5-7 minutes to refresh their fresh-baked aroma and texture. Refill with chocolate spread if needed.
FAQs
Can I use roasted hazelnuts instead of raw?
Absolutely! Roasted hazelnuts add an even richer, nuttier flavor. Just chop them finely and use them as instructed.
Is it necessary to roll the dough balls in hazelnuts?
While not mandatory, it’s highly recommended as it adds texture, flavor, and visual appeal that complement the creamy filling.
Can I make these cookies dairy-free?
Yes! Use dairy-free butter alternatives and a suitable chocolate-hazelnut spread to keep the flavor while accommodating dietary needs.
How do I prevent the cookies from spreading too much?
Make sure your butter is not melted and chill the dough slightly if it’s very soft to help maintain shape during baking.
Can I substitute hazelnuts with other nuts?
Certainly! Almonds, pecans, or pistachios work well; just chop them finely and roll the dough balls as usual.
What’s the best way to store filled cookies?
Store filled cookies in an airtight container at room temperature for up to 3 days to keep the filling fresh and delicious.
Can I use other chocolate spreads?
Definitely! Whether it’s classic Nutella, peanut butter chocolate, or specialty hazelnut spreads, feel free to experiment with your favorites.
How do I know when the cookies are perfectly baked?
Look for set edges, a slightly soft center, and no glossy raw dough appearance. The cookies will firm up as they cool but should not be hard out of the oven.
Final Thoughts
These Chocolate Hazelnut Thumbprint Cookies are pure joy wrapped in a crumbly, nutty shell with a molten center of chocolate-hazelnut dreaminess. It’s one of those recipes that brings warmth to your kitchen and smiles to your table—plus, it’s so easy to make that you’ll want to keep a batch ready at all times. A perfect harmony of texture, flavor, and comforting nostalgia awaits you with every bite.
Have you tried this Chocolate Hazelnut Thumbprint Cookies Recipe? I’d love to hear how it turned out! Leave a comment below. If you loved this recipe, please share it with friends and family. Happy cooking! 🍪❤️
PrintChocolate Hazelnut Thumbprint Cookies Recipe

These amazing Chocolate Hazelnut Thumbprint Cookies are soft, rich cocoa cookies rolled in chopped hazelnuts and filled with a luscious chocolate hazelnut spread. Perfectly bite-sized and irresistibly nutty, they offer a delightful balance of textures and flavors, ideal for sharing or satisfying your chocolate cravings.
- Prep Time: 25 minutes
- Cook Time: 14 minutes
- Total Time: 1 hour 10 minutes
- Yield: 20 servings 1x
- Category: Dessert/Cookies
- Method: Baking
- Cuisine: American
Ingredients
Cookie Dough
- 1 cup (2 sticks) unsalted butter, softened
- 2/3 cup granulated sugar
- 2 teaspoons vanilla extract
- 2 cups all-purpose flour
- 1/2 cup cocoa powder
- 1/2 teaspoon salt
Coating and Filling
- 1/2 cup hazelnuts, finely chopped (for rolling)
- 1/2 cup chocolate hazelnut spread (such as Nutella)
- Extra whole hazelnuts for garnish (optional)
Instructions
- Preheat the Oven and Prepare Baking Sheets: Preheat your oven to 350°F (175°C). Line two baking sheets with parchment paper to prevent sticking and ensure even baking.
- Cream the Butter and Sugar: In a large mixing bowl, use an electric mixer to cream together the softened butter and granulated sugar until the mixture is light and fluffy, then mix in the vanilla extract for added flavor.
- Combine the Dry Ingredients: In a separate bowl, whisk together the all-purpose flour, cocoa powder, and salt to ensure even distribution of ingredients.
- Mix Dry Ingredients into Butter Mixture: Gradually add the dry ingredients to the butter mixture, mixing until well combined and forming a firm, pliable dough suitable for shaping.
- Shape the Cookies: Roll the dough into balls about 1 inch in diameter. Roll each ball thoroughly in the finely chopped hazelnuts until fully coated. Place the hazelnut-coated dough balls on the prepared baking sheets, spacing them about 2 inches apart to allow for spreading during baking.
- Create Indentations: Using your thumb or the back of a small spoon, gently press an indentation into the center of each cookie ball to create space for the filling after baking.
- Bake the Cookies: Bake in the preheated oven for 12-14 minutes. The cookies should be set but still soft to the touch, with slightly firm edges.
- Add Chocolate Filling: Once removed from the oven and while still warm, press the indentations again if they have puffed up during baking. Spoon about a teaspoon of chocolate hazelnut spread into each indentation. Optionally, press a whole hazelnut into the spread to add texture and decoration.
- Cool and Serve: Let the cookies cool on the baking sheets for 5 minutes, then transfer them to a wire rack to cool completely before serving or storing.
Notes
- Make sure the butter is softened but not melted for proper creaming.
- Finely chopping the hazelnuts helps the coating stick better and adds crunch.
- If the dough feels too sticky, chill it in the refrigerator for 15 minutes before shaping.
- Store cookies in an airtight container at room temperature for up to 5 days.
- For a gluten-free version, substitute the all-purpose flour with a gluten-free baking mix.
- Optionally garnish with a whole hazelnut in the center for presentation.
Keywords: Chocolate Hazelnut Thumbprint Cookies, Cocoa Cookies, Nutty Cookies, Chocolate Hazelnut Spread, Nutella Cookies, Baked Cookies, Holiday Cookies