Nutter Butter Bars Recipe
Picture this: the irresistible scent of roasted peanuts mingling with sweet vanilla wafting through your kitchen, teasing your senses while golden edges crisp in the oven. As you unwrap each velvety, gooey bite of these bars, your taste buds dive into a perfect harmony of crunchy cookies, melted peanut butter, and buttery sweetness. This Nutter Butter Bars Recipe is not just a treat; it’s like a warm hug from your favorite childhood memory, wrapped in a dessert you can whip up in under an hour. Whether you’re craving a quick snack or an impressive party hit, these bars deliver bliss every time.
Why You’ll Love This Nutter Butter Bars Recipe
- Ready in 40 minutes: From crumb to slice, these bars come together swiftly, making them perfect for last-minute dessert emergencies or cozy afternoon baking.
- Uses simple ingredients: With pantry staples like peanut butter, sweetened condensed milk, and Nutter Butter cookies, there’s no complicated shopping list to stress over.
- Perfect for beginners: No specialized baking skills required—just straightforward steps that anyone can follow to create a delightful treat.
- Impressive presentation: The layers and colorful Reese’s Pieces topping make these bars visually stunning and irresistibly inviting.
- Customizable: Swap in your favorite nuts, add a drizzle of chocolate, or sprinkle with sea salt for endless personalized twists.
Why This Nutter Butter Bars Recipe Works
This recipe hits all the right notes because of its brilliant use of texture and flavor contrasts. The crushed Nutter Butter cookies create a firm yet tender crust that perfectly supports the creamy peanut butter and condensed milk filling. Melting the peanut butter before mixing ensures a smooth, luscious blend that permeates every bite, while sprinkling peanut butter chips and roasted peanuts on top adds those satisfying pockets of crunch. Baking the bars gently until edges turn golden guarantees that perfect balance between gooey and crisp. It’s a timeless formula that guarantees crowd-pleasing success!
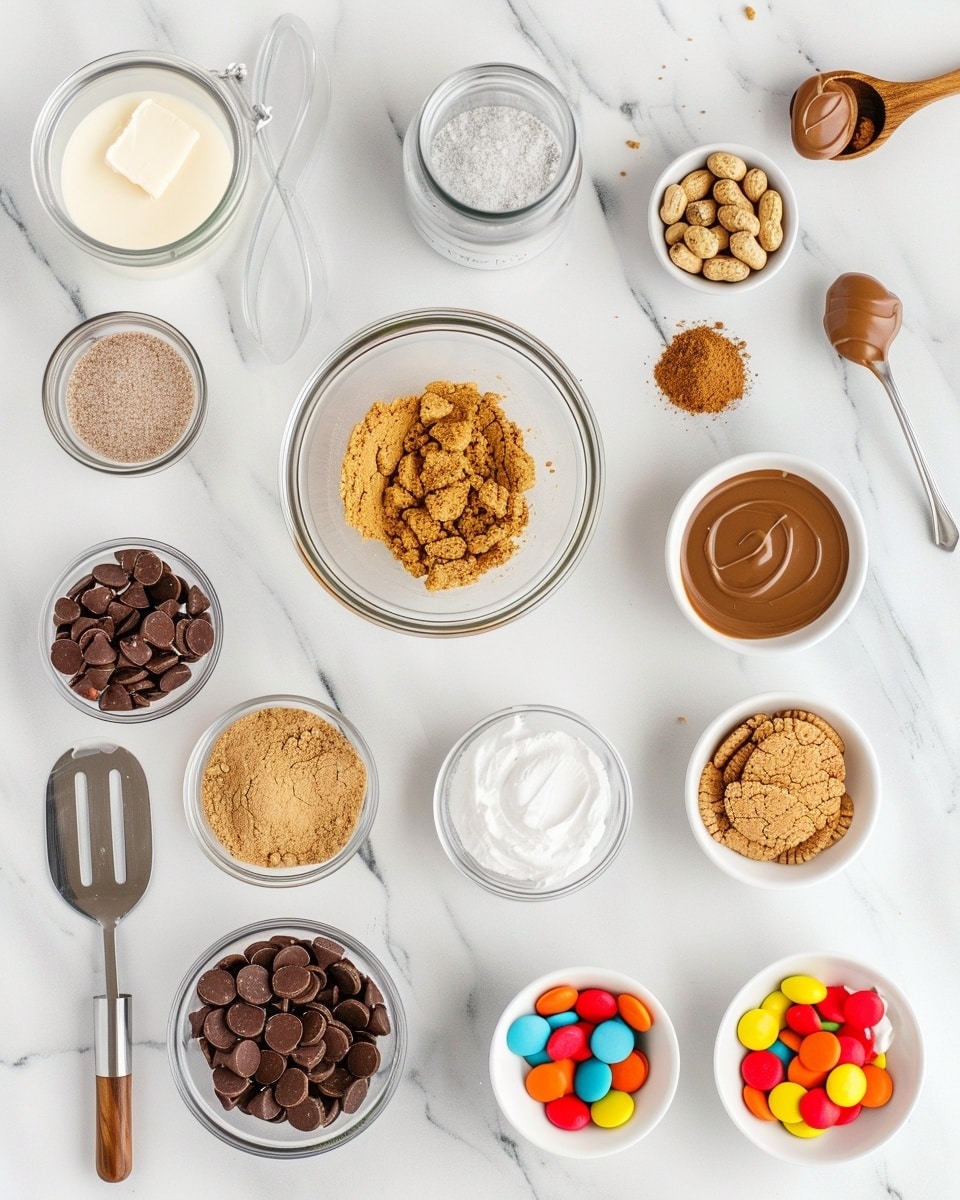
Ingredients You’ll Need
Each ingredient here plays a starring role—simple, accessible, and designed to blend seamlessly for maximum flavor impact.
- Nutter Butter cookies (32 pieces): The star of the show, crushed for a rich, peanut-infused crust.
- Melted butter (1/2 cup): Binds the crust crumbs and adds buttery richness.
- Brown sugar (2 tablespoons): Adds a soft caramel sweetness and enhances the cookie crust’s flavor.
- Salt (1/4 teaspoon): Balances sweetness and elevates all flavors.
- Sweetened condensed milk (14 oz can): Creates a sticky, luscious filling with rich sweetness.
- Creamy peanut butter (1/4 cup + 2 tablespoons): Provides smooth peanut goodness throughout and as a finishing drizzle.
- Peanut butter chips (1 cup): Melted pockets of extra peanut flavor and texture.
- Roasted peanuts (1/2 cup): Offer a satisfying crunch and enhanced nutty depth.
- Chopped Nutter Butter cookies (12 pieces): Adds texture and visual appeal on top.
- Reese’s Pieces candy (3/4 cup): Bursts of color and fruity peanut butter flavor make these bars pop.
- Flaky sea salt (optional): Adds a gourmet finish, heightening the sweet and salty contrast.
Ingredient Substitutions & Tips
- Nutter Butter cookies: Substitute with any peanut butter sandwich cookie or graham crackers for a milder base.
- Peanut butter: Natural peanut butter or almond butter works well; just ensure it’s creamy for smooth mixing.
- Peanut butter chips: You can swap these for white chocolate or butterscotch chips to play with flavor.
- Reese’s Pieces: Consider M&Ms or chopped chocolate candies to switch up texture and color.
👨🍳 Pro Tips for Perfect Results
- Press the crust firmly: Use the bottom of a glass to compact the cookie mixture; this prevents crumbling after baking.
- Don’t overbake: The bars should be slightly soft in the center; they’ll set as they cool, keeping them irresistibly chewy.
- Microwave peanut butter gently: Heat in short bursts to avoid burning or oil separation.
- Chill bars fully before cutting: Refrigeration helps achieve clean, sharp slices that hold their shape.
- Use parchment paper in the pan: It makes lifting the bars out a breeze and keeps your pan clean.
How to Make Nutter Butter Bars Recipe
Step 1: Preheat and Prepare Your Pan
Set your oven to 350 degrees Fahrenheit and line a 9 x 13-inch pan with parchment paper, leaving an overhang on the sides for easy removal later. Getting this step right ensures your bars bake evenly and you can lift them out without a hassle.
💡 Pro Tip: Rinse your pan with cold water after lining it—it helps the parchment paper lay flat.
Step 2: Make the Cookie Crust
Crush 32 Nutter Butter cookies until they become fine crumbs—either blitz in a food processor, use a blender, or place them in a zip-top bag and roll with a pin. In a large bowl, stir together the crumbs, brown sugar, and salt. Pour in the melted butter and mix well until the crumbs are evenly moistened. Press this mixture firmly and evenly into the prepared pan.
💡 Pro Tip: Press the crust tightly using the flat bottom of a measuring cup for a sturdy base that won’t crumble.
Step 3: Prepare the Peanut Butter Filling
Melt 1/4 cup of creamy peanut butter in a medium microwave-safe bowl for about 30 seconds until smooth. Stir in the entire can of sweetened condensed milk thoroughly, creating a silky, sweet peanut mixture ready to spread.
💡 Pro Tip: Stir well after melting to ensure even consistency and prevent lumps.
Step 4: Assemble the Bars
Scatter the peanut butter chips and roasted peanuts evenly over the pressed crust. Pour the peanut butter condensed milk mixture on top, making sure to cover everything. Add the chopped Nutter Butter cookies and Reese’s Pieces candy on the surface, then gently press them into the filling with a spatula or fork to secure.
💡 Pro Tip: Be gentle when pressing toppings in—too much force may cause the filling to ooze out.
Step 5: Bake Until Golden
Pop the pan into the oven and bake for 30 to 35 minutes. Look for golden edges and a slightly puffed center; that’s your signal that magic has happened. Once out, place on a wire rack to cool completely, then pop the bars in the refrigerator to chill thoroughly.
💡 Pro Tip: The bars will firm up as they cool—wait until they’re chilled before slicing.
Step 6: The Finishing Drizzle
Before serving, melt 2 tablespoons of peanut butter and drizzle it over the top of the chilled bars for an extra touch of decadence and visual appeal.
💡 Pro Tip: Use a spoon or a small piping bag for neat, even drizzle lines.
Common Mistakes to Avoid
Learn from these common pitfalls:
- Over-crushing the cookies: Too fine crumbs can make the crust too dense and hard; aim for fine but slightly sandy texture.
- Not pressing crust firmly enough: This causes the base to crumble apart when cutting or serving.
- Microwaving peanut butter too long: Overheating can cause oil separation, impacting texture and flavor.
- Skipping the chill time: Bars that aren’t fully cooled will be too soft and messy to cut.
- Overbaking: Bars will dry out and lose their gooey center if baked too long; watch closely near the end of baking time.
- Adding toppings too late: Place toppings before baking so they meld nicely into the filling instead of just sitting on top.
Delicious Variations to Try
Once you’ve mastered the classic Nutter Butter Bars Recipe, why not shake things up with these fun twists?
Chocolate Lover’s Delight
Mix in 1/2 cup of mini chocolate chips with the filling and sprinkle the top with chopped dark chocolate before baking. Adds an indulgent mocha note that’s pure heaven.
Crunchy Trail Mix
Swap out peanuts for a mix of chopped almonds, cashews, and dried cranberries. The variety of textures and sweet-tart punch makes each bite exciting.
Salted Caramel Swirl
Drizzle softened caramel sauce over the peanut butter mixture before baking and sprinkle flaky sea salt on top. The salty-sweet combo takes these bars to the next level.
Spicy Kick
Fold a pinch of cayenne pepper into the peanut butter mixture to awaken your taste buds with a hint of heat beneath the sweetness.
Mini Nutter Butter Cup Overload
Top the bars with halved mini peanut butter cups instead of Reese’s Pieces for an ultra-decadent treat with bursts of creamy chocolate.
How to Serve Nutter Butter Bars Recipe
Garnishes
Sprinkle flaky sea salt or crushed peanuts on top for a gourmet finish. Add a light dusting of powdered sugar or a drizzle of melted dark chocolate for extra flair.
Side Dishes
Pair these bars with a scoop of vanilla ice cream or a dollop of whipped cream to balance the peanut butter sweetness. A cold glass of milk or rich coffee complements the flavors perfectly.
Creative Ways to Present
Cut bars into small bite-sized squares for parties or arrange them on a decorative platter layered with colorful napkins. Serve chilled with mini forks or cocktail picks to make snacking effortless and elegant.
Make Ahead and Storage
Storing Leftovers
Keep leftover Nutter Butter Bars in an airtight container in the refrigerator. They stay delicious for up to 5 days while maintaining their gooey goodness.
Freezing
Wrap bars tightly in plastic wrap and foil, then freeze for up to 3 months. Thaw overnight in the fridge before serving to retain their perfect texture.
Reheating
For a warm treat, microwave a single slice for 10-15 seconds, or place bars in a preheated oven at 300 degrees Fahrenheit for 5 minutes. This softens the bars without sacrificing structure.
FAQs
Can I use crunchy peanut butter instead of creamy?
Yes! Crunchy peanut butter will add extra texture but may make the filling less smooth. Stir well to incorporate and expect a bit more chewiness.
Are there gluten-free alternatives for this recipe?
You can use gluten-free peanut butter sandwich cookies or substitute with gluten-free graham cracker crumbs to create a gluten-free version.
Can I make this recipe nut-free?
This recipe relies on peanut butter and peanuts for its signature flavor, so nut-free versions may require a different base such as sunflower seed butter and nut-free sandwich cookies.
Why is my crust crumbly?
This usually means the crust wasn’t pressed firmly or didn’t have enough butter. Make sure to compact the crumbs tightly when preparing.
How do I get clean slices?
Chill the bars thoroughly before slicing and use a sharp knife wiped clean between cuts for neat pieces.
Can I use natural peanut butter?
Natural peanut butter works best if stirred well before melting. It may alter texture slightly but offers a fresh peanut taste.
What if I don’t have a food processor?
Crush the cookies in a zip-top bag with a rolling pin or heavy can until fine crumbs form.
Can I double the recipe?
Absolutely! Use two 9 x 13 pans and bake accordingly. Keep an eye on baking time as it might vary slightly.
Final Thoughts
There’s something truly magical about this Nutter Butter Bars Recipe — it’s the kind of dessert that brings smiles, sparks conversations, and fills your kitchen with irresistible aromas. Whether enjoyed warm from the oven or chilled after a day in the fridge, every bite is a celebration of peanut buttery goodness and childhood nostalgia made real. These bars are easy enough for a casual weekday treat but impressive enough to wow guests at your next gathering.
Have you tried this Nutter Butter Bars Recipe? I’d love to hear how it turned out! Leave a comment below. If you loved this recipe, please share it with friends and family. Happy cooking! 🍪🥜
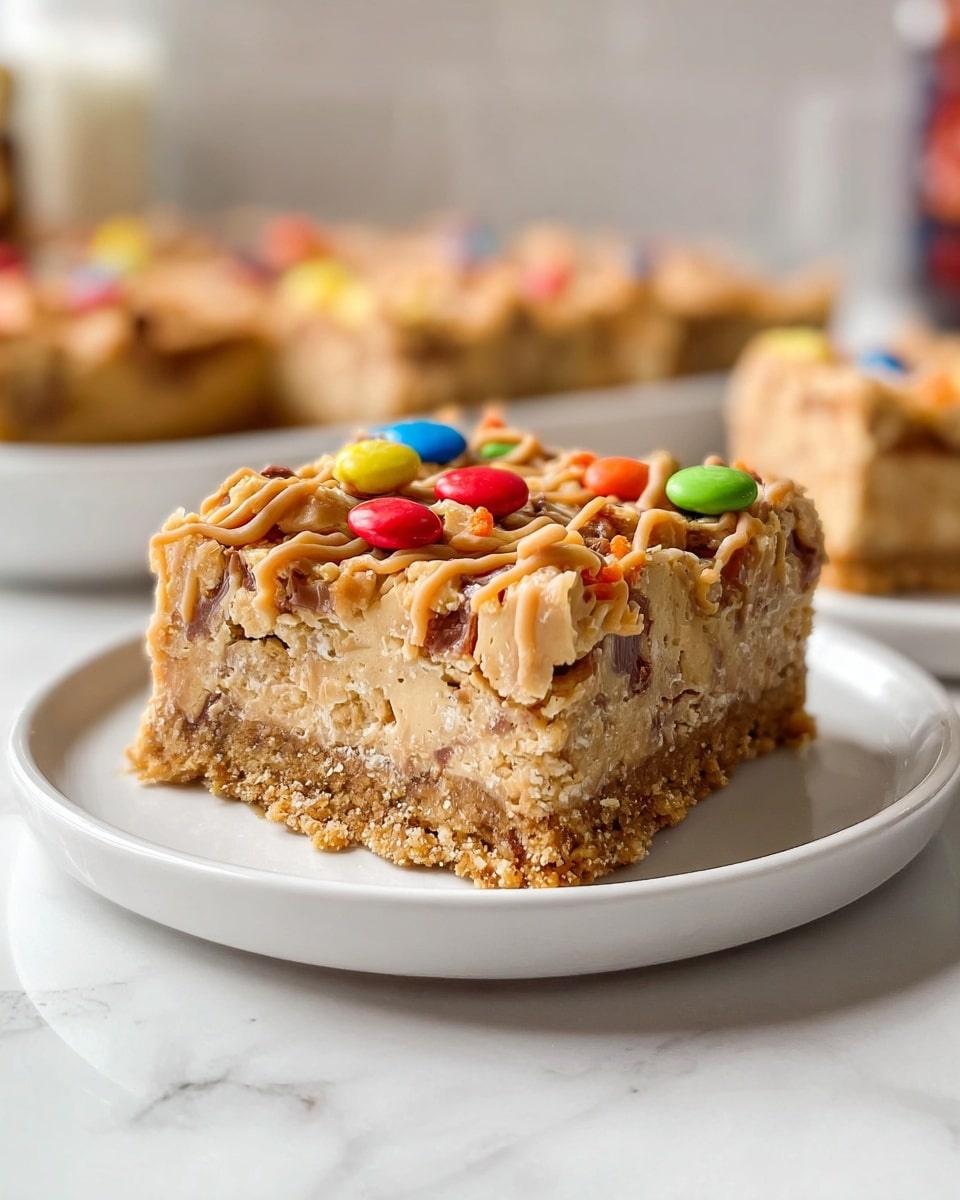
PrintNutter Butter Bars Recipe
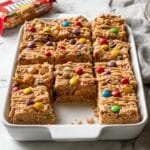
These Nutter Butter Bars combine the classic peanut butter cookie flavor with a rich, creamy filling and crunchy toppings. Featuring a buttery Nutter Butter cookie crust, a sweetened condensed milk and peanut butter filling, and a delightful mix of peanut butter chips, roasted peanuts, chopped cookies, and Reese’s Pieces candy, these bars are baked to golden perfection and finished with a peanut butter drizzle for an irresistible peanut butter lover’s treat.
- Prep Time: 10 minutes
- Cook Time: 35 minutes
- Total Time: 45 minutes
- Yield: 24 servings 1x
- Category: Dessert
- Method: Baking
- Cuisine: American
Ingredients
Crust
- 32 Nutter Butter cookies (approx. 4 cups crumbs)
- 1/2 cup melted butter
- 2 tablespoons brown sugar
- 1/4 teaspoon salt
Filling and Toppings
- 1 can sweetened condensed milk (14 oz.)
- 1/4 cup creamy peanut butter
- 1 cup peanut butter chips
- 1/2 cup roasted peanuts
- 12 Nutter Butter cookies (chopped)
- 3/4 cup Reese’s Pieces candy
- Flaky sea salt, optional
Drizzle
- 2 tablespoons creamy peanut butter
Instructions
- Preheat the oven: Preheat your oven to 350°F (175°C). Line a 9 x 13-inch baking pan with parchment paper to prevent sticking and for easy removal of the bars later.
- Prepare the Nutter Butter crust: Crush 32 Nutter Butter cookies into approximately 4 cups of fine crumbs using a food processor, blender, or by placing them in a zip-top bag and crushing with a rolling pin. In a large bowl, combine the cookie crumbs, brown sugar, and salt. Pour in the melted butter and stir well until all crumbs are evenly coated. Use a glass or flat-bottomed measuring cup to firmly press the crust mixture into the bottom of the prepared pan, creating an even layer.
- Make the peanut butter filling: In a medium microwave-safe bowl, melt 1/4 cup of creamy peanut butter by microwaving for about 30 seconds. Stir until smooth. Add the entire can of sweetened condensed milk to the melted peanut butter and mix thoroughly until fully combined.
- Assemble the bars: Evenly sprinkle the peanut butter chips and roasted peanuts over the crust in the pan. Pour the peanut butter and sweetened condensed milk mixture evenly on top. Next, sprinkle the chopped 12 Nutter Butter cookies and Reese’s Pieces candy over the filling. Using a spatula or fork, gently press the toppings into the peanut butter mixture to help everything stick together. If desired, sprinkle flaky sea salt on top to enhance the flavors.
- Bake the bars: Place the pan in the preheated oven and bake for 30 to 35 minutes, or until the edges are golden brown and the bars are set. When done, remove from the oven and transfer the pan onto a wire rack to cool completely. After cooling, chill the bars in the refrigerator to firm up.
- Serve with peanut butter drizzle: Before serving, melt 2 tablespoons of creamy peanut butter in the microwave until smooth and warm. Drizzle this peanut butter over the chilled bars to add an extra layer of flavor and visual appeal. Cut into 24 servings and enjoy!
Notes
- Ensure the crust is pressed firmly for a sturdy base to hold the filling and toppings.
- Chilling the bars before serving helps them firm up and makes cutting easier.
- You can substitute Reese’s Pieces with other peanut butter candies or chocolate chips if preferred.
- Store bars in an airtight container in the refrigerator for up to 5 days.
- For a nut-free version, omit the roasted peanuts and use allergy-friendly toppings.
Keywords: Nutter Butter bars, peanut butter dessert, peanut butter bars, no-bake cookie crust, sweetened condensed milk dessert, Reese’s Pieces bars