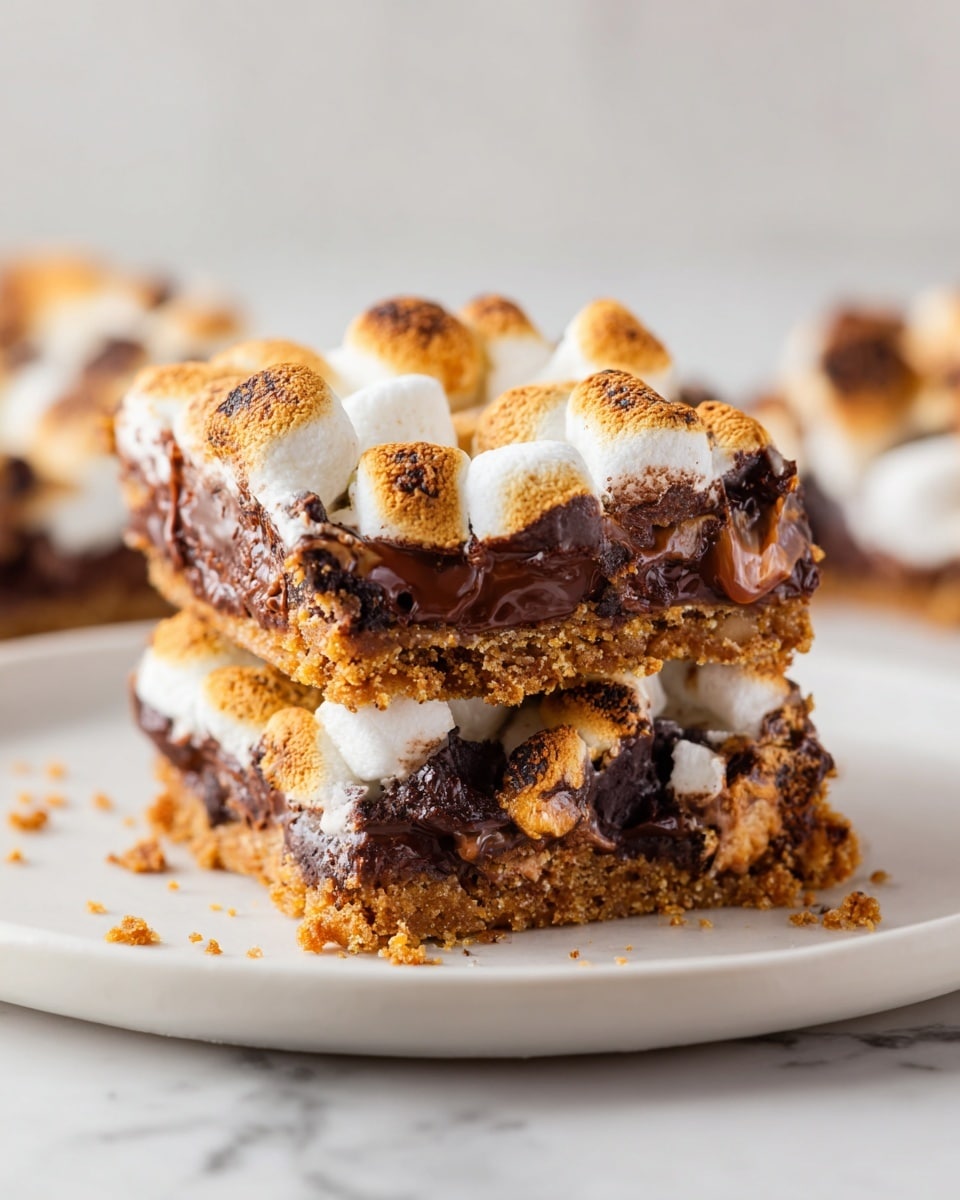
Gluten-Free S’mores Bars Recipe
Picture this: the warm, sweet scent of toasted marshmallows mingling with rich melted chocolate and the comforting crunch of buttery gluten-free graham cracker crust. As you pull these bars out of the oven, their golden surface bubbling with gooey marshmallows and chocolate chips, your heart instantly melts—this is pure dessert magic. Whether you’re craving a nostalgic campfire treat without the campfire or looking to impress guests with a quick, easy, and utterly scrumptious snack, this Gluten-Free S’mores Bars Recipe is about to become your new favorite indulgence.
Why You’ll Love This Gluten-Free S’mores Bars Recipe
- Ready in 25 minutes: Perfect for when you need a fast, show-stopping dessert without hours in the kitchen.
- Simple, wholesome ingredients: Made with pantry staples like gluten-free graham crackers, butter, marshmallows, and chocolate chips.
- Totally foolproof for beginners: No complicated steps—just mix, bake, and enjoy.
- Beautiful presentation: Gooey layers of chocolate and marshmallow with a crunchy crumb topping that dazzles every time.
- Completely customizable: Vegan options, different chocolate varieties, and extra add-ins make this recipe all your own.
Why This Gluten-Free S’mores Bars Recipe Works
The magic of this Gluten-Free S’mores Bars Recipe lies in balancing texture and flavor expertly. First, finely processed gluten-free graham crackers create a crust that’s both crisp and tender, holding the bars together without compromising that classic s’mores crunch. Then, toasting the marshmallows in the oven—or with a kitchen torch—ensures they get golden and gooey without burning, giving you that irresistible caramelized flavor. Lastly, layering the chocolate chips before and after baking locks in velvety melted chocolate, while the crumb topping adds a delightful contrast. These simple yet thoughtful techniques are what deliver irresistible bars every single time.
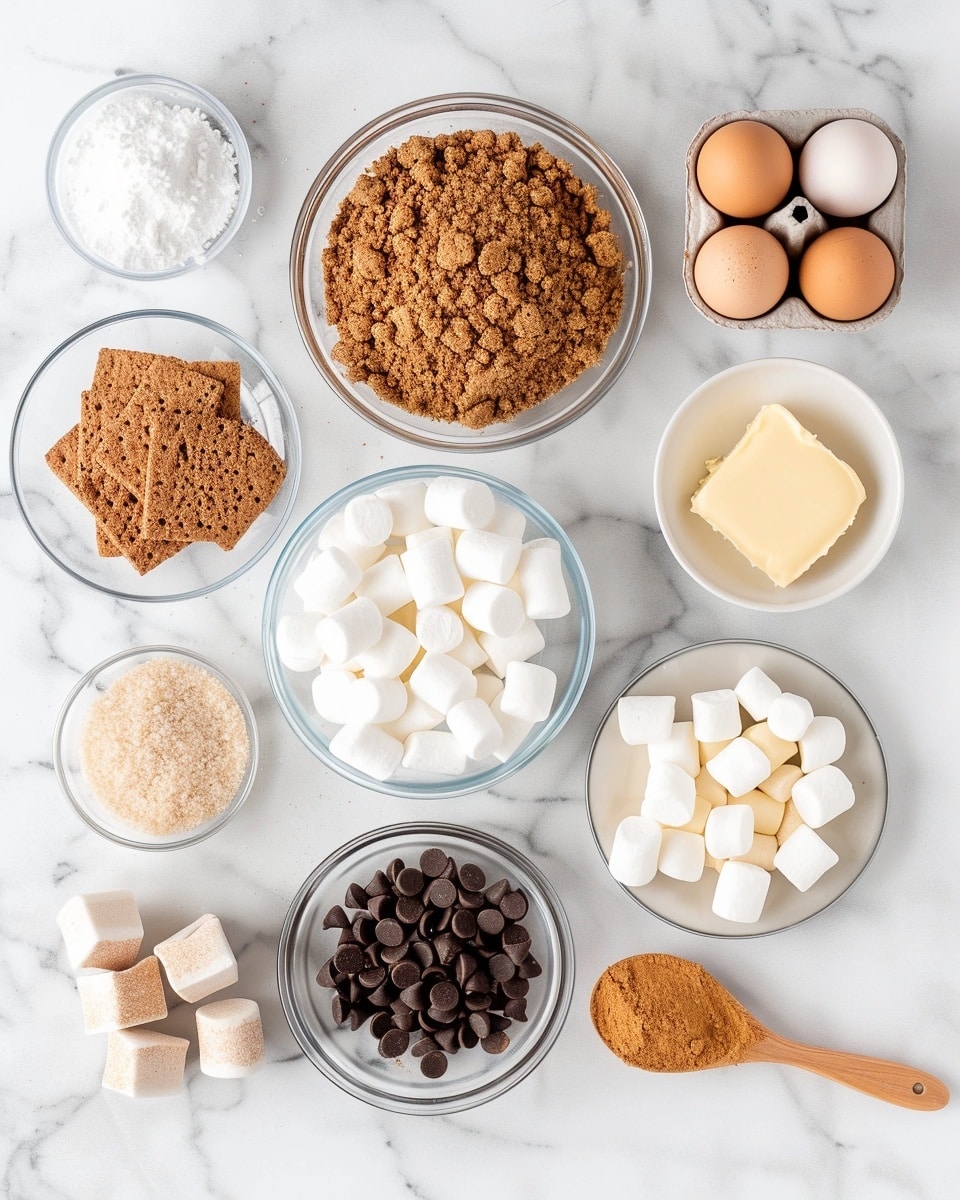
Ingredients You’ll Need
No need to stress over complicated shopping lists here—these ingredients are straightforward yet essential to hitting every note of true s’mores bliss.
- Gluten-free graham crackers: The base of these bars, giving that perfect crunch and sweet warmth.
- Unsalted butter (or dairy-free alternative): Adds richness and helps bind the crust.
- Brown sugar: Imparts caramel undertones and helps with that golden crust texture.
- Salt: Enhances all the flavors, balancing sweetness beautifully.
- Ground cinnamon: Adds subtle warming spice for an elevated twist.
- Mini marshmallows (or vegan alternative): The star of the show, toasted to gooey perfection.
- Semi-sweet chocolate chips (or vegan option): Melts into luscious pockets of chocolate throughout.
Ingredient Substitutions & Tips
- Gluten-free graham crackers: Swap for gluten-free digestive biscuits or crushed gluten-free cookies for a slightly different crust flavor profile.
- Butter: Use coconut oil or dairy-free butter alternatives to keep the recipe vegan and dairy-free.
- Brown sugar: Light or dark brown sugar both work; for a less sweet version, reduce sugar slightly.
- Marshmallows: Vegan marshmallows substitute seamlessly if avoiding gelatin-based options.
👨🍳 Pro Tips for Perfect Results
- Reserve some crackers for topping: Breaking up a few reserved gluten-free graham crackers to sprinkle on top adds delightful texture and visual appeal.
- Don’t skip toasting: That final toast of marshmallows with a torch or broiler takes the flavor from great to unforgettable.
- Mind the oven temperature: 350°F is key to melting and browning without burning your marshmallows or drying the crust.
- Even pressing: Press the crust mix firmly and evenly for a sturdy base that won’t crumble when cut.
- Use parchment paper: Lining your pan makes bar removal and clean-up a breeze.
How to Make Gluten-Free S’mores Bars Recipe
Step 1: Prep the Pan and Oven
Preheat your oven to 350°F. Line a 9×13 inch baking dish with parchment paper—this will make lifting the bars out as easy as pie later. Trust me, your future self will thank you!
💡 Pro Tip: Let that parchment overhang a bit on the sides for convenient bar removal.
Step 2: Prep the Graham Crackers
Set aside 3 to 4 whole gluten-free graham crackers—you’ll use these later for a crunchy topping surprise. Add the rest to your food processor, pulsing until you have fine, sand-like crumbs roughly measuring about 3 cups.
💡 Pro Tip: If you don’t have a food processor, place the crackers in a sealed plastic bag and crush them with a rolling pin or heavy pan.
Step 3: Make the Crust
In a medium bowl, stir together the graham cracker crumbs, melted butter, brown sugar, salt, and a touch of ground cinnamon. Once combined, press this mixture firmly and evenly into the prepared baking dish. This crust is your s’mores foundation—think buttery, sweet, and slightly spiced.
💡 Pro Tip: Use the bottom of a glass or measuring cup to press the crust tight and level.
Step 4: Bake the Crust
Pop the crust into the oven and bake for 10 minutes, just until golden and fragrant. This brief bake gives your crust that perfect texture and depth of flavor, so don’t skip it!
💡 Pro Tip: Keep an eye on it to prevent over-browning—the aroma will guide you.
Step 5: Layer Chocolate and Marshmallows
Save one cup each of the chocolate chips and mini marshmallows aside for later decorating. Scatter the remaining chocolate chips evenly over the warm crust, then evenly top with most of the mini marshmallows.
💡 Pro Tip: Don’t press the marshmallows down—instead, let them puff up and toast beautifully.
Step 6: Bake Again
Return the baking dish to the oven and bake another 10 minutes. The marshmallows should turn lightly golden and puff up, while the chocolate melts behind the scenes, creating that classic gooey combo.
💡 Pro Tip: If your marshmallows aren’t browning enough, use the broiler for a minute or two—but watch closely to avoid burning.
Step 7: Add Toppings and Toast
Remove the pan and immediately add the reserved chocolate chips and marshmallows across the top. Break up the leftover reserved graham crackers and sprinkle them generously over everything. Now, for the showstopper: lightly toast the marshmallows with a kitchen torch until golden and bubbly.
💡 Pro Tip: No torch? Slide the bars under the broiler for 1-2 minutes, watching carefully.
Step 8: Cool and Slice
Allow the bars to cool completely before lifting with the parchment paper and slicing into squares. The chilling helps the layers set, so each square stays intact as you serve ooey gooey perfection.
💡 Pro Tip: Use a sharp knife heated under warm water for clean, neat cuts.
Common Mistakes to Avoid
Learn from these common pitfalls:
- Under-baking the crust: It needs a full 10 minutes to crisp properly; otherwise, bars may be soggy.
- Skipping reserved crumbs for topping: This extra texture adds so much delightful crunch and contrast.
- Over-toasting marshmallows: Charred marshmallows can taste bitter and overpower the bars.
- Pressing marshmallows down: This prevents them from puffing and getting that classic toasted fluffiness.
- Not letting bars cool: Cutting while warm can cause them to fall apart and lose shape.
- Using the wrong pan size: A smaller pan will over-thicken; a larger pan will make bars too thin.
Delicious Variations to Try
Once you’ve mastered the classic, get ready to experiment and make this treat truly yours:
Peanut Butter Delight
Swirl peanut butter into the graham cracker crust before baking for an irresistible nutty twist with chocolate and marshmallow.
Salted Caramel Touch
Drizzle salted caramel sauce over the bars just before the final toast for that perfect sweet-salty combo.
Berry Surprise
Add dried cranberries or chopped freeze-dried strawberries into the crust or as a topping for a pop of tangy color and flavor.
Dark Chocolate & Sea Salt
Use dark chocolate chips and sprinkle flaky sea salt on top after baking to balance sweetness with sophisticated depth.
Vegan Version
Simply swap butter for vegan alternatives, use vegan chocolate chips and marshmallows, and you have a compassionate crowd-pleaser.
How to Serve Gluten-Free S’mores Bars Recipe
Garnishes
Sprinkle with crushed toasted nuts or drizzle melted chocolate over the top for an extra special finish.
Side Dishes
Serve alongside a scoop of vanilla bean ice cream or a dollop of whipped coconut cream for a dreamy contrast.
Creative Ways to Present
Cut bars into bite-sized squares and serve skewered on cocktail sticks for fun party treats. Or stack layers with whipped cream and berries for a s’mores parfait-inspired dessert.
Make Ahead and Storage
Storing Leftovers
Store cooled bars in an airtight container at room temperature for up to 3 days, or keep refrigerated for a week to maintain freshness.
Freezing
Wrap bars tightly in plastic wrap and aluminum foil, then freeze for up to 2 months. Thaw overnight in the fridge before serving.
Reheating
Pop bars in a warm oven at 300°F for 5–7 minutes or microwave briefly to revive gooey goodness without melting the structure completely.
FAQs
Can I make these bars dairy-free?
Yes! Swap butter for your favorite dairy-free butter or coconut oil, and use vegan chocolate chips and marshmallows to keep it completely dairy-free.
Is this recipe safe for people with gluten intolerance?
Absolutely. Using certified gluten-free graham crackers ensures that this recipe is safe for those avoiding gluten.
Can I use regular marshmallows instead of mini?
You can, but mini marshmallows melt more evenly and create that perfect gooey layer. If using large marshmallows, cut them into smaller pieces for best results.
What’s the best way to toast marshmallows without a torch?
Simply place the bars under a preheated broiler for 1-2 minutes, but watch closely to avoid burning.
Can I add nuts or other mix-ins?
Yes! Chopped nuts, shredded coconut, or even chocolate chunks can be sprinkled into the crust or on top for added flavor and texture.
How do I store leftover bars?
Keep leftovers in an airtight container at room temperature for 3 days or refrigerate for up to a week.
Can I double the recipe?
Definitely! Use a larger pan, like 9×18 inches, or two 9×13 pans, adjusting baking time slightly as needed.
Why are my marshmallows melting too much?
Make sure not to bake too long after adding marshmallows, and avoid pressing them down. Toasting should be brief to keep their shape.
Final Thoughts
This Gluten-Free S’mores Bars Recipe isn’t just dessert—it’s a joyful experience wrapped in gooey, crunchy, chocolatey bliss. It brings back those carefree campfire memories without any of the fuss, and it’s a guaranteed crowd-pleaser for any occasion.
Have you tried this Gluten-Free S’mores Bars Recipe? I’d love to hear how it turned out! Leave a comment below. If you loved this recipe, please share it with friends and family. Happy cooking! 😊
PrintGluten-Free S’mores Bars Recipe

These Gluten-Free S’mores Bars combine the classic flavors of graham crackers, melted butter, chocolate chips, and toasted marshmallows into an easy-to-make, crowd-pleasing dessert. Perfect for those avoiding gluten while still craving the nostalgic taste of s’mores, these bars are baked until golden and finished with a toasty marshmallow topping for a gooey, delicious treat.
- Prep Time: 10 minutes
- Cook Time: 20 minutes
- Total Time: 30 minutes
- Yield: 16 servings 1x
- Category: Dessert
- Method: Baking
- Cuisine: American
- Diet: Gluten Free
Ingredients
Crust
- 16 oz gluten-free graham crackers (reserve 3–4 whole crackers for topping)
- 1/2 cup unsalted butter, melted (or dairy-free butter alternative)
- 1/3 cup brown sugar
- 1/4 teaspoon salt
- 1/8 teaspoon ground cinnamon
Filling & Topping
- 16 oz mini marshmallows (use vegan if needed)
- 10 oz semi-sweet chocolate chips (use vegan if needed)
Instructions
- Preheat and Prepare Pan: Preheat your oven to 350°F (175°C). Line a 9×13-inch baking dish with parchment paper to ensure easy removal of the bars later.
- Reserve Graham Crackers: Set aside 3 to 4 whole gluten-free graham crackers to use as a crunchy topping at the end.
- Process Graham Crackters: Place the remaining gluten-free graham crackers in a food processor and pulse until you achieve fine crumbs, approximately three cups in volume.
- Make Crust Mixture: In a medium bowl, combine the graham cracker crumbs with melted butter, brown sugar, salt, and ground cinnamon. Stir thoroughly until the mixture is well combined and forms a crumbly base.
- Form and Bake Crust: Press the crust mixture evenly into the bottom of the prepared 9×13-inch pan. Bake in the preheated oven for 10 minutes or until the crust turns golden brown and becomes fragrant.
- Add Filling Layers: Reserve one cup each of mini marshmallows and chocolate chips. Distribute the remaining chocolate chips evenly over the baked crust, followed by spreading the remaining mini marshmallows evenly on top.
- Bake Marshmallows: Return the pan to the oven and bake for another 10 minutes until the marshmallows are lightly browned and puffed. Remove and let cool for a few minutes.
- Add Reserved Toppings: Sprinkle the reserved chocolate chips and mini marshmallows over the warm bars to add extra gooeyness and texture.
- Top with Graham Crackers: Break up the reserved whole gluten-free graham crackers and sprinkle the pieces over the bars for added crunch.
- Toast Marshmallows: Using a kitchen torch, lightly toast the marshmallows on top until golden and caramelized. If you do not have a torch, place the bars under the oven broiler for 1–2 minutes, watching carefully to avoid burning.
- Cool and Serve: Allow the bars to cool completely to set before slicing into 16 squares and serving.
Notes
- You can use vegan marshmallows and chocolate chips to make this recipe entirely vegan.
- If a kitchen torch is not available, use your oven broiler cautiously to toast marshmallows.
- Ensure the gluten-free graham crackers are finely ground for a good crust texture.
- Allow bars to cool completely for clean slices and to avoid gooey mess.
- Store leftovers in an airtight container at room temperature for up to 3 days.
Keywords: Gluten-Free S’mores Bars, S’mores dessert, gluten-free dessert, baked s’mores, gluten-free graham cracker bars, marshmallow chocolate bars