Fudgy Chocolate Cookies with Raspberry Filling and Chocolate Coating Recipe
Picture this: The warm aroma of rich cocoa and sweet raspberries filling your kitchen, mixing with the tempting sound of chocolate gently melting into a glossy coating. You’re holding a cookie that boasts a fudgy chocolate exterior, a vibrant ruby-red raspberry heart, and a silky chocolate coating that snaps delightfully with every bite. This isn’t just any cookie—it’s a moment of pure, decadent bliss that feels like a hug from the inside out. It’s quick enough to whip up on a cozy afternoon yet impressive enough to wow your friends and family. Let me take you through this unforgettable experience with my cherished Fudgy Chocolate Cookies with Raspberry Filling and Chocolate Coating Recipe.
Why You’ll Love This Fudgy Chocolate Cookies with Raspberry Filling and Chocolate Coating Recipe
- Ready in under an hour: From start to finish, this recipe comes together in about 50 minutes, so you can indulge your chocolate cravings faster than you can say “yum.”
- Simple, pantry-friendly ingredients: No exotic products here—just classic staples that you probably already have on hand, making it stress-free and budget-friendly.
- Perfect for beginners and pros alike: The method is forgiving but impressive, so whether you’re a newbie or a seasoned baker, these cookies turn out bakery-level delicious every single time.
- Show-stopping presentation: The delicate raspberry filling peeks out like a jewel beneath a sleek chocolate coating, making these cookies a feast for the eyes and the palate.
- Endlessly customizable: Feel free to swap out fillings or chocolates to tailor the flavor and make this recipe your own edible masterpiece.
Why This Fudgy Chocolate Cookies with Raspberry Filling and Chocolate Coating Recipe Works
What makes this recipe shine is the harmonious balance of textures and flavors working together like a dream. The fudge-like cookie dough creates a rich, moist foundation that holds its shape beautifully after baking. Cooling the dough before shaping ensures easier handling and a tender crumb. The raspberry filling isn’t just sweet; it’s tangy and fresh, thanks to the fresh fruit, high-quality jam, and a touch of lemon juice, cutting through the chocolate richness with bright bursts. Lastly, the glossy chocolate coating adds a textural contrast and a stunning finish that seals in all those luscious layers. These steps combined bring out a cookie experience so luscious and memorable, you’ll want to bake them on repeat.

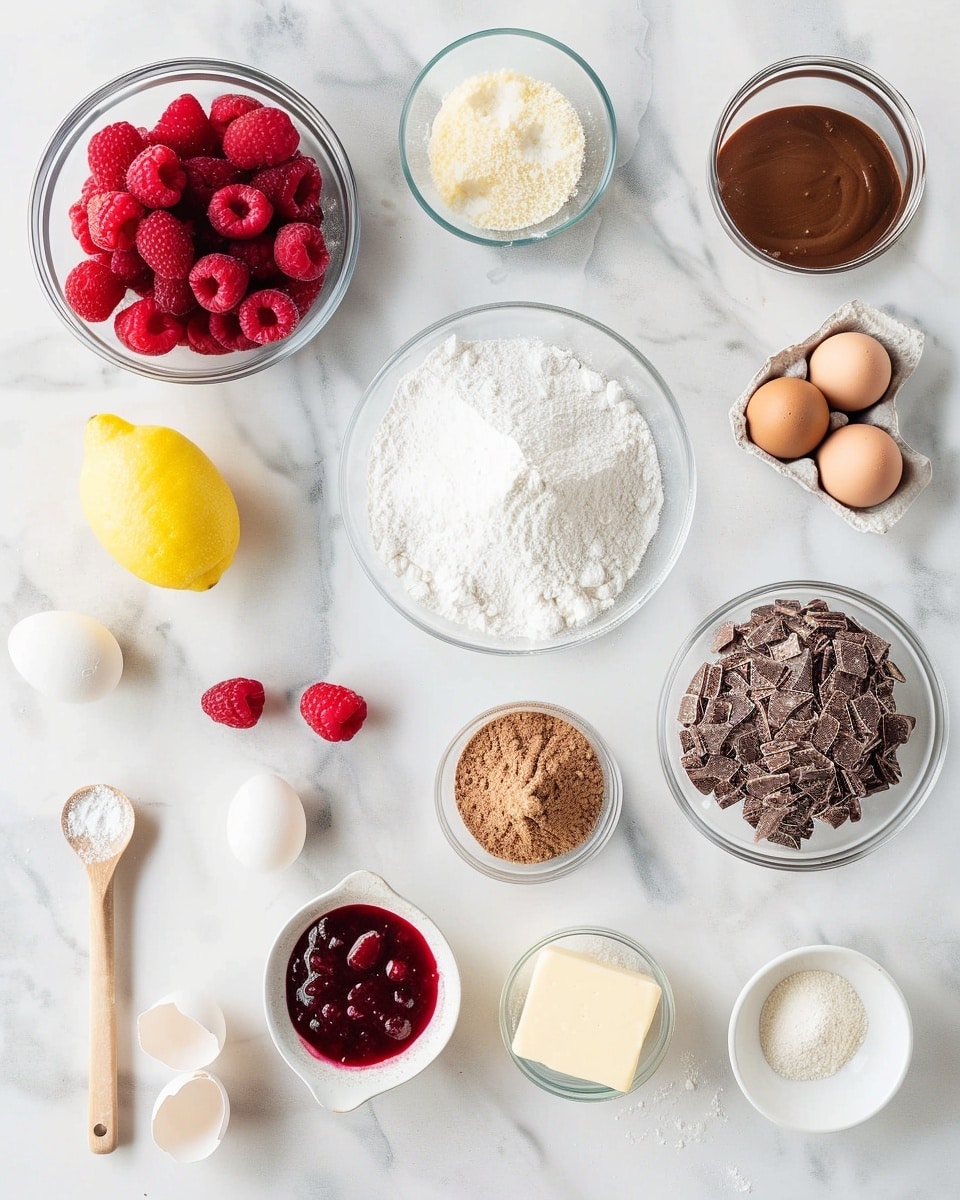
Ingredients You’ll Need
This recipe calls for straightforward yet essential ingredients that together craft pure magic. Each component plays a vital role, enhancing the cookies’ depth and texture while keeping the process approachable.
- Fresh raspberries: Provide natural tartness and vibrant color to the filling.
- Raspberry jam: Adds extra sweetness and smoothness to the filling.
- Granulated sugar: Sweetens the filling and cookie dough just right.
- Cornstarch: Thickens the raspberry filling perfectly.
- Lemon juice: Brightens the raspberry flavor with a refreshing zing.
- Unsalted butter: Creates that buttery richness for the cookie base.
- Brown sugar: Gives a subtle molasses warmth contributing to cookie softness.
- Eggs: Bind the dough and add moisture.
- Vanilla extract: Brings a cozy aromatic depth.
- All-purpose flour: Provides structure to the cookies.
- Unsweetened cocoa powder: Delivers deep chocolate intensity.
- Baking soda: Helps cookies rise slightly and stay tender.
- Salt: Balances sweetness and enhances chocolate flavor.
- Semi-sweet chocolate chips (optional): Adds extra bursts of melty chocolate.
- Semi-sweet or dark chocolate: For the luscious coating that gives a professional, glossy finish.
- Coconut oil (optional): Smoothes the chocolate coating and creates shine.
Ingredient Substitutions & Tips
- Butter: You can substitute with margarine or coconut oil in equal amounts, but butter yields the best texture and flavor.
- All-purpose flour: Try gluten-free flour blends for a GF version, adjusting the texture carefully.
- Raspberry jam: Swap for any other berry jam like strawberry or blackberry for a different fruity surprise.
- Coconut oil: Omit if you prefer; the chocolate coating will still be delicious but slightly less glossy.
👨🍳 Pro Tips for Perfect Results
- Use room temperature butter: This ensures it creams beautifully with sugar for the ideal cookie texture.
- Chill the dough: Refrigerating helps control spreading and makes shaping the cookie balls much easier.
- Work gently when sealing: To prevent filling leaks, pinch the dough edges firmly but without over-stretching.
- Melt chocolate slowly: Use short bursts in the microwave and stir frequently to avoid scorching.
- Cool cookies completely before dipping: Prevents the filling from melting and keeps the coating smooth.
How to Make Fudgy Chocolate Cookies with Raspberry Filling and Chocolate Coating Recipe
Step 1: Make the Raspberry Filling
In a small saucepan, gently combine the fresh raspberries, raspberry jam, sugar, cornstarch, and lemon juice. Set the heat to medium and stir frequently, letting the raspberries break down until the mixture thickens into a luscious, jam-like consistency—about five minutes. This cooking step intensifies the natural berry flavor while the cornstarch gives your filling that just-right spreadable texture. Remove the pan from heat and let the filling cool completely to prevent it from melting the cookie dough in the next steps.
💡 Pro Tip: Strain the filling through a fine mesh sieve if you prefer a smoother texture without seeds.
Step 2: Prepare the Chocolate Cookie Dough
Preheat your oven to 350°F (175°C) and line baking sheets with parchment paper for easy cleanup. In a large bowl, cream together the softened butter, brown sugar, and granulated sugar until the mixture is light, fluffy, and aromatic—about 2 to 3 minutes. Add in the eggs one after the other, mixing well, then stir in the vanilla extract. In a separate bowl, whisk together the flour, cocoa powder, baking soda, and salt to distribute the dry ingredients evenly. Gradually fold the dry ingredients into the wet mixture, just until combined. If you’re feeling extra decadent, gently fold in semi-sweet chocolate chips now to sneak in pockets of melty goodness. Wrap the dough in plastic wrap or cover it and chill in the fridge for at least 30 minutes; this extra resting time makes the dough easier to handle and prevents your cookies from flattening too much.
💡 Pro Tip: Avoid over-mixing once combined to keep the fudgy texture perfect.
Step 3: Assemble the Cookies
Take about 1 1/2 tablespoons of the chilled dough and flatten it slightly in your palm, creating a small round disk. Spoon roughly 1/2 teaspoon of the cooled raspberry filling into the center of the dough. Cover it with another small flattened piece of dough, carefully sealing the edges by gently pinching them together so none of that precious fruity filling escapes. Then roll the filled dough ball smoothly to form a uniform round cookie and place it on your prepared baking sheet. Repeat with the remaining dough and filling, giving each cookie about 2 inches of space to spread. Bake the cookies for 10 to 12 minutes; watch for set edges with a soft center—they will firm up as they cool, preserving that dreamy fudginess.
💡 Pro Tip: Don’t worry if the cookies look slightly soft when you pull them from the oven; this means fudgy perfection awaits.
Step 4: Coat the Cookies in Chocolate
While the cookies cool on a wire rack, melt your semi-sweet or dark chocolate in a microwave-safe bowl, heating in 20-30 second intervals and stirring frequently until silky smooth. Stir in coconut oil if you want that extra glossy finish and a slightly softer set. Once the cookies are fully cooled, dip the top of each one into the melted chocolate, letting excess drip off before returning it to the rack to set. You can speed up this step by popping the cookies into the fridge for about 15 to 20 minutes, or let them set naturally at room temperature for a luxuriously glossy coating that cracks ever so slightly when bitten.
💡 Pro Tip: Use a fork or dipping tool to free excess chocolate and keep the coating thin and elegant.
Common Mistakes to Avoid
Learn from these common pitfalls:
- Skipping chilling the dough: Leads to flat, overly spread cookies that lose their fudgy texture.
- Filling too warm or runny: Causes leaks and can make dough soggy—always let the filling cool completely.
- Overbaking: Results in dry cookies, so watch the edges carefully for that just-set look.
- Not sealing edges properly: The raspberry filling can ooze out and burn in the oven.
- Melting chocolate too fast: Can scorch and become grainy—melt slowly and stir often.
- Dipping warm cookies in chocolate: Can melt filling or cause uneven coating; wait for cookies to fully cool.
Delicious Variations to Try
Once you’ve mastered the classic Fudgy Chocolate Cookies with Raspberry Filling and Chocolate Coating Recipe, why not mix things up to keep your taste buds dancing?
Orange Raspberry Twist
Add a teaspoon of finely grated orange zest to the raspberry filling for a zesty citrus pop that beautifully complements the deep chocolate notes.
Salted Caramel Surprise
Swap the raspberry filling for a dollop of homemade or store-bought salted caramel sauce for molten center indulgence with a hint of sea salt magic.
Mint Chocolate Delight
Mix a drop of peppermint extract into the cookie dough and use a mint jelly for the filling to recreate that refreshing chocolate-mint combo.
Peanut Butter Bliss
Replace the raspberry center with a spoonful of creamy peanut butter and add chopped peanuts to the dough for a crunchy, nutty delight.
Berry Medley
Combine raspberries, blueberries, and blackberries in the filling for a richer, more complex berry burst that brightens every bite.
White Chocolate Drizzle
After the chocolate coating sets, drizzle melted white chocolate over the top for an elegant, eye-catching contrast.
How to Serve Fudgy Chocolate Cookies with Raspberry Filling and Chocolate Coating Recipe
Garnishes
Sprinkle a light dusting of powdered sugar or fresh raspberry seeds for texture and visual appeal. A few edible flowers or a pinch of flaky sea salt on top of the chocolate coating can add elevated sophistication.
Side Dishes
Pair these cookies with a scoop of vanilla bean ice cream, a cup of rich espresso, or a glass of cold milk for the ultimate indulgent treat.
Creative Ways to Present
Serve on a sleek platter layered with fresh berries and sprigs of mint. Box them as stunning homemade gifts with a handwritten note—perfect for celebrations or just because moments.
Make Ahead and Storage
Storing Leftovers
Keep your baked cookies in an airtight container at room temperature for up to 3 days. The chocolate coating helps maintain freshness, but the raspberry filling tastes even better fresh.
Freezing
Freeze unbaked cookie dough balls on parchment-lined trays, then transfer them to a freezer-safe bag. Bake directly from frozen, adding a couple more minutes to the baking time. Baked cookies freeze well too—store them in airtight containers to preserve flavor.
Reheating
Warm cookies gently in the microwave for 10-15 seconds to revive that gooey, fudgy center. Avoid overheating to maintain the perfect texture.
FAQs
Can I use frozen raspberries for the filling?
Yes! Just thaw them completely and drain any excess liquid before using to avoid making the filling too runny.
What if I don’t have cocoa powder?
You can substitute with melted chocolate, but be sure to reduce other fats in the recipe to keep the balance right.
Can I make these cookies dairy-free?
Use dairy-free butter and dark chocolate that’s soy or coconut-based for a delicious vegan-friendly version.
Do I need to add the chocolate coating?
The coating adds a lovely finish and flavor contrast, but these cookies taste fantastic without it too.
Is it okay to double the recipe?
Absolutely! Just bake the cookies in batches to give them enough space to bake evenly.
Can I make this recipe gluten-free?
Yes, swap the all-purpose flour for a gluten-free blend that includes xanthan gum for proper texture.
How should I store leftover raspberry filling?
Keep leftovers in a sealed container in the fridge for up to a week or freeze for longer storage.
What is the best chocolate for the coating?
Semi-sweet or dark chocolate with at least 60% cocoa works beautifully. Look for high-quality chocolate to get that perfect snap and shine.
Final Thoughts
I cannot express enough how much joy these Fudgy Chocolate Cookies with Raspberry Filling and Chocolate Coating Recipe brings to any table—whether a casual afternoon snack or the centerpiece of a special celebration. The interplay of deep chocolate and fresh raspberry, all wrapped up in a glossy chocolate embrace, offers a symphony of flavors and textures you’ll find yourself craving again and again.
Have you tried this Fudgy Chocolate Cookies with Raspberry Filling and Chocolate Coating Recipe? I’d love to hear how it turned out! Leave a comment below. If you loved this recipe, please share it with friends and family. Happy cooking! 🍫🍓
PrintFudgy Chocolate Cookies with Raspberry Filling and Chocolate Coating Recipe

These fudgy chocolate cookies with a luscious raspberry filling are a delightful treat for any chocolate lover. Soft, rich chocolate dough encases a tangy, homemade raspberry jam center, and the cookies are finished with a smooth semi-sweet chocolate coating. Perfect for dessert or special occasions, these cookies combine intense chocolate flavor with a fresh fruity burst for a truly irresistible bite.
- Prep Time: 50 minutes
- Cook Time: 15 minutes
- Total Time: 1 hour 5 minutes
- Yield: 18–20 cookies 1x
- Category: Cookies
- Method: Baking
- Cuisine: American
Ingredients
For the Raspberry Filling:
- 1/2 cup fresh raspberries (or frozen, thawed)
- 1/4 cup raspberry jam (high-quality or seedless)
- 2 tablespoons granulated sugar
- 1 tablespoon cornstarch
- 1 tablespoon lemon juice
For the Chocolate Cookie Dough:
- 1 cup unsalted butter, softened
- 1 cup brown sugar
- 1/2 cup granulated sugar
- 2 large eggs
- 2 teaspoons vanilla extract
- 2 cups all-purpose flour
- 3/4 cup unsweetened cocoa powder
- 1 teaspoon baking soda
- 1/4 teaspoon salt
- 1/2 cup semi-sweet chocolate chips (optional)
For the Chocolate Coating:
- 8 oz semi-sweet or dark chocolate, melted
- 1 tablespoon coconut oil (optional for smoother coating)
Instructions
- Make the Raspberry Filling: In a small saucepan, combine fresh raspberries, raspberry jam, sugar, cornstarch, and lemon juice. Cook over medium heat, stirring frequently, until the mixture thickens and raspberries break down, about 5 minutes. Remove from heat and cool completely to set the filling.
- Prepare the Chocolate Cookie Dough: Preheat oven to 350°F (175°C) and line baking sheets with parchment paper. Cream together butter, brown sugar, and granulated sugar until light and fluffy. Beat in eggs one at a time, then stir in vanilla extract. In another bowl, whisk flour, cocoa powder, baking soda, and salt. Gradually add dry ingredients to wet, mixing until just combined. Fold in chocolate chips if using. Chill dough for 30 minutes.
- Assemble the Cookies: Flatten about 1 1/2 tablespoons of dough in your palm, place 1/2 teaspoon of cooled raspberry filling in center. Cover with another small piece of dough, seal edges by pinching, roll into a ball. Place on baking sheet 2 inches apart. Repeat with remaining dough and filling. Bake 10-12 minutes until edges set but centers remain soft. Cool 5 minutes on baking sheet, then transfer to wire rack.
- Coat the Cookies in Chocolate: Melt chocolate in microwave in short bursts, stirring until smooth. Stir in coconut oil for shine if using. Dip cooled cookies’ tops into chocolate, allow excess to drip off, and place back on wire rack. Let chocolate set at room temperature or refrigerate to speed setting.
Notes
- Using seedless raspberry jam creates a smoother filling texture.
- Chilling the dough prevents spreading and makes it easier to handle the filled cookies.
- Semi-sweet chocolate chips in the dough enhance the chocolate intensity but are optional.
- Coconut oil in the chocolate coating gives a glossy finish and smoother texture.
- Store cookies in an airtight container at room temperature for up to 3 days, or refrigerate for up to a week.
Keywords: Fudgy chocolate cookies, raspberry filling, chocolate coated cookies, homemade cookies, chocolate raspberry dessert