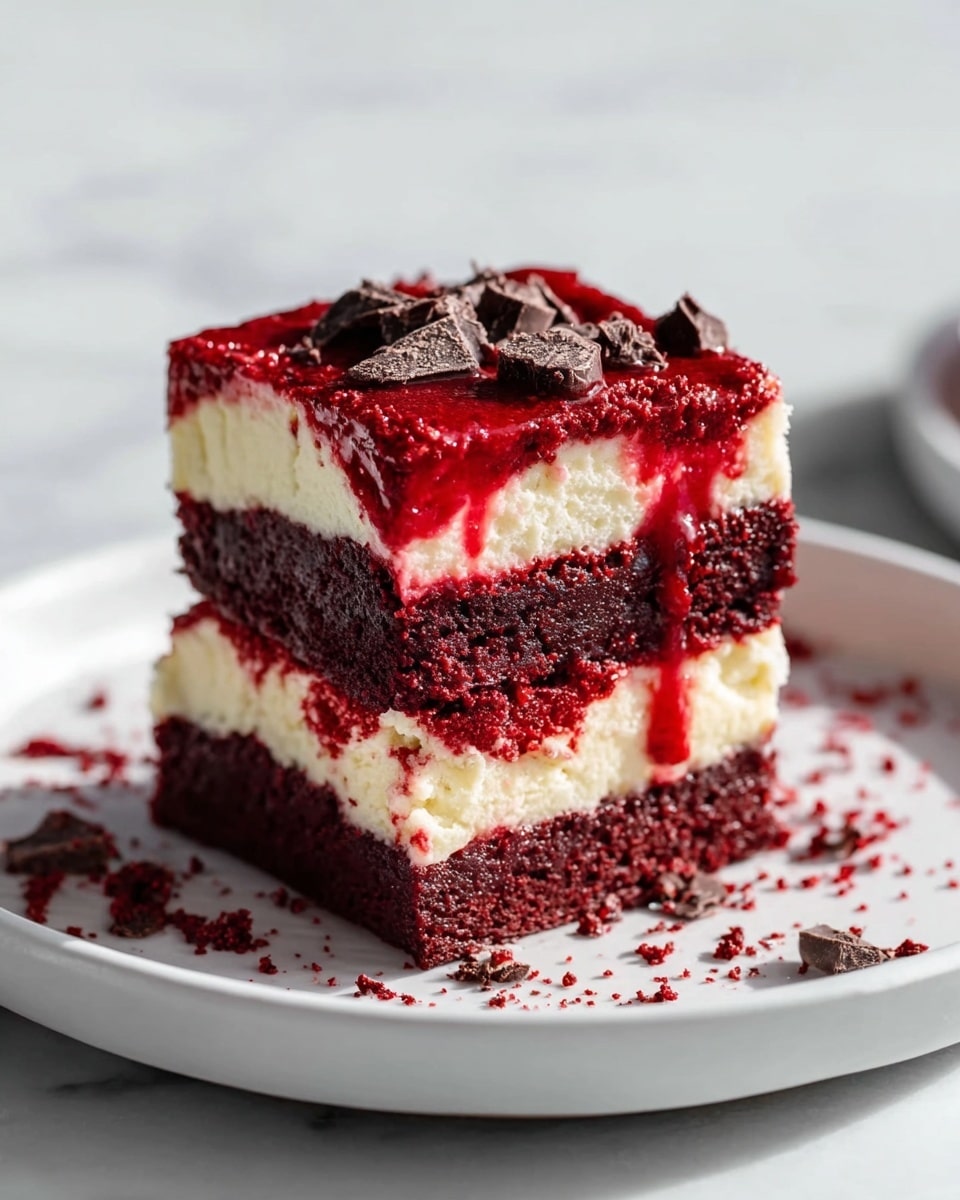
Irresistible Red Velvet Cheesecake Brownies for Valentine’s Day Recipe
Picture this: the moment you open your oven, a warm, sweet aroma wraps around your kitchen like a cozy hug. The glossy swirls of vibrant red velvet cheesecake peek through the glossy crust, teasing your senses before the first bite melts delightfully on your tongue. These Irresistible Red Velvet Cheesecake Brownies for Valentine’s Day Recipe blend the rich, deep chocolate notes with tangy, creamy cheesecake in a way that feels like a love letter baked just for you—or that special someone.
This recipe invites you into a blissful baking experience that’s as quick and easy as it is impressive. Whether you’re a seasoned baker or trying your hand at something new, these brownies promise a velvety, luscious treat that will win hearts without the fuss. Let’s dive into what makes these brownies a must-have for Valentine’s Day and beyond!
Why You’ll Love This Irresistible Red Velvet Cheesecake Brownies for Valentine’s Day Recipe
- Ready in just about an hour: From mixing bowls to cooling racks, you’ll have a stunning dessert in under 90 minutes that looks like it took twice as long.
- Uses simple, widely available ingredients: No scavenging specialty shops needed—everything you need is likely in your pantry or fridge already.
- Perfect for beginners: Foolproof steps and basic techniques ensure anyone can whip these up with confidence and joy.
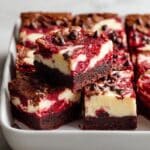
- Impressive presentation: The swirl of bright red velvet and cream cheese creates eye-catching patterns that will wow friends, family, or your Valentine.
- Customizable to fit your taste: Easily swap ingredients for dietary preferences, make it vegan, gluten-free, or alter the cheesecake flavor to your liking.
Why This Irresistible Red Velvet Cheesecake Brownie for Valentine’s Day Recipe Works
The magic of this recipe lies in the harmonious layering and textural contrast between the rich red velvet brownie base and the creamy cheesecake topping. The red velvet batter’s subtle cocoa undertones, enhanced by a touch of red gel food coloring, give it that iconic look and flavor, while the cheesecake filling’s smooth, tangy sweetness cuts through the richness beautifully. The gentle swirl step is crucial—it not only looks stunning but melds the two elements perfectly without mixing into a single color, preserving vibrant red and creamy white ribbons. This technique creates a pleasing bite every time, making it hard to stop at just one!
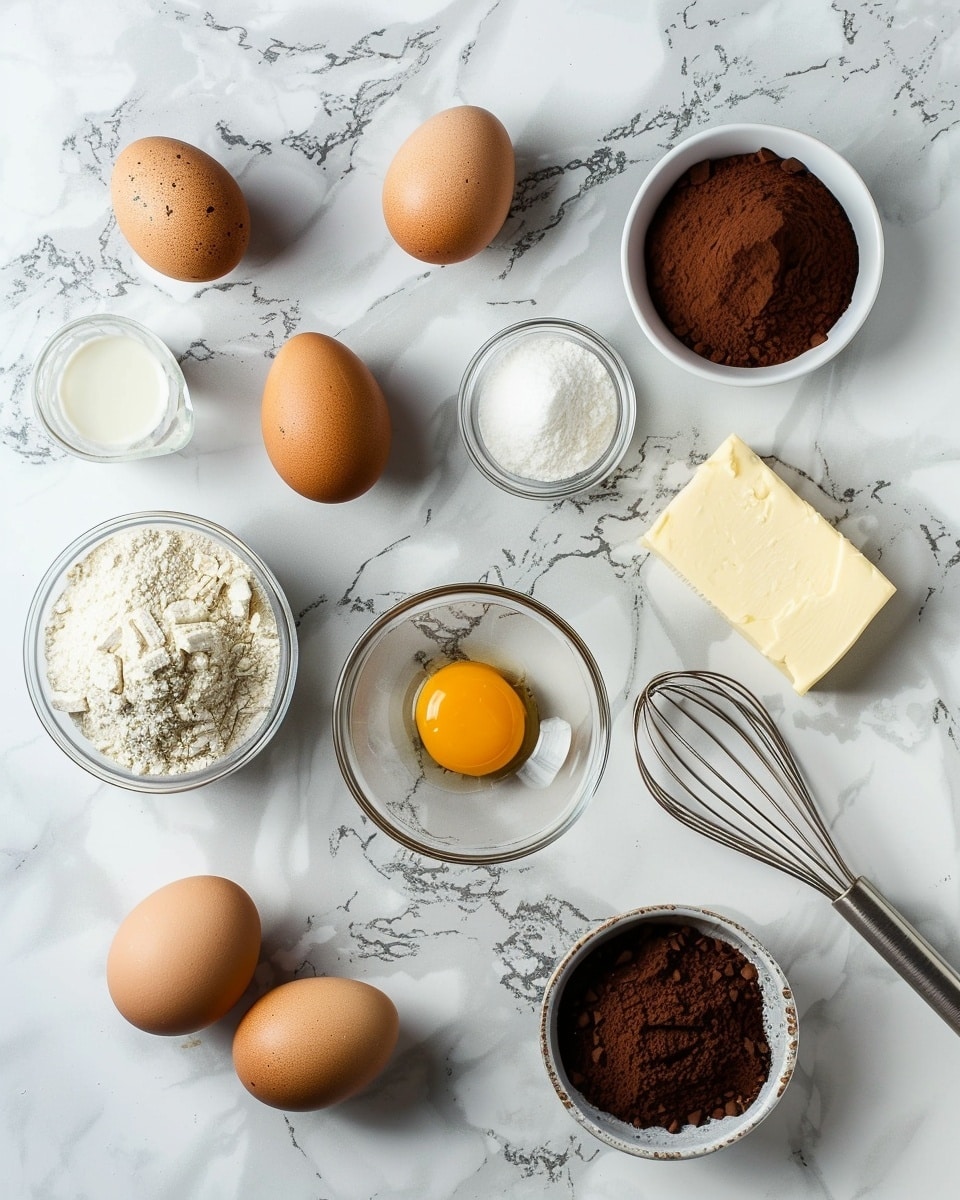
Ingredients You’ll Need
This recipe celebrates simplicity with ingredients you know and love, each playing a key role in delivering the perfect texture and taste.
- Large eggs: Bind the brownie and cheesecake layers together and help achieve that tender crumb.
- Granulated sugar: Adds sweetness and moisture to both layers without overpowering.
- Vanilla extract: Provides aromatic depth that complements the chocolate and cream cheese flavors.
- Unsalted butter: Infuses a rich, velvety mouthfeel and helps bind ingredients with its creamy fat.
- Red gel food coloring: Gives the brownie its signature vibrant hue without altering texture or flavor.
- All-purpose flour: The backbone of structure, imparting just the right density.
- Cocoa powder: Delivers that classic chocolate hint essential in every red velvet.
- Salt: Balances the sweetness for a well-rounded flavor experience.
- Cream cheese: Creates the luscious, tangy topping that’s the star in every bite.
Ingredient Substitutions & Tips
- Eggs: Substitute with flax eggs (1 tablespoon flaxseed meal + 3 tablespoons water per egg) for a vegan option.
- Granulated sugar: Coconut sugar can be used for a less refined, slightly caramel-like sweetness.
- Unsalted butter: Swap with coconut oil to make this recipe dairy-free while maintaining moistness.
- All-purpose flour: Gluten-free flour blends work great to accommodate gluten sensitivity without compromising texture.
👨🍳 Pro Tips for Perfect Results
- Use room temperature ingredients: This helps everything combine smoothly and results in a consistent batter.
- Don’t overmix the flour: Stir just until combined to keep the brownies tender, not tough.
- Reserve a small amount of batter: For gorgeous swirled toppings that add visual drama without extra fuss.
- Let brownies cool completely: This ensures clean, neat slices and the perfect chewy texture.
- Use a sharp knife for slicing: Wipe blade between cuts to keep the swirls crisp and defined.
How to Make Irresistible Red Velvet Cheesecake Brownies for Valentine’s Day Recipe
Step 1: Preheat and Prepare Your Pan
Start by setting your oven to 350°F (175°C). Line an 8×8-inch baking pan with parchment paper. This step is key to preventing your brownies from sticking and makes cleanup a breeze.
💡 Pro Tip: Let the parchment paper hang over the edges for easy lifting once baked.
Step 2: Mix the Red Velvet Brownie Base
In a large bowl, whisk together the eggs, granulated sugar, and vanilla extract until the mixture turns slightly frothy, hinting at lightness. Next, stir in the melted butter and vibrant red gel food coloring, folding gently. Now sift in your flour, cocoa powder, and a pinch of salt; combine just until smooth and no flour pockets remain.
💡 Pro Tip: Use Dutch-processed cocoa powder if you want a deeper chocolate flavor in your red velvet.
Step 3: Prepare the Cream Cheese Filling
In a separate bowl, beat together the softened cream cheese, sugar, vanilla extract, and the single egg until silky and smooth. This sweet, tangy cream cheese mixture is what transforms the brownies from ordinary to unforgettable.
💡 Pro Tip: Make sure your cream cheese is fully softened to avoid lumps in the filling.
Step 4: Assemble the Layers
Spread most of the brownie batter evenly into your prepared pan, saving a few tablespoons for the topping. Pour the cream cheese filling over the brownie layer, then dollop the reserved brownie batter on top. Use a knife or skewer to swirl the two together, creating gorgeous marbled patterns that look like artwork.
💡 Pro Tip: Don’t over-swirl; a few large, sweeping motions create the best visual impact.
Step 5: Bake and Cool
Bake your masterpiece for about 30 minutes or until a toothpick inserted near the center comes out clean. Once baked, allow the brownies to cool completely in the pan. This step sets the structure and ensures clean, neat slices that hold their shape.
💡 Pro Tip: Cooling completely enhances the chewy texture and allows flavors to develop fully.
Common Mistakes to Avoid
Learn from these common pitfalls:
- Overmixing the batter: Leads to dense, tough brownies instead of tender and moist ones.
- Using cold cream cheese: Causes lumps in the filling, ruining the smooth texture.
- Skipping parchment paper: Results in brownies sticking to the pan and frustrating removal.
- Over-swirl swirling: Can cause the red velvet and cheesecake layers to blend into an unappealing color.
- Baking too long: Dries out the brownies and diminishes that luscious fudgy texture.
- Cutting brownies too early: Leads to crumbly edges; patience is key for perfect slices.
Delicious Variations to Try
Once you’ve mastered the classic Irresistible Red Velvet Cheesecake Brownies for Valentine’s Day Recipe, why not have fun exploring these scrumptious twists?
Salted Caramel Swirl
Add ribbons of homemade or store-bought salted caramel sauce between the brownie and cheesecake layers for a luscious, sophisticated flavor boost.
Nutty Delight
Fold chopped toasted pecans or walnuts into the brownie batter for added crunch and a nutty aroma that pairs beautifully with the cheesecake.
Vegan Version
Use flax eggs and coconut oil in place of eggs and butter, and swap cream cheese with a vegan-friendly alternative like cashew cream for a compassionate yet decadent treat.
Mocha Infusion
Add a teaspoon of instant espresso powder to the brownie batter for a subtle coffee kick that enhances the chocolate notes and amps up richness.
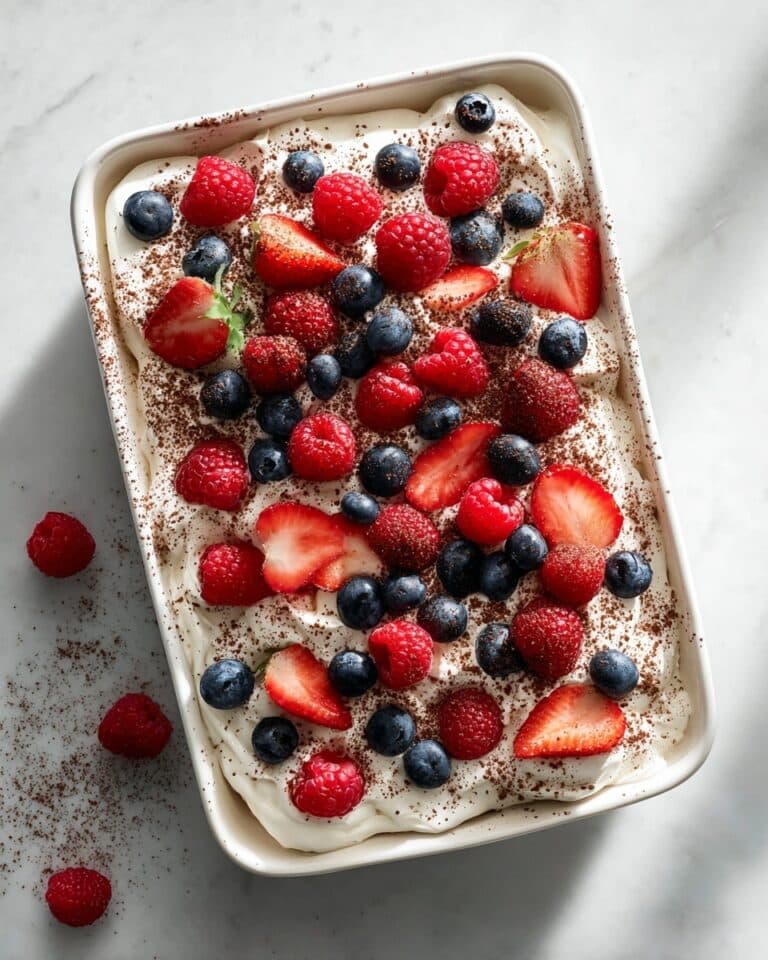
Berry Burst
Scatter fresh raspberries or swirl in raspberry preserves to introduce a tart contrast that plays beautifully against the creamy cheesecake.
How to Serve Irresistible Red Velvet Cheesecake Brownies for Valentine’s Day Recipe
Garnishes
Sprinkle with powdered sugar, top with whipped cream, or decorate with fresh strawberries or edible rose petals for a romantic touch.
Side Dishes
Pair with a scoop of creamy vanilla ice cream, a rich cup of espresso, or a glass of chilled rosé for the perfect Valentine’s Day dessert experience.
Creative Ways to Present
Serve in elegant glass dishes for a layered parfait look, or cut into small bite-sized squares as party finger foods with decorative picks.
Make Ahead and Storage
Storing Leftovers
Keep your brownies covered tightly with plastic wrap or in an airtight container at room temperature for up to 3 days or in the fridge for up to a week to retain freshness.
Freezing
Wrap individual squares in plastic wrap and foil, then freeze for up to 3 months. Thaw overnight in the refrigerator before serving.
Reheating
Warm brownies gently in the microwave for 10-15 seconds or let them sit at room temperature until softened for a freshly baked feel.
FAQs
Can I make this recipe dairy-free or vegan?
Absolutely! Use flax eggs for egg substitutes, coconut oil instead of butter, and vegan cream cheese alternatives like cashew cream. The texture will remain deliciously satisfying.
What if I don’t have red gel food coloring?
You can skip it for a delicious chocolate cheesecake brownie, or use liquid food coloring but add sparingly since gel offers more vibrant color without altering batter consistency.
How do I achieve the perfect swirl?
Dollop batter and cream cheese alternately, then use a butter knife or skewer to gently swirl with wide, slow motions without mixing everything together.
Can I use boxed brownie mix?
Yes! Substitute the brownie layer with your favorite box mix but consider adding the cocoa and red coloring yourself to maintain that signature flavor and look.
How long should I bake the brownies?
About 30 minutes at 350°F (175°C), but start checking at 25 minutes by inserting a toothpick near the center—it should come out clean or with just a few moist crumbs.
How do I store the brownies to keep them moist?
Store them in an airtight container at room temperature. You can also tightly wrap them if freezing to prevent freezer burn and moisture loss.
Can I double the recipe?
Yes! Just use a larger pan (like 9×13 inches) and adjust baking time accordingly—usually 40-45 minutes, but check often to avoid drying out.
Can I add nuts or other mix-ins?
Definitely! Chopped pecans, walnuts, or even white chocolate chips can be folded into the brownie batter for added texture and flavor.
Final Thoughts
There’s something truly magical about the way these Irresistible Red Velvet Cheesecake Brownies for Valentine’s Day Recipe come together—each bite bursting with love, flavor, and that perfect balance of creaminess and chocolatey goodness. Whether you’re making them for a romantic celebration, a cozy night in, or just because you deserve something special, these brownies deliver on all fronts with warmth and charm.
Have you tried this Irresistible Red Velvet Cheesecake Brownies for Valentine’s Day Recipe? I’d love to hear how it turned out! Leave a comment below. If you loved this recipe, please share it with friends and family. Happy cooking! ❤️
PrintIrresistible Red Velvet Cheesecake Brownies for Valentine’s Day Recipe
These Irresistible Red Velvet Cheesecake Brownies combine the rich, deep flavors of red velvet brownies with a creamy cheesecake swirl, making them the perfect decadent treat for Valentine’s Day or any special occasion. This recipe features a tender, moist brownie base with a luscious cream cheese topping, creating a delightful contrast in every bite.
- Prep Time: 20 minutes
- Cook Time: 30 minutes
- Total Time: 50 minutes
- Yield: 9 brownies 1x
- Category: Dessert
- Method: Baking
- Cuisine: American
Ingredients
Brownie Batter
- 2 large eggs (substitute with flax eggs for vegan)
- 1 cup granulated sugar (can use coconut sugar for less refined)
- 1 teaspoon vanilla extract (pure extract gives the best results)
- ½ cup unsalted butter (substitute with coconut oil for dairy-free)
- 1 tablespoon red gel food coloring (can omit for a chocolate brownie version)
- 1 cup all-purpose flour (substitute with gluten-free flour for gluten-free)
- ⅓ cup cocoa powder (Dutch-processed cocoa can be used)
- 1 pinch salt (balances sweetness)
Cheesecake Filling
- 1 8 oz cream cheese (or use mascarpone for a richer filling)
- ¼ cup granulated sugar (adjust according to taste)
- 1 teaspoon vanilla extract (same purpose as above)
- 1 large egg (can substitute with silken tofu for vegan filling)
Instructions
- Preheat and prepare the pan: Preheat your oven to 350°F (175°C) and line an 8 by 8-inch baking pan with parchment paper to prevent sticking and make removal easier.
- Mix wet ingredients for the brownie: In a large bowl, whisk together the 2 large eggs, 1 cup granulated sugar, and 1 teaspoon vanilla extract until fully combined and slightly frothy. This creates a light, airy base for the brownies.
- Add butter and coloring: Incorporate the melted unsalted butter and 1 tablespoon red gel food coloring into the egg mixture, mixing thoroughly to combine the flavors and achieve the characteristic red velvet color.
- Combine dry ingredients: Sift together 1 cup all-purpose flour, ⅓ cup cocoa powder, and 1 pinch salt, then gently fold into the wet mixture until just combined, careful not to overmix to keep the brownies tender.
- Spread brownie batter: Spread most of the brownie batter evenly into the prepared pan, reserving a few tablespoons of the batter to use for topping later.
- Prepare cheesecake filling: In a separate bowl, beat together the softened 8 oz cream cheese, ¼ cup granulated sugar, 1 teaspoon vanilla extract, and 1 large egg until smooth and creamy, creating a luscious cheesecake layer.
- Layer cheesecake filling: Pour the cheesecake filling evenly over the brownie base in the baking pan, spreading it out carefully.
- Top with reserved batter: Dot the reserved brownie batter on top of the cheesecake filling, then use a knife or skewer to create swirls by gently dragging it through both layers for a marbled effect.
- Bake: Bake the brownies in the preheated oven for about 30 minutes or until a toothpick inserted into the center comes out clean or with just a few moist crumbs attached.
- Cool and serve: Allow the brownies to cool completely in the pan on a wire rack before slicing into 9 squares. This ensures clean cuts and proper set of the cheesecake layer.
Notes
- To make this recipe vegan, substitute eggs with flax eggs and use coconut oil instead of butter. For the cheesecake filling, silken tofu can replace the egg and use vegan cream cheese alternatives.
- For a gluten-free option, replace all-purpose flour with a gluten-free flour blend suitable for baking.
- The red gel food coloring creates the vibrant red velvet appearance but can be omitted for a traditional chocolate brownie version.
- Allow brownies to cool fully before slicing to prevent the cheesecake topping from cracking or separating.
- Storing brownies in an airtight container in the refrigerator will keep them fresh for up to 4 days.
Keywords: Red velvet brownies, cheesecake brownies, Valentine’s Day dessert, chocolate brownies, red velvet cheesecake swirl