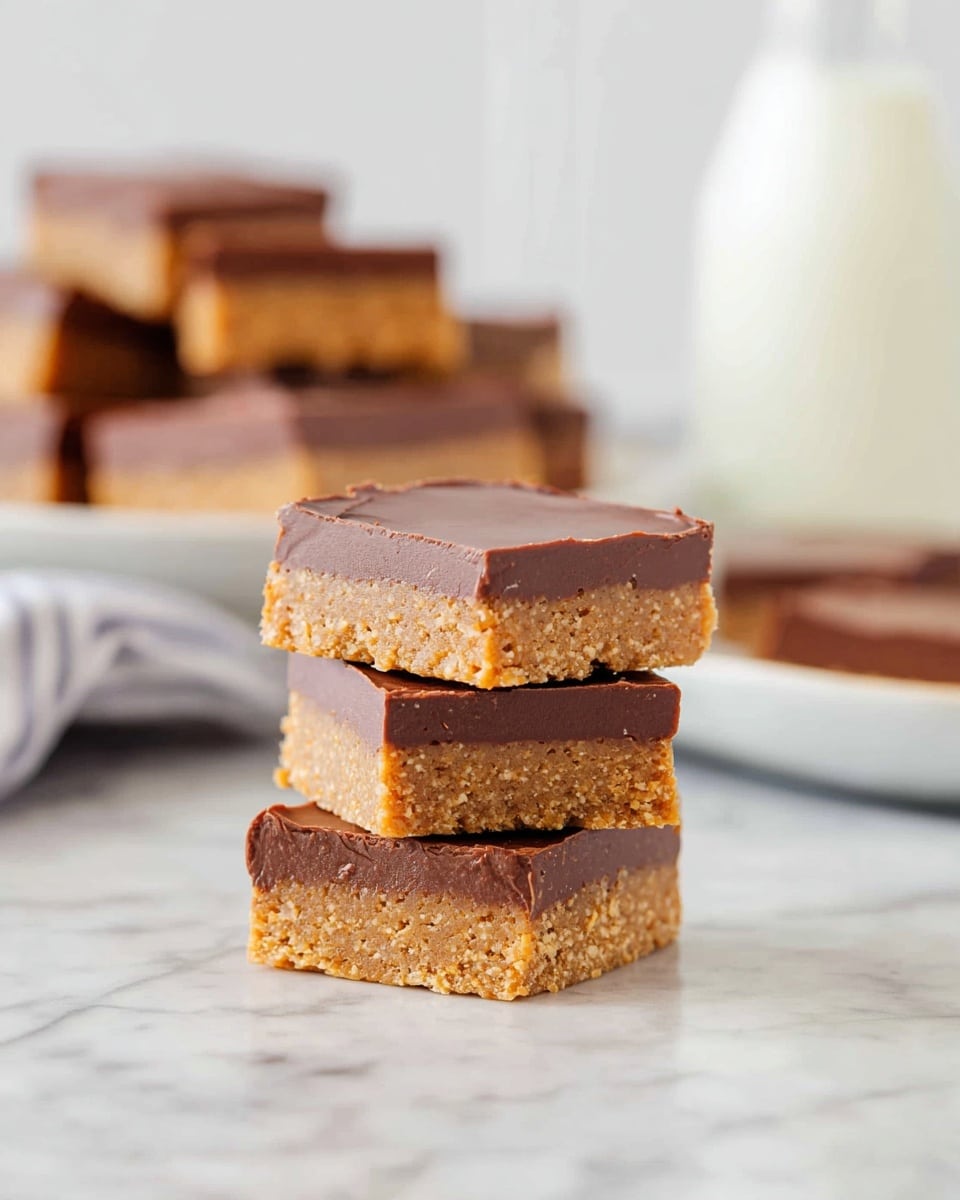
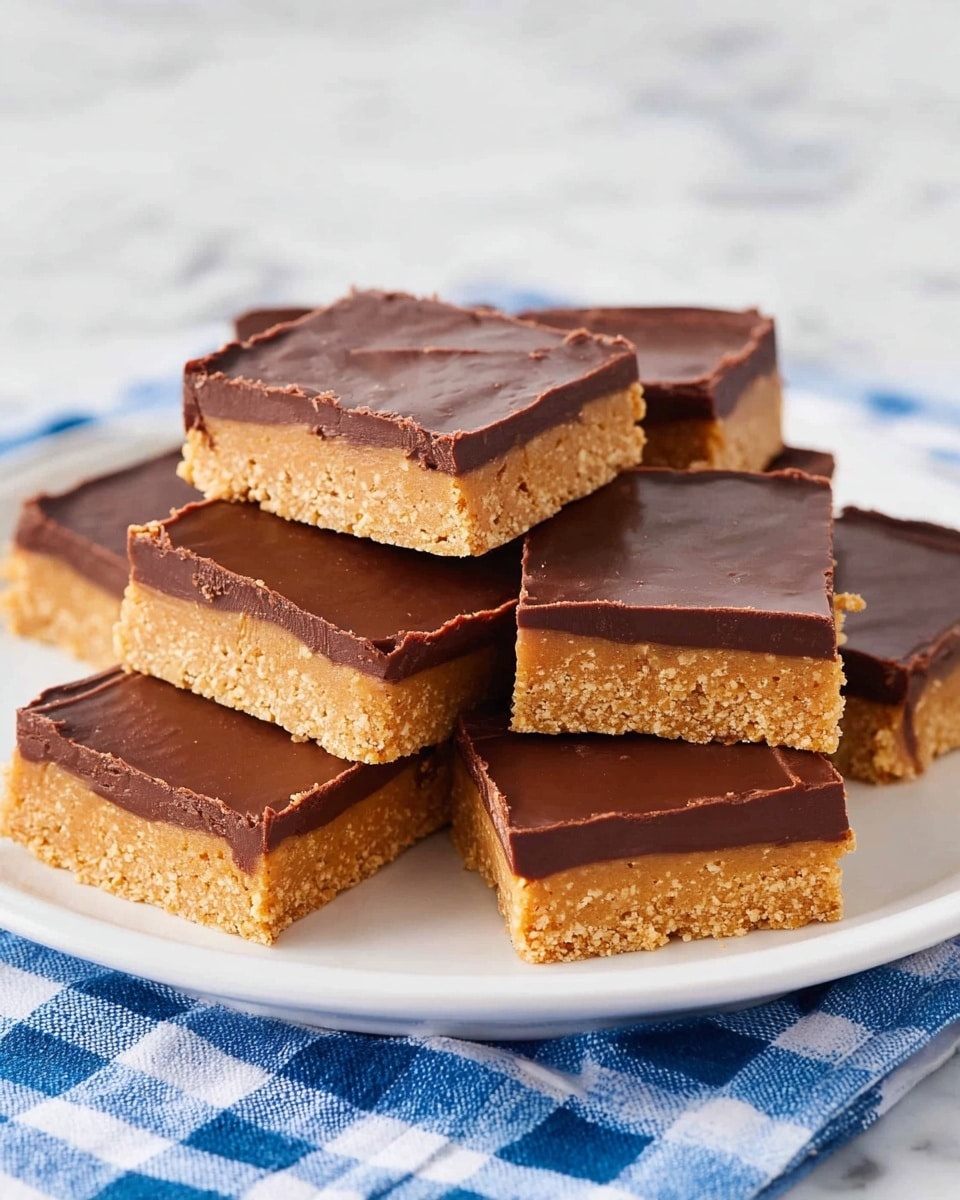
Homemade Reese’s Bars Recipe
If you are a peanut butter and chocolate lover, then this Homemade Reese’s Bars Recipe is going to become your new obsession. These bars perfectly capture the iconic flavors of Reese’s in a wonderfully creamy, crunchy, and melt-in-your-mouth treat that’s incredibly easy to make right in your own kitchen. The balance between the buttery, graham cracker-infused peanut butter base and the rich milk chocolate topping makes this recipe a snack and dessert favorite that’s sure to impress everyone you share it with.
Ingredients You’ll Need
The beauty of this Homemade Reese’s Bars Recipe lies not only in its taste but also in its simple, straightforward ingredients. Each component works harmoniously to build the perfect texture and flavor profile, from the smooth peanut butter to the subtle crunch from graham cracker crumbs and the sweet chocolate finish.
- 1 cup salted butter (melted): Adds rich creaminess and moisture that bind the base together beautifully.
- 2 cups Keebler graham cracker crumbs: Provides a lightly sweet, crunchy texture that lifts the bars from ordinary to extraordinary.
- 1/4 cup light brown sugar: A touch of caramel notes that enhance the depth of flavor.
- 1 3/4 cups powdered sugar: Ensures a smooth sweetness and helps firm up the base.
- 1 cup creamy peanut butter (plus 1 tablespoon): The heart of the recipe delivering that classic peanut butter flavor, with the extra tablespoon enriching the chocolate topping.
- 1/2 teaspoon vanilla extract: A subtle aroma that rounds out the taste perfectly.
- 11 ounce milk chocolate chips: Melts into a perfectly glossy, decadent chocolate layer that crowns each bar.
How to Make Homemade Reese’s Bars Recipe
Step 1: Prepare the Peanut Butter Base
Start by combining the melted salted butter, graham cracker crumbs, light brown sugar, powdered sugar, creamy peanut butter, and vanilla extract in a medium-sized bowl. Stir everything together until you get a smooth and creamy mixture. If your mixture feels too soft or loose, just add a bit more powdered sugar until it reaches that perfect moldable consistency. Once ready, press the mixture firmly into a 9×13-inch pan to create an even base, then pop it into the refrigerator. This chilling step helps the bars firm up nicely, so the next layers will set perfectly.
Step 2: Melt and Spread the Chocolate Topping
While the base chills, melt your milk chocolate chips along with 1 tablespoon of creamy peanut butter. This small addition keeps the chocolate extra silky and enriches the peanut butter flavor that shines through in every bite. You can melt the mixture in the microwave at 50% power in 1-2 minute increments or use a double boiler method on the stove. After melting, give it a good stir to make sure it’s perfectly smooth, then pour it gently over the chilled peanut butter layer. Use a spatula to spread the chocolate evenly and tap the pan lightly on the counter to smooth out the surface and remove any air bubbles.
Step 3: Chill and Cut
Place the pan back in the refrigerator for about 30 minutes or until the chocolate has fully hardened. When you’re ready to serve, let the bars come to room temperature for a couple of minutes. This trick helps prevent the chocolate from cracking when sliced. Cut into squares and get ready to enjoy the heavenly bite of your Homemade Reese’s Bars Recipe.
How to Serve Homemade Reese’s Bars Recipe
Garnishes
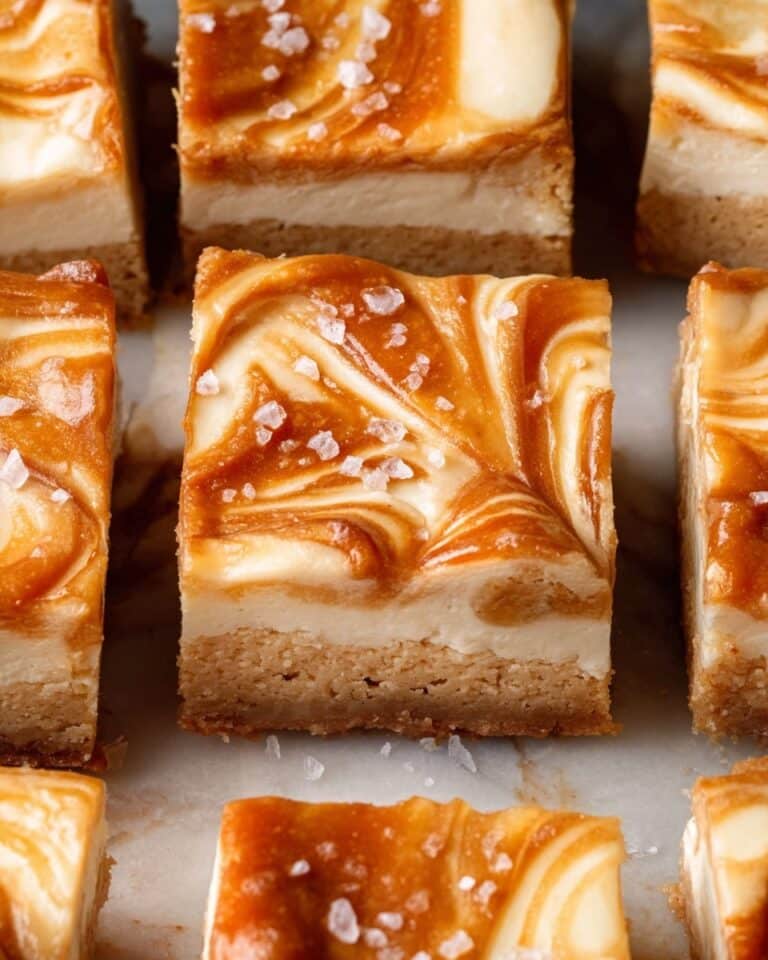
To elevate your bars, consider sprinkling a pinch of flaky sea salt over the chocolate layer before chilling. This little touch balances the sweetness and brings out the peanut butter flavor even more. You might also add crushed peanuts or a drizzle of melted dark chocolate for extra flair and texture.
Side Dishes
These bars are rich and satisfying on their own but pair wonderfully with a cold glass of milk or a cup of freshly brewed coffee. If you want to turn it into an indulgent dessert, serve alongside vanilla ice cream or a scoop of whipped cream to complement the chewy and creamy texture perfectly.
Creative Ways to Present
Try cutting the Homemade Reese’s Bars Recipe into bite-sized squares and arranging them on a stylish serving platter with festive cupcake liners for parties. Alternatively, wrap individual bars in parchment paper tied with twine for delightful homemade gifts that friends and family will adore.
Make Ahead and Storage
Storing Leftovers
Once cut, store your bars in an airtight container in the refrigerator to keep them fresh. They’ll stay delicious for up to one week, making them a great option for a ready-to-go snack or last-minute dessert anytime you want a quick peanut butter chocolate fix.
Freezing
If you want to enjoy these bars later, freeze them in a single layer on a parchment-lined baking sheet first, then transfer to a freezer-safe container or bag. This prevents sticking and allows you to take out exactly how many you want. When properly wrapped, the bars can be frozen for up to three months without losing their flavor or texture.
Reheating
To soften frozen bars, simply let them thaw at room temperature for 15-20 minutes. If you prefer, warm a single bar in the microwave for about 10 seconds to revive that fresh-baked softness—just be careful not to overheat the chocolate topping.
FAQs
Can I use natural peanut butter in this Homemade Reese’s Bars Recipe?
Yes, you can, but keep in mind that natural peanut butter tends to be more oily and less sweet, which might change the texture and flavor slightly. You may need to adjust the powdered sugar to get the right consistency.
Is there a substitute for graham cracker crumbs?
If you don’t have graham cracker crumbs, crushed digestive biscuits or vanilla wafers can work as a great alternative, adding a similar texture and sweetness to the peanut butter base.
How do I prevent the chocolate topping from cracking when cutting?
Allow the bars to sit at room temperature for a few minutes after removing from the fridge. This softens the chocolate just enough to cut cleanly without cracking or crumbling.
Can I use dark chocolate instead of milk chocolate?
Absolutely! Dark chocolate will give the bars a slightly more intense, bittersweet flavor, which pairs wonderfully with peanut butter if you prefer less sweetness.
Are these bars gluten-free?
Traditional graham cracker crumbs usually contain gluten, so if you need a gluten-free option, look for gluten-free graham cracker crumbs or use a suitable gluten-free biscuit alternative.
Final Thoughts
Whenever the craving strikes for a peanut butter and chocolate treat, this Homemade Reese’s Bars Recipe is the answer. It’s straightforward, incredibly tasty, and perfect for sharing with loved ones or indulging yourself. Get your ingredients, have fun making it, and enjoy the delicious results of a classic flavor combo made from scratch with love!
PrintHomemade Reese’s Bars Recipe

These Homemade Reese’s Bars are a delicious no-bake treat combining a buttery graham cracker and peanut butter base topped with a rich milk chocolate layer. Perfect for peanut butter and chocolate lovers, these bars come together quickly and make a great dessert or snack.
- Prep Time: 10 minutes
- Cook Time: 5 minutes
- Total Time: 30 minutes
- Yield: 20 servings 1x
- Category: Dessert
- Method: No-Cook
- Cuisine: American
Ingredients
Base Layer
- 1 cup salted butter, melted
- 2 cups Keebler graham cracker crumbs
- 1/4 cup light brown sugar
- 1 3/4 cups powdered sugar
- 1 cup creamy peanut butter
- 1/2 teaspoon vanilla extract
Chocolate Topping
- 11 ounces milk chocolate chips
- 1 tablespoon creamy peanut butter
Instructions
- Prepare the Base: In a medium-sized bowl, combine the melted salted butter, graham cracker crumbs, light brown sugar, powdered sugar, 1 cup creamy peanut butter, and vanilla extract. Stir the mixture until it is smooth and creamy. If the mixture feels too soft, gradually add more powdered sugar to achieve a firmer consistency suitable for pressing.
- Press Into Pan: Evenly press the peanut butter graham cracker mixture into a 9×13-inch pan, making sure to create a flat and compact base. Place the pan into the refrigerator to chill while you prepare the chocolate topping.
- Melt Chocolate Topping: In a microwave-safe bowl, melt the milk chocolate chips with 1 tablespoon of creamy peanut butter on 50% power for 1 to 2 minutes, stirring occasionally to ensure even melting. Alternatively, melt the chocolate and peanut butter over a double boiler on the stove, stirring continuously until smooth.
- Spread Chocolate: Pour and evenly spread the melted chocolate mixture over the chilled peanut butter base using a spatula. To smooth out the chocolate layer and remove air bubbles, gently tap the pan on the countertop.
- Chill to Set: Return the pan to the refrigerator and chill for about 30 minutes or until the chocolate topping has fully hardened. Before slicing, let the bars sit at room temperature for a few minutes to prevent the chocolate from cracking when cut.
- Serve: Cut into 20 squares and enjoy these homemade, rich, and creamy Reese’s Bars!
Notes
- For a firmer base, add extra powdered sugar as needed to achieve the right texture.
- Use a spatula or the back of a spoon to press the base evenly into the pan for uniform thickness.
- When melting chocolate, be careful not to overheat to prevent burning or seizing.
- Store bars in the refrigerator for up to 1 week to maintain freshness.
- You can substitute creamy peanut butter with natural peanut butter, but the texture may vary slightly.
Keywords: Homemade Reese’s bars, peanut butter bars, no-bake dessert, chocolate peanut butter bars, easy dessert recipe