Simple Grinch Cookies Recipe
“`html
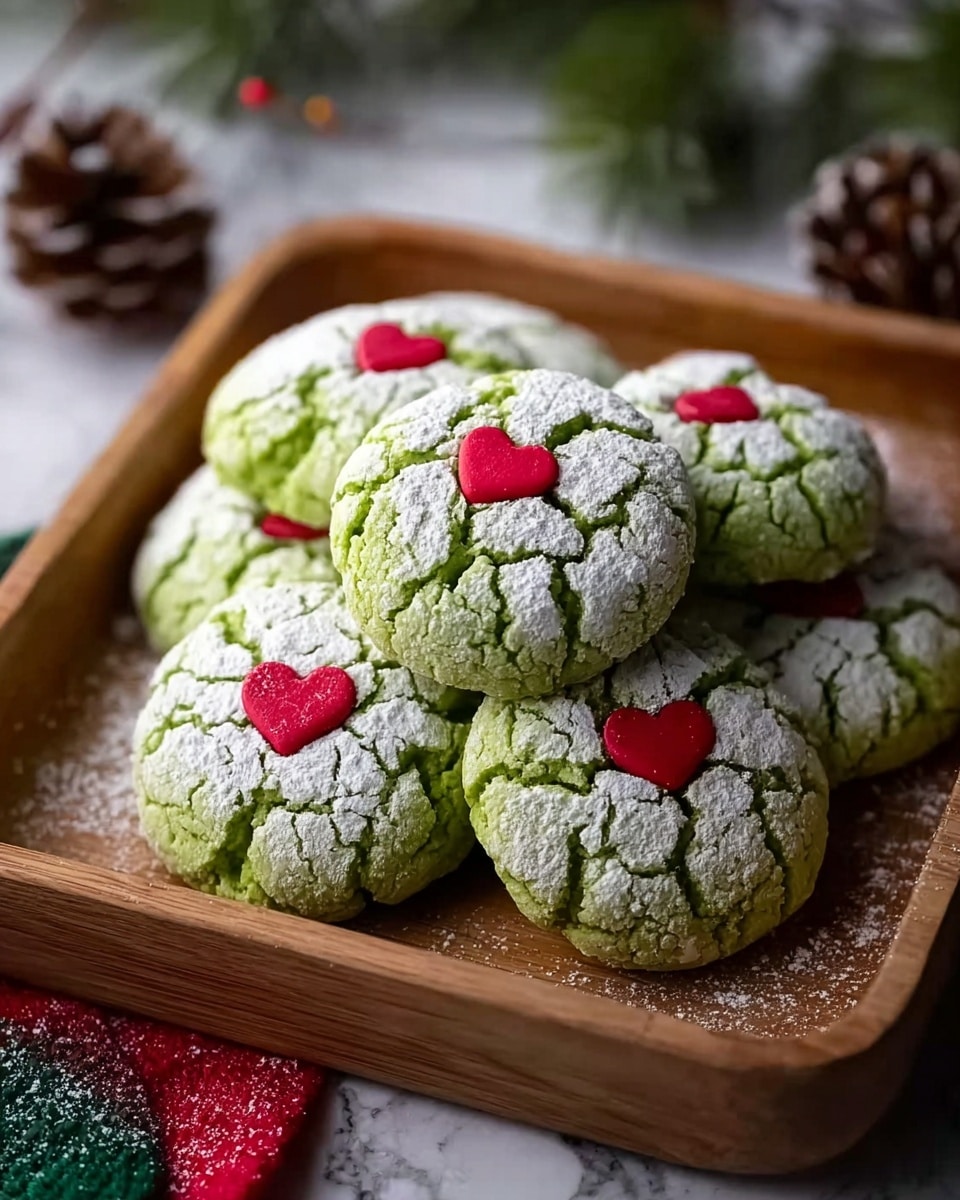
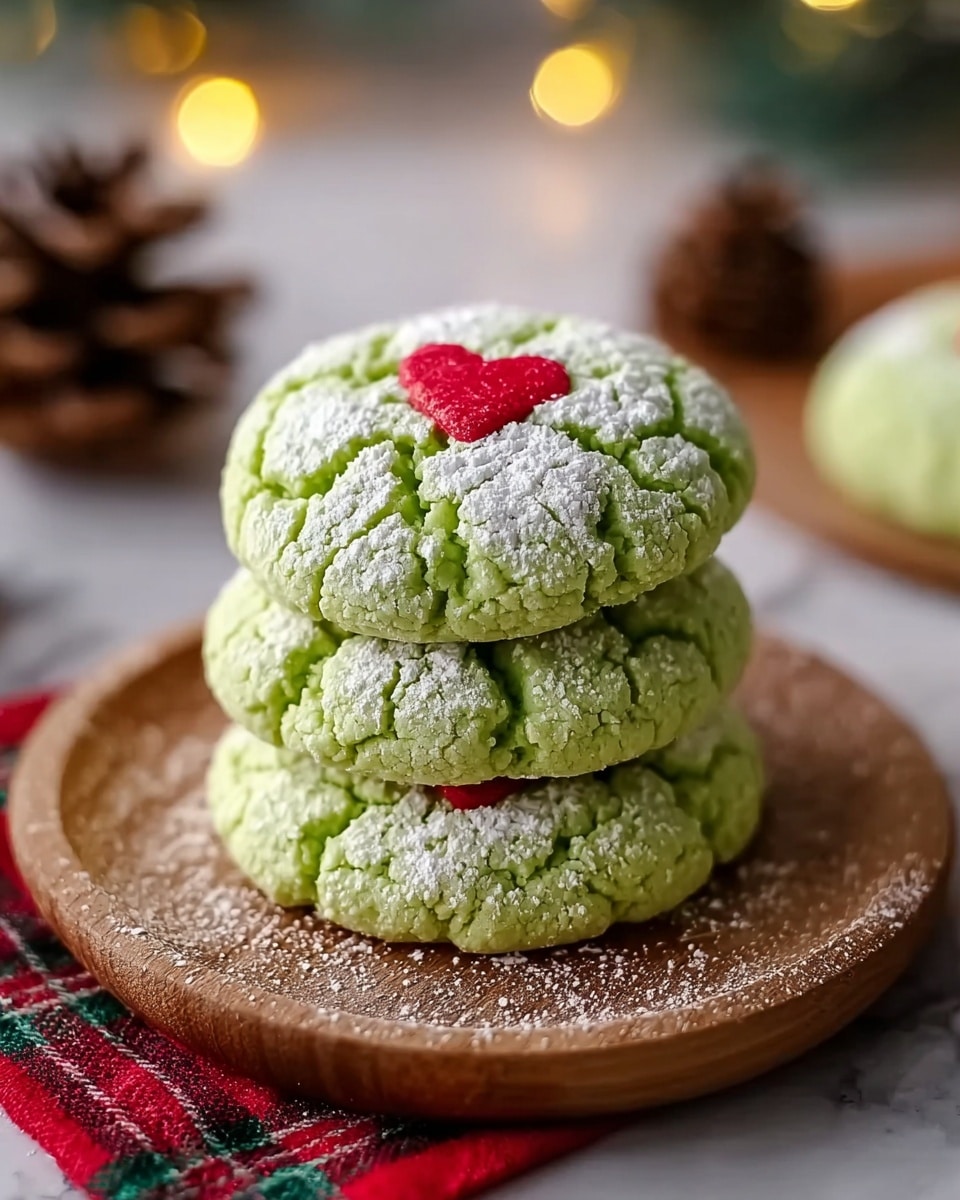
If you’re on the hunt for a fun, festive treat that brings smiles and a burst of holiday cheer, look no further than this Simple Grinch Cookies Recipe. These vibrant green cookies are as delightful as they are delicious, boasting a perfectly chewy texture with a crackled snowy coating and a whimsical red heart sprinkle right in the center. They capture the playful spirit of the Grinch in every bite and are incredibly easy to make, turning your kitchen into a merry workshop without any fuss.
Ingredients You’ll Need
This Simple Grinch Cookies Recipe relies on a handful of essential ingredients that work together to create those bright green, crinkle-coated cookies that everyone will love. Each ingredient plays a crucial role—whether it’s flavor, texture, or that festive pop of color that makes these cookies unforgettable.
- Green gel food coloring: Choose gel for vibrant color without adding extra moisture, keeping the dough just right.
- Powdered sugar (2 cups plus ½ cup): Provides sweetness and contributes to the crackled coating that makes these cookies so special.
- Large eggs (2, room temperature): Help bind the dough and add richness for tender cookies.
- Unsalted butter (½ cup, softened): Soft butter adds creaminess and moisture for soft yet sturdy cookies.
- Baking powder (1 tbsp): Ensures the cookies rise evenly, giving them that perfect lightness.
- All-purpose flour (2.5 cups): The foundation for structure, King Arthur flour recommended for consistent results.
- Vanilla extract (1 tbsp): Adds a warm, sweet undertone that complements the green base beautifully.
- Salt (½ tsp): Balances sweetness and enhances all other flavors.
- Cornstarch (½ cup): Mixed with powdered sugar to create the signature snowy coating that crackles in the oven.
- Red heart-shaped sprinkles (optional): A festive finishing touch that adds charm and holiday spirit.
How to Make Simple Grinch Cookies Recipe
Step 1: Prepare Your Workspace and Ingredients
Start by preheating your oven to 350°F and lining two baking sheets with parchment paper. This small step sets you up for success, ensuring your oven is ready when you finish mixing and preventing the cookies from sticking. For smooth sailing, measure out all your ingredients into separate bowls before mixing; it’s a little trick that keeps the process joyful and stress-free.
Step 2: Combine Dry Ingredients
In a medium bowl, whisk together the flour, 2 cups of powdered sugar, baking powder, and salt. This step evenly disperses the leavening agent so your cookies rise delightfully and prepares the base for the dough’s texture and sweetness.
Step 3: Beat Wet Ingredients and Add Color
In a large bowl, beat the softened butter, room temperature eggs, and vanilla extract until bright and fluffy—about 2 to 3 minutes. Now, add a couple drops of the green gel food coloring and continue beating until the dough glows with a uniform, festive green hue and no streaks of white remain. Using gel coloring is a game-changer for vibrant coloring without soggy dough.
Step 4: Combine Wet and Dry Mixtures
Pour the dry ingredients into the green batter and gently stir with a spatula or mixer set to low. Mix just until everything comes together—overmixing can make cookies tough, and nobody wants that. The dough should be cohesive and easy to work with.
Step 5: Create the Snowy Coating
Mix the remaining powdered sugar with cornstarch in a shallow bowl. This snowy blend is what gives your cookies that enchanting crackled surface once baked. Using a tablespoon, scoop dough balls roughly one-and-a-half tablespoons each, then roll each ball thoroughly in the coating mixture until coated on all sides.
Step 6: Shape and Bake
Place the coated dough balls onto your prepared sheets, spacing them about 3 inches apart for room to spread. Gently press down on the top of each dough ball with your palm to encourage even baking. Bake for 12 minutes or until the edges show slight crinkling and the bottoms turn a light golden brown. Don’t forget to immediately press a red heart-shaped sprinkle into the center of each warm cookie—this charming detail truly brings the Grinch theme to life and sticks perfectly thanks to the cookie’s residual warmth.
Step 7: Cool and Enjoy
Move your cookies onto a wire rack to cool completely. As they cool, the crackled texture sets, and the cookies reach the ideal chewy-yet-crisp consistency that makes them irresistible. Once cooled, they’re ready to serve or store for later enjoyment.
How to Serve Simple Grinch Cookies Recipe
Garnishes
While the red heart-shaped sprinkle is iconic, you can also experiment with tiny white edible pearls or shimmering sugar dust to add an extra festive sparkle. Sprinkles bring not only color contrast but also a fun textural element that lights up any holiday cookie tray.
Side Dishes
These Grinch cookies are fantastic alongside a cold glass of milk or a warm cup of hot chocolate. They also make a brilliant sweet companion to vanilla or peppermint-flavored coffee, making your holiday gatherings feel cozy and bright.
Creative Ways to Present
For an unforgettable presentation, arrange these green delights on a white platter with holly leaves or red ribbon to echo the holiday colors. Wrapping them in clear cellophane bags tied with red or green ribbons turns them into charming edible gifts that family and friends will adore.
Make Ahead and Storage
Storing Leftovers
Keep leftover cookies fresh by storing them in an airtight container at room temperature for up to 5 days. Layer with parchment paper between cookies to maintain that crisp-crackled coating and avoid any sticking.
Freezing
You can freeze the unbaked dough balls coated in the powdered sugar-cornstarch mix by placing them on a baking sheet, freezing until solid, then transferring to a freezer-safe bag. Bake straight from frozen, adding an extra minute or two to the baking time. Baked cookies freeze well, too—store them in a well-sealed container or freezer bag for up to 3 months.
Reheating
To revive a chilly or slightly stale cookie, warm it gently in a 300°F oven for about 5 minutes. This brings back the soft center while keeping the crackled edges delightful, almost as if they just came out of the oven again.
FAQs
Can I use liquid food coloring instead of gel?
While you can, it’s better to stick with gel coloring for this recipe because it provides a more vibrant green without adding extra liquid to your dough, which could affect the texture.
How do I prevent the cookies from spreading too much?
Pressing the dough balls down slightly before baking helps control the spread. Also, make sure your butter is softened, not melted, which keeps the dough from becoming too loose.
What makes the crackled coating possible?
The combination of powdered sugar and cornstarch creates a dry, snowy coating that cracks beautifully during baking, giving these cookies their signature Grinch-like look.
Can I substitute the red heart sprinkles?
Absolutely! Any small red sprinkle or candy works, but the heart shape adds that magical connection to the Grinch theme—perfect for the holiday season.
Are these cookies suitable for kids to make?
Definitely! This Simple Grinch Cookies Recipe is straightforward and fun, making it a perfect activity to enjoy with little helpers, especially when decorating with sprinkles.
Final Thoughts
Trust me, once you make this Simple Grinch Cookies Recipe, it’ll become your go-to for holiday baking that’s both festive and foolproof. They’re quick to whip up, charming to look at, and absolutely delicious to eat. So gather your ingredients, invite some friends or family, and get ready to spread some joyful Grinch-inspired fun straight from your oven to your heart.
“`
PrintSimple Grinch Cookies Recipe

These Simple Grinch Cookies are festive, vibrant green treats perfect for holiday celebrations. With a soft, chewy texture and a crackled powdered sugar coating, they capture the whimsical spirit of the Grinch using red heart-shaped sprinkles as a charming accent. Made with basic ingredients like all-purpose flour, powdered sugar, eggs, and butter, and colored with green gel food coloring, these cookies are easy to prepare and a delightful holiday favorite.
- Prep Time: 10 minutes
- Cook Time: 12 minutes
- Total Time: 27 minutes
- Yield: 4 servings (about 16 cookies, assuming 4 per serving) 1x
- Category: Dessert
- Method: Baking
- Cuisine: American
Ingredients
Dry Ingredients
- 2.5 cups all-purpose flour (King Arthur preferred)
- 2 cups powdered sugar
- 1 tbsp baking powder
- 1/2 tsp salt
- 1/2 cup powdered sugar (for coating)
- 1/2 cup cornstarch (for coating)
Wet Ingredients
- 1/2 cup unsalted butter, softened to room temperature
- 2 large eggs, room temperature
- 1 tbsp vanilla extract
- Green gel food coloring (McCormick or Wilton recommended, about 2 drops)
Decorations
- Red heart-shaped sprinkles (optional but recommended)
Instructions
- Preheat and Prepare: Preheat your oven to 350°F and line two baking sheets with parchment paper to ensure even baking and prevent sticking. Measuring out all ingredients beforehand helps streamline the process.
- Combine Dry Ingredients: In a medium bowl, whisk together the flour, 2 cups powdered sugar, baking powder, and salt until evenly mixed. This ensures the leavening agent is well distributed for proper cookie rise and texture.
- Mix Wet Ingredients and Color: In a large bowl, beat the softened butter, room temperature eggs, and vanilla extract with an electric mixer for 2-3 minutes until slightly fluffy. Add about 2 drops of green gel food coloring and continue mixing until the dough is uniformly bright green with no streaks.
- Combine Wet and Dry Ingredients: Add the dry mixture to the wet ingredients and stir with a spatula or mixer on low speed just until combined to avoid tough cookies. The dough should come together quickly into a cohesive mass.
- Prepare Coating and Shape Dough: Mix the 1/2 cup powdered sugar and cornstarch in a small shallow bowl to create the crackled coating. Using a tablespoon measure, scoop about 1½ tablespoons of dough into balls, then roll each ball in the cornstarch-sugar mixture ensuring full coating.
- Arrange and Bake: Place coated dough balls on the lined baking sheets spaced about 3 inches apart. Gently press down the top of each ball with your palm to promote even baking. Bake for 12 minutes or until edges show crackling and bottoms turn light golden brown.
- Add Sprinkles and Cool: Immediately after taking the cookies out of the oven, press a red heart-shaped sprinkle into the center of each warm cookie so it adheres well. Transfer cookies to a wire rack to cool completely, allowing the crackled texture to set and develop a chewy-crispy finish.
- Serve or Store: Serve once cooled. Store leftover cookies in an airtight container for up to 5 days to maintain freshness and texture.
Notes
- Use gel food coloring rather than liquid to avoid altering dough consistency.
- Room temperature eggs and butter produce better dough texture and easier mixing.
- Do not overmix the dough to keep cookies tender rather than tough.
- Pressing the dough balls slightly before baking helps even cooking and crackling.
- Applying sprinkles while cookies are warm ensures they stick properly.
- Cookies can be stored at room temperature in airtight containers for up to 5 days.
Keywords: Grinch cookies, green cookies, holiday cookies, Christmas baking, festive cookies, powdered sugar coating, red heart sprinkles, chewy cookies